A Beginner's Guide to SEED CYCLING

I lost my period for over two years after going off the hormonal birth control pill. My hormones were a mess, and I experienced a number of unpleasant symptoms including breakouts, digestive issues, and dramatic mood swings. But with the help of Seed Cycling, supplementation, and a few simple lifestyle changes, I've been able to re-balance my hormones, regulate my cycle, and naturally bring back my period.

While seed cycling is just one of the many changes I've implemented while trying to restore my cycle, it's effectiveness should not be underestimated. Out of all the diet and lifestyle changes I made throughout my hormone-balancing journey, seed cycling has hands down been the most powerful. I remember when I first heard about seed cycling. I was intrigued, excited, and hopeful - but also very confused. I had so many questions, but no one to turn to for advice.

I created this Beginner's Guide to Seed Cycling to break down the process in a simple and easily understandable way, and to hopefully help you navigate the abundance of confusing information online.  By sharing my personal experience, I hope to give you the courage and inspiration to take your health into your own hands. Our body naturally wants to heal - but sometimes, it just needs a little support

*Disclaimer - I am a Registered Holistic Nutritionist, not a doctor or medical practitioner. All information shared below is a combination of my personal experience, research, and education as a Nutritionist. For personalized medical advice, please consult a licensed Medical Doctor or Naturopathic Doctor.

What is Seed Cycling?

Seed Cycling is the process of naturally regulating our reproductive hormones by supplementing with certain seeds at specific times of the month. The unique nutritional properties in each seed are strategically used to mimic and positively affect different hormones in our bodies - specifically estrogen and progesterone.

Basic principle: using seeds to naturally regulate the menstrual cycle, ease unpleasant symptoms, rebalance hormones, reduce PMS, encourage fertility, or bring back a missing period.

How Does Seed Cycling Work?

During the first half of our menstrual cycle, the sex hormone 'estrogen' needs dominant in order for us to ovulate. However, it’s ratio is incredibly important. Estrogen needs to be present in just the right amount (not too much, and not too little!) for our hormones to remain balanced. Often, estrogen gets overproduced (or progesterone gets under produced due to stress, improper nourishment, or nutrient deficiency), which can lead to estrogen dominance and a variety of unpleasant symptoms. Other times, estrogen may be low due to excessive exercise or not eating enough. Flax and pumpkin seeds help bring estrogen levels back into balance by encouraging the right amount to be produced, while simultaneously preventing excess buildup. In the second half of our menstrual cycle, our body requires the sex hormone 'progesterone' to build the uterine lining and encourage a period. Sesame and sunflower seeds support progesterone production during this phase.

4E3A8A97-7B6D-44F5-8B36-22F8A3707CFB.JPG

What Seeds Do I Use?

To seed cycle, you need to supplement with four different seeds: flax, pumpkin, sunflower, and sesame. I also recommend a fifth supplement: evening primrose oil. Evening primrose oil isn't always included in a seed cycling protocol, but I personally think it's incredibly beneficial to incorporate.

FLAX SEEDS - Flax is rich in omega-3 essential fatty acids. The seeds contain estrogenic-like properties that encourage healthy estrogen production, along with lignans that simultaneously block excess estrogen from being produced.

PUMPKIN SEEDS  - Pumpkin seeds are rich in omega 6 and zinc; two nutrients that support our sex hormones and encourage reproduction.

SUNFLOWER SEEDS - Sunflower is an excellent source of vitamin e and selenium. The seeds contain lignans that mimic and support progesterone production.

SESAME SEEDS - Sesame is high in vitamin e, and contains the same hormone-balancing lignans as flax. The seeds encourage fertility and support progesterone balance.

EVENING PRIMROSE OIL - Evening primrose oil naturally balances our cycle, particularly encouraging menstrual bleeding. I’ve fond it to be incredibly helpful for those with amenorrhea or very light periods. The oil also reduces PMS symptoms and helps regulate our emotions.

Where to Begin:

Seeds are rotated between the follicular phase and the luteaul phase of our menstrual cycle. If you don't currently get a period (or have irregular periods) then take the seeds according to the moon's cycle. This is what I did, and it worked incredibly well for me.

seed_cycling_chart.png
Moon-Phases-Chart.jpg

IF YOU HAVE A REGULAR PERIOD

DAY 1 - FOLLECULAR PHASE (weeks 1 & 2)

Start day 1 of seed cycling on your first day of bleeding. Consume 1 tbsp of ground flax seeds and 1 tbsp of ground pumpkin seeds every day for the next two weeks, until the luteal phase begins on day 15. Use flax and pumpkin seeds to help support estrogen levels and balance extra estrogen produced during this time.

DAY 15 - LUTEAL PHASE  (weeks 3 & 4)

Start day 15 of seed cycling on your first day of ovulation. Switch the seeds from flax and pumpkin to 1 tbsp of ground sesame and 1 tbsp of ground sunflower. Continue supplementing the sunflower seeds and sesame seeds daily for the next two weeks, until your period begins again. Use sunflower and sesame to help boost progesterone production during this time.

IF YOU DON'T HAVE A (REGULAR) PERIOD

DAY 1 - NEW MOON (weeks 1 & 2)

Start day 1 of seed cycling on the first day of the new moon.  Consume 1 tbsp of ground flax seeds and 1 tbsp of ground pumpkin seeds every day for the next two weeks, until the day of the full moon on day 15. Use flax and pumpkin seeds to help support estrogen levels and balance extra estrogen produced during this time.

DAY 15 - FULL MOON (weeks 3 & 4)

Start day 15 of seed cycling on the first day of the full moon.  Switch the seeds from flax and pumpkin to 1 tbsp of ground sesame and 1 tbsp of ground sunflower. Continue supplementing the sunflower seeds and sesame seeds daily for the next two weeks, until the day of the new moon. Use sunflower and sesame to help boost progesterone production during this time.

How to take the seeds:

Grind the seeds into a fine 'flour' before consuming, to help our body digest them easier and ensure all the nutrients are absorbed properly.

Why Should I Start?

Seed cycling is a natural way to regulate our hormones, menstrual cycle, and emotions. I recommend seed cycling to anyone who experiences:

  • Irregular periods

  • PMS

  • Amenorrhea (no period at all)

  • Symptoms of a hormonal imbalance

Seeking deeper hormone support?

Although seed cycling is a supportive tool when used in partnership with a hormone-balancing protocol, it won’t fix a deeper-rooted hormonal imbalance on it’s own. If you experience painful or heavy cycles, irregular periods, amenorrhea, PCOS, endometriosis, fertility challenges, overwhelming PMS, mood swings, cyclical acne, low libido, sleep disturbances, hair loss, or symptoms from hormonal birth control - know that you are not alone, and there is so much hope. The body can heal when given the right environment. We just have to cultivate balance again through addressing the root and beginning to fully nourish and support our body’s unique and individual needs.

As a Registered Holistic Nutritionist with a focus on women’s health and hormone balance, I offer personalized 1:1 sessions to support you on this journey. Feel free to reach out to wholisticallyhannah@gmail.com or check out the Work with Me page for more information about working together. I also offer a 76-page Wholistic Cycle Guide, that dives deep into the pillars of hormone balance, cycling syncing, and connecting with your cyclical rhythm.

59D59C3D-E10D-44F0-B80D-7A51A9F4F4A8.JPG

FAQ'S

WHAT TYPE OF SEEDS SHOULD I USE

Look for raw, organic seeds if possible. Buying them in bulk can help to offset the cost. Make sure to store your seeds in the fridge or freezer to preserve their nutrients and prevent oxidation!

DO I NEED TO GRIND THE SEEDS, OR CAN I EAT THEM WHOLE?

It's important to grind the seeds first so our body can digest them properly. Whole seeds can be very hard to digest. By grinding the seeds, we ensure our body fully absorbs all the nutrients.

HOW DO I PREPARE THE SEEDS?

First, I pre-measure out my seeds while they're still whole. Then, I use a coffee grinder to grind them into a fine powder.  I usually grind for 3-5 days in advance, and store the leftover powder in a glass container in the fridge or freezer. You can also buy preground seeds (aka flax meal) for convenience, but I don’t encourage this due to a higher chance of the seeds ‘oxidizing’ and becoming rancid. Once ground, seeds go rancid quite quickly, lose their nutritional value, and become unhealthy to consume. If it’s not realistic for you to grind your seeds every couple of days, just do the best you can. If that means grinding enough for two weeks in advance, store the remainder in the freezer to keep them fresh.

HOW SHOULD I EAT THE SEEDS?

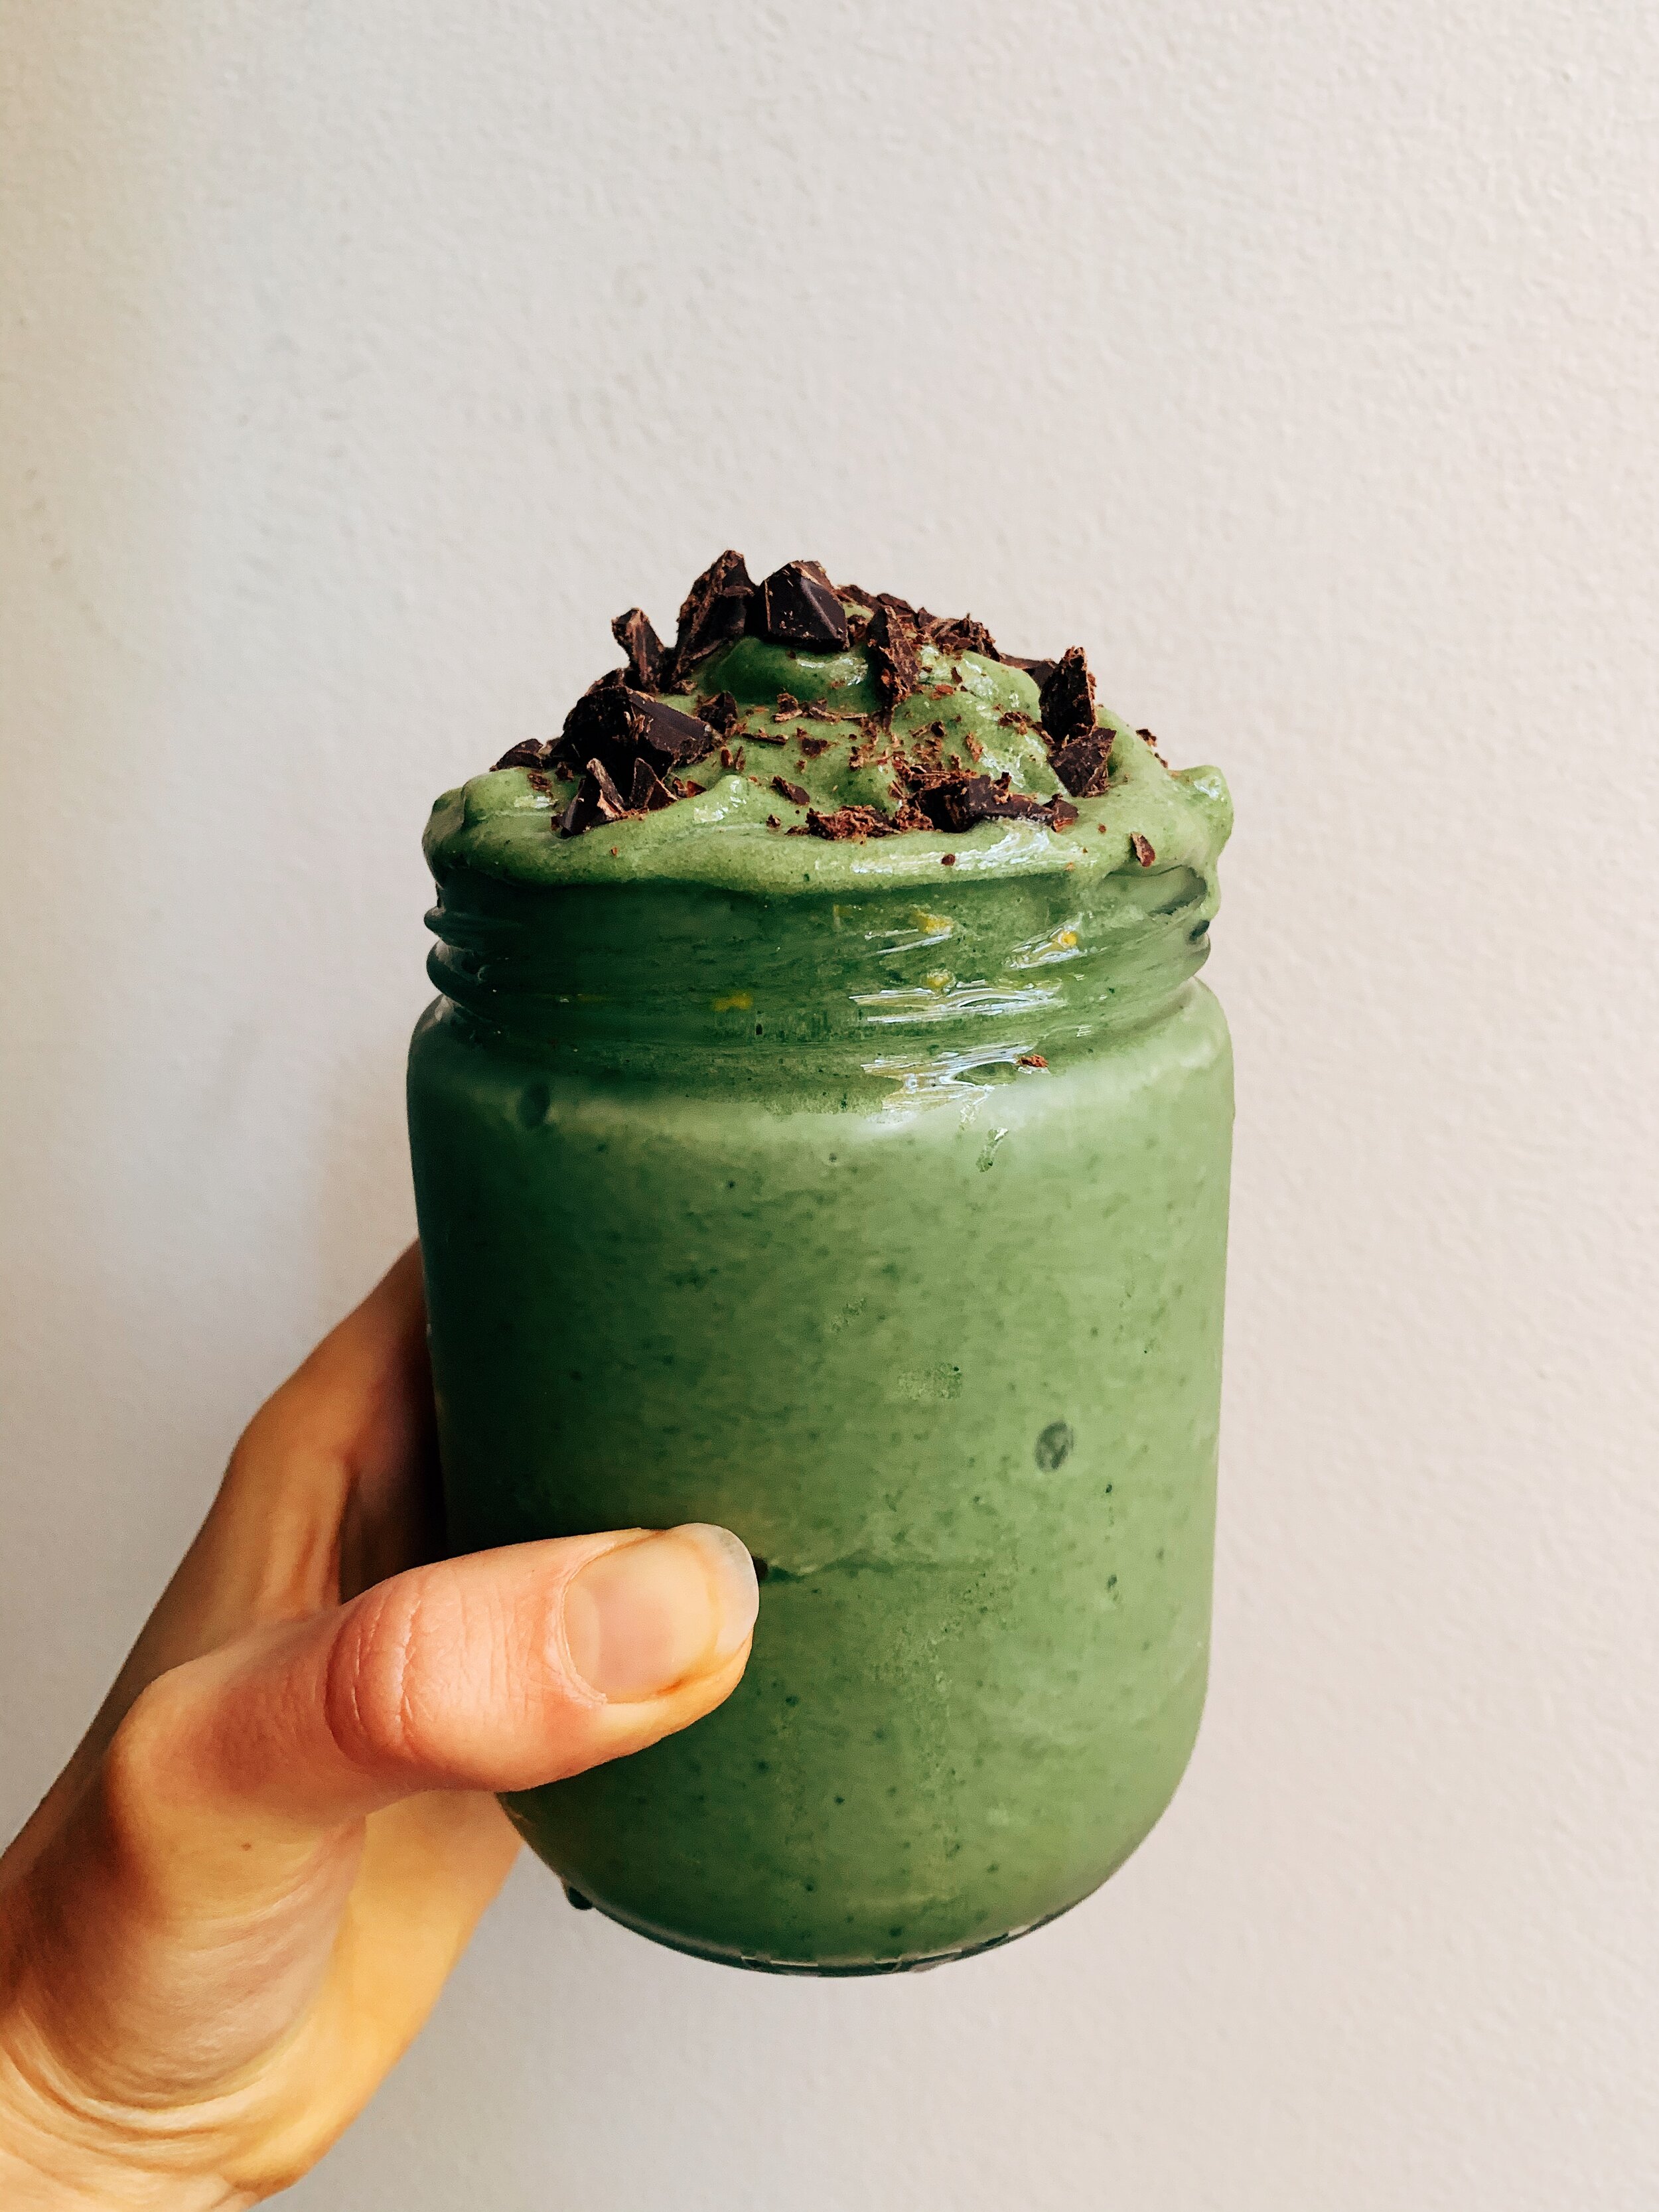
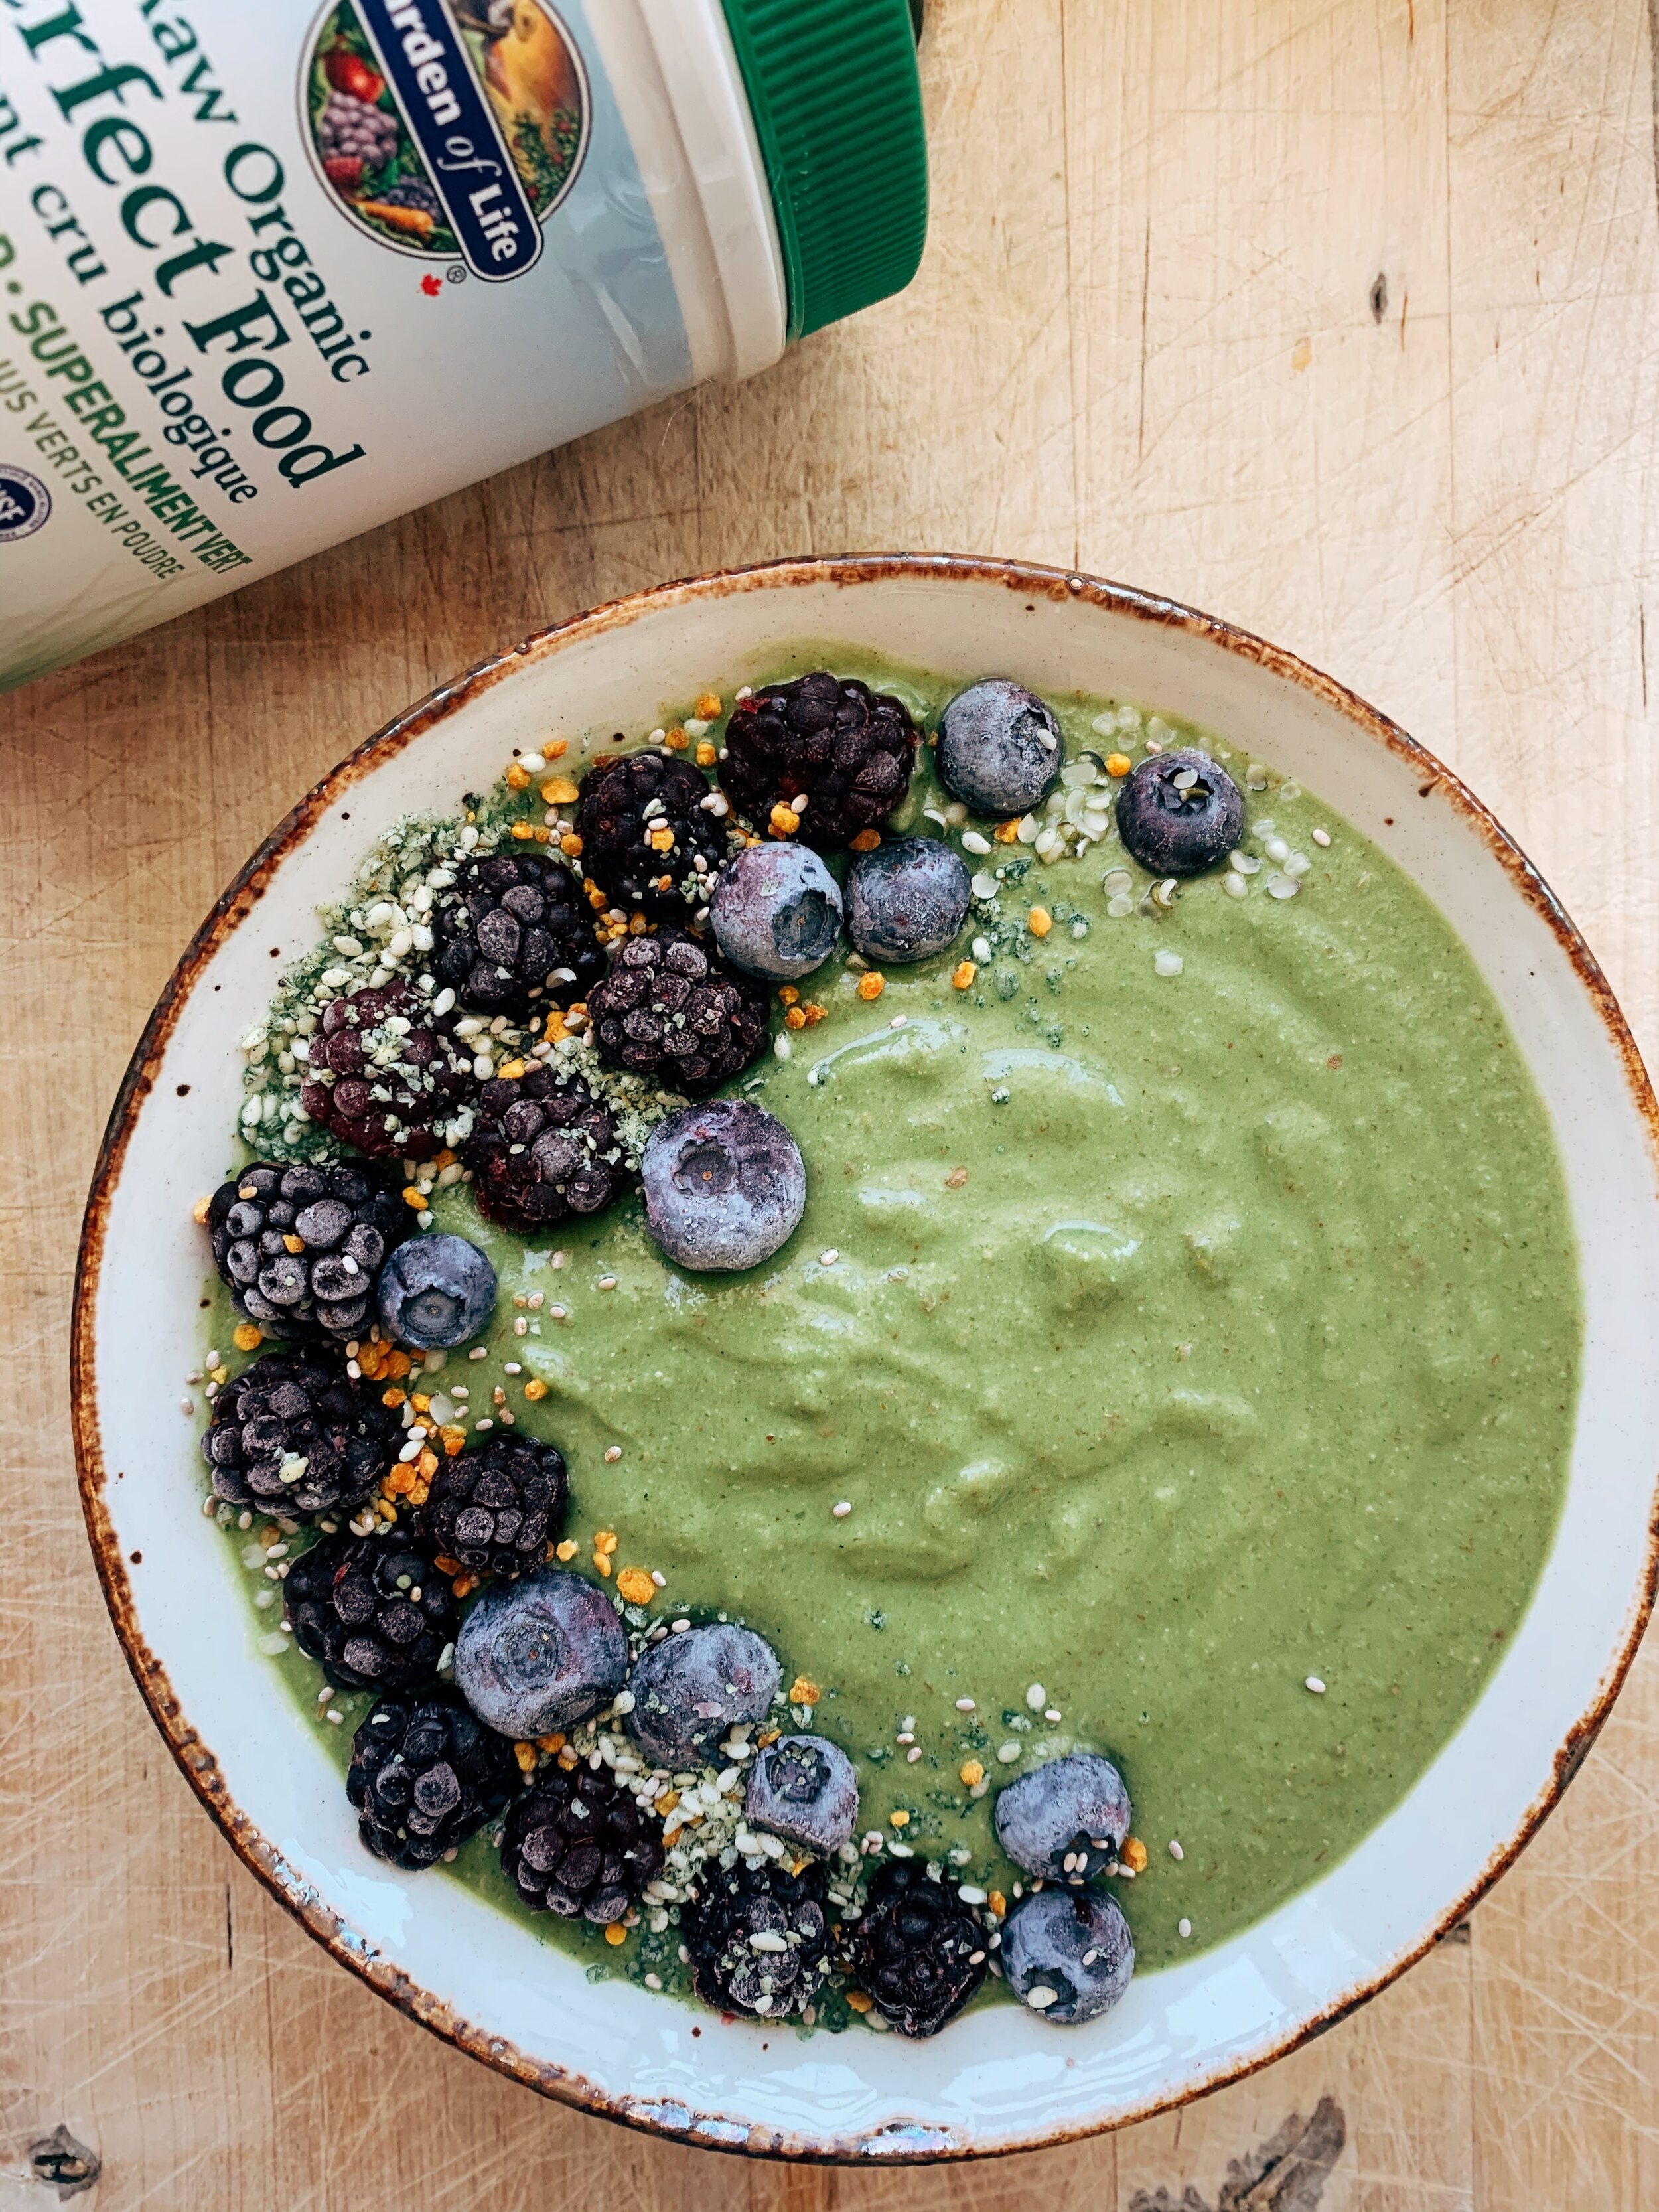
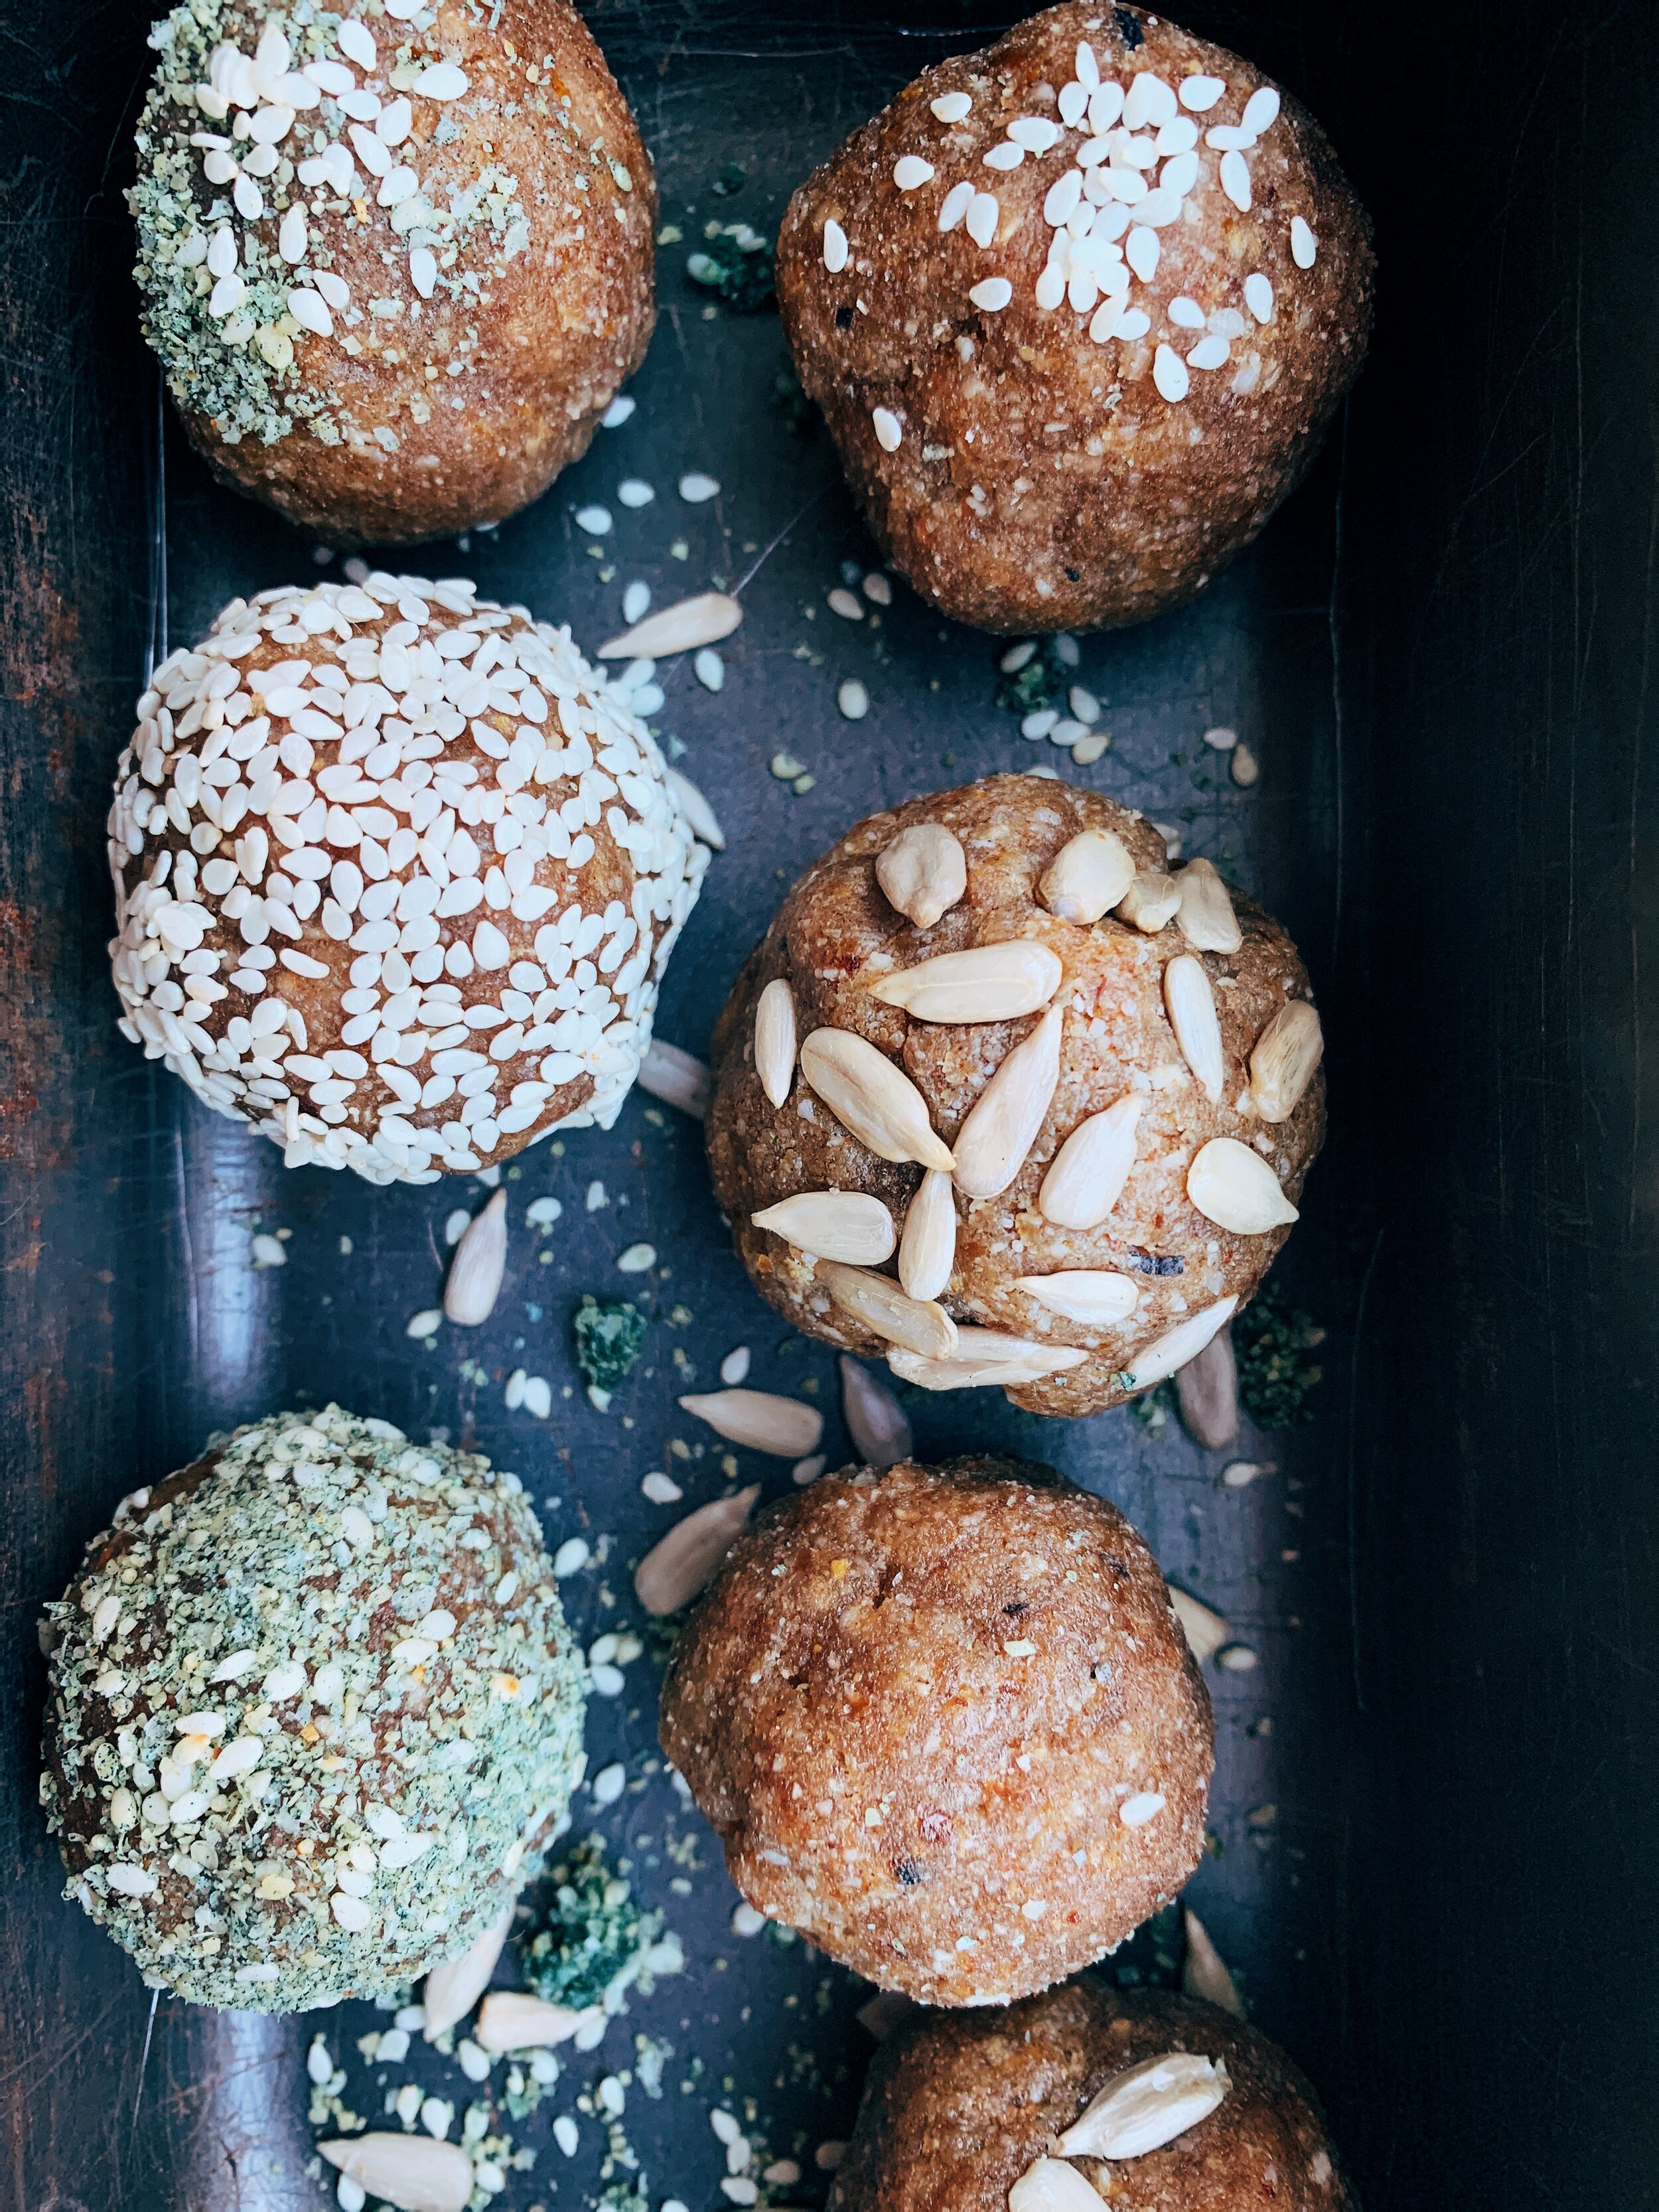
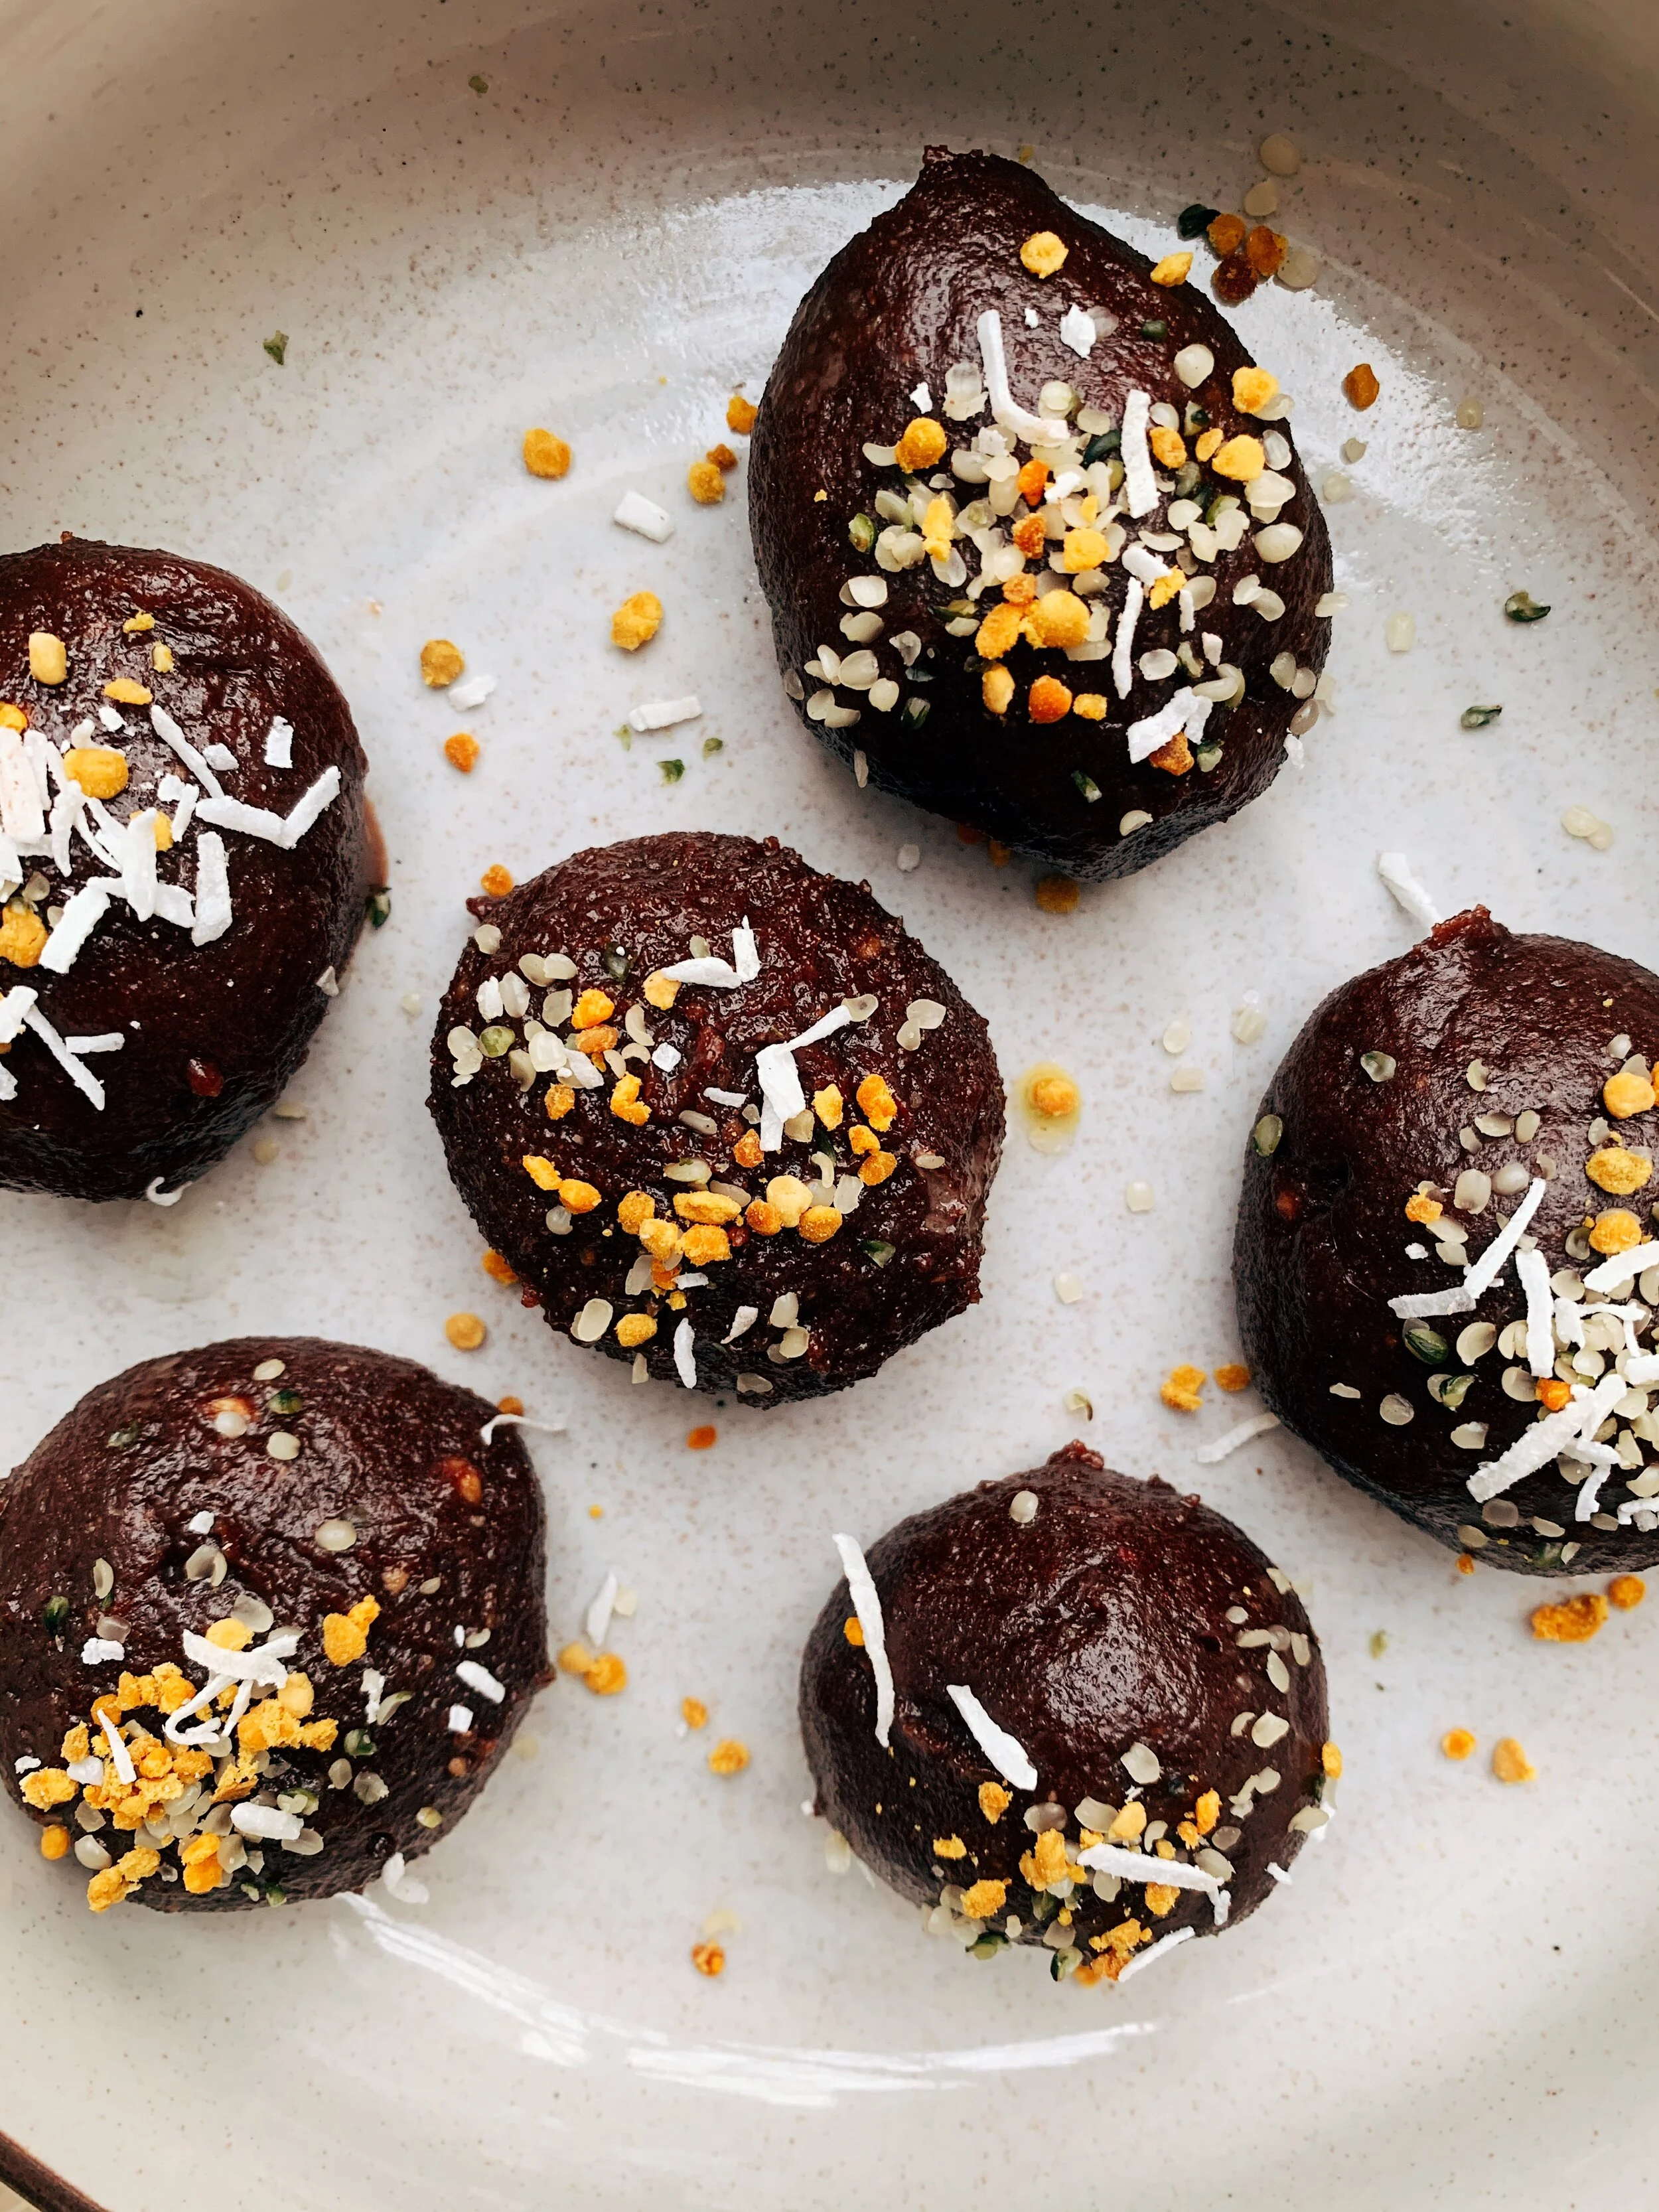
There are tons of fun ways to incorporate ground seeds into your meals. I like blending them to smoothies, sprinkling them on oatmeal bowls, yogurt, and salads, or incorporating them in a batch of no-bake bliss balls. The options are truly endless! You can totally eat them by the spoonful, too. Just mix the ground seeds in a cup with some water and eat the paste. I also know people who eat them with a spoonful of nut butter as a quick and nourishing snack.

IS THERE AN ALTERNATIVE TO EATING GROUND SEEDS?

I personally believe Seed Cycling is most affective when we consume the seeds freshly ground. However! If this is not realistic or always possible for you, there is an alternative:

  • SEED BUTTER CYCLING: Seed butter cycling uses the same principles as Seed Cycling, but we incorporate seed butter as opposed to ground seeds. This can be a more convenient way of Seed Cycling, especially with a busy schedule or while traveling. Purchase organic sunflower, pumpkin, and sesame (aka tahini) butter. To incorporate the flax, you may need to make your own flax butter as I’ve never seen it in stores. To do so, process toasted flax seeds along with some coconut oil in a food processor or high-speed blender until smooth, transfer to a jar, and store in the fridge. Consume 1 tbsp of the butters in place of the seeds.

CAN I EAT OTHER SEEDS WHILE SEED CYCLING?

Yes. Eating other seeds such as chia or hemp while seed cycling does not affect the process. However, I recommend avoiding sunflower and sesame during the first half of the cycle, and pumpkin and flax during the second half of the cycle.

CAN YOU SEED CYCLE WHILE ON HORMONAL BIRTH CONTROL?

Hormonal birth control works by releasing synthetic hormones into our body. Seed cycling will not have much affect over top these artificial hormones.

CAN YOU SEED CYCLE WITH AN IUD?

It depends on the type of IUD. If you have a copper IUD, then YES! T he copper IUD does not release any hormones into our body. If you have a hormonal IUD (ex Mirena or Skyla) then seed cycling will not be as beneficial.

14A8CA40-D04D-4F22-B503-24C48560D923.JPG

Have you tried seed cycling? Please share your tips, advice, or personal experience.

Cauliflower Oats

5DEB7980-86DB-44F1-A450-5095261EE390.JPG

Cauliflower. The secret to thick, creamy, voluminous oats. Did you know?!

My body always asks for oatmeal when autumn rolls around. When we start tuning in, we notice these seasonal shifts in energy levels, fluctuating mood, and the foods we crave. And these days, I just love starting the morning with a comforting bowl of warm oats. I recently began adding riced cauliflower to my oatmeal, and it’s become a real game-changer. The vegetable adds texture, thickness, and so many nutrients, without sacrificing flavour. You honestly can’t taste it at all!

Cruciferous veggies like cauliflower help support our hormones and balanced blood sugar. The high fibre content encourages liver detoxification and excess hormone elimination, while supporting optimal digestion. Try your best to buy organic cauliflower (or local when in-season!), as the conventional alternative is heavily sprayed with harmful chemicals.

I always use frozen-riced cauliflower for this recipe, but fresh cauli works too! I usually buy my cauliflower rice pre-made for convenience sake, and store it in the freezer for tons of simple recipes. You can find cauliflower rice in the frozen section at many grocery stores (I buy mine in bulk from Costco!), or you can easily make your own. To make cauliflower rice, wash and chop a whole head of cauliflower into chunks. Place in a food processor, and process on high for 2-3 minutes until the cauliflower resembles small, “rice-like” crumbles.

D94F6BF7-737D-4166-8151-7CB2B221613C.JPG

CauliFlower Oats

Recipe

  • 1/2 cup gf rolled oats

  • 1 cup riced cauliflower

  • 1 cup water or unsweetened nut milk of choice

Optional Add-ins

  • Sweetened plant-based protein

  • Spices like cinnamon, vanilla, nutmeg

  • Nuts, seeds, nut butter

  • Sliced banana or frozen berries

  • Honey or maple syrup to sweeten

Method

In a small pot, combine oats and water or nut milk, and bring to a boil. Once boiling, turn to medium-low and cook until the oats begin to thicken. Add you cauliflower, and continue to cook for 2-3 minutes until soft. Remove from heat, stir in additional add-ins, and serve.

Coconut Vanilla Bliss Balls

Bliss balls are like little balls are pure bliss. They’re perfect in the afternoon with a cup of tea, as a grab-and go snack during those extra busy days, or post-dinner as the perfect lower-sugar treat.

When choosing snacks that I know will nourish me, I like to follow a few simple guidelines: I want a snack that’s wholesome, minimally processed, and made with simple real-food ingredients. And just as importantly, I make sure my snacks contain a generous amount of good-for-you fats and protein to encourage satiation and satisfaction. Eating good quality fats like nuts, seeds, and cold-pressed oil is essential for shutting of our hunger hormones and keeping blood sugar levels balanced.

So let’s let go of any fear we may have around fat, and start celebrating it!

IMG_1176.JPG


A Note on Soaking

Think of nuts and seeds as little closed packaged. We have to actively ‘open’ them to obtain their maximum nutritional properties. However, breaking down these foods can be a challenge for our digestive system - especially when digestion isn’t working optimally. This is when soaking comes in handy! When we soak our nuts and seeds in water (and an acid!), the protective outer layer easily dissolves and we’re able to unlock the plant’s full nutrient spectrum. Soaking is essentially ‘pre-digestion’.

Recipe

  • 10 mejool dates, soaked*

  • 1/3 cup coconut flour

  • 1 cup nuts (I recommend a blend of hazelnuts + cashews)**

  • 1/4 cup seeds (I used hemp, but sunflower + pumpkin work too!)**

  • 1 scoop vanilla protein powder or collagen

  • 2 tbsp coconut or MCT oil

  • 1 tsp cinnamon

  • Pinch of sea salt

*Place dates in a bowl and cover with boiling water. Let sit for 5 minutes to soften. This will make them much easier to blend!

**To soak your nuts and seeds, place them in a mason jar and cover with filtered water. Additionally, add 1 tsp lemon juice or vinegar to maximize the result. Let soak for 2+ hours (or overnight), drain, rinse, and use. Please note that tiny seeds like hemp, chia, flax + sesame should not be soaked.

Method

Combine all ingredients in a food proccesor or high-power blender. I use and recommend this one by Hamilton Beach, but any food processor will work. Pulse the mixture a few times to get things moving, then blend on medium-speed until ingredients are fully blended and a smooth mixture forms. Pause to scrape down the sides as needed.

Once fully pureed, roll the ‘dough’ into small golf-ball sized balls. Place in the freezer or fridge to set, and serve cold. The balls can be stored in the fridge for up to 5 days, or in the freezer for weeks. Where you store them will depend on which consistency you prefer. :)

A GUIDE TO PERIOD CUPS

IMG_4434.jpg


Periods! Let’s talk about them.

I dreaded my menstrual cycle for most of my life. I’ve always been one of those girls with a naturally heavier period. And every month, in the first couple days of my cycle, I routinely bled through tampons, pads, pants, and sheets.

I first heard about the period cup a few years ago from a friend. “They'll change your period FOREVER!” she said. But after a quick google search, I immediately turned the idea down. Inserting a physical cup, into my body?! No way!

But this year, everything changed. I began to crave a deeper connection with my body and my cycle. I felt a strong desire to learn more about my anatomy. And I started to become curious about my blood. Not to mention, I was SO tired of using tampons that just didn’t work with my heavy bleed. And most importantly, I started to understand the startling impact conventional menstrual products have on our planet.


What is a Menstrual Cup, Anyway?

A menstrual cup is a small, flexible, reusable cup that’s typically made from silicone or rubber. Unlike tampons or pads, the menstrual cup collects your blood instead of absorbing it! Similarly to using a tampon, menstrual cups are inserted into the vagina. Once inside, the cup sits below the cervix and catches your flow as you bleed. Once the cup is full, you simply pop it out, empty it’s contents into the toilet, give the cup a quick rinse to clean, and pop it back in.

Why Switch to the Cup?

I held off from trying the menstrual cup for SO long because I was scared of the unknowns. What if insertion hurts? What if I leak? What if my cup gets lost inside of me?

But today, I’ve grown to deeply love my menstrual cup. And after a little education, reassurance, and practice, those fears have quickly melted away. So why use a menstrual cup? There are SO many reasons to make the switch:

Information

  • Using a period cup offers a beautiful opportunity to get to know your body AND your blood! Did you know the colour of your period is a free hormone test? After switching to the menstrual cup, I’m now able to get a picture of my hormonal health every single month, based on my blood’s colour, texture, duration, and flow.

Sustainability

  • Period cups are SO much better for our earth. Did you know a single person uses approximately 11,000 disposable tampons in their lifetime? All together, menstrual products add up to over 200,000 tons of waste, per year. Now that’s A LOT of waste. Especially considering it takes 800(!!!!!!!) years for one pad to fully break down. Additionally, the actual production of period products is environmentally disruptive. Conventional pads and tampons are typically made from cotton; one of the most water-intensive crops to grow. They also contain large amounts of plastic (think applicators, wrappers, and packaging) which end up crowding our landfills and polluting our oceans.

Health

  • Period cups are SO much better for our health. Conventional tampons + pads contain a wide variety of added chemicals, toxins, and pesticide residue that absorbs into our bloodstream. Studies show these chemicals actually disrupt our endocrine system and contribute to hormonal imbalance - along with promoting all sorts of disease.

  • Wearing a menstrual cup greatly reduces the risk of Toxic Shock Syndrome (TSS), which happens from bacteria that begins to form when menstrual products (specifically tampons) are left in for too long. TSS is a dangerous and potentially fatal condition.

Affordability

  • The average women spends approximately $6,000 on menstrual hygiene products throughout her bleeding years. Just imagine how much $$$ you can save by switching to a reusable menstrual cup!

Ease

  • You can often go much longer between emptying your cup than changing a tampon. This is the biggest blessing for someone with a heavy bleed, like me. Goodbye leakage worries, hello freedom!

  • You can safely leave the menstrual cup in overnight while you sleep. My period-sleeps have truly become so. much. better. since switching to the cup.


CBCDB639-1956-44A2-A339-8B2D4E868F5D-BB04BD10-DEE6-45A5-85A4-B900951F3B9A.jpg

Why I love VIV

Not all menstrual cups are created equal. It’s SO important to do your research before purchasing, and find a consciously made cup with non-toxic materials. Your cup will be INSIDE of you, after all! After searching for (and testing) many different period cups, I finally found a menstrual-care company that embodies everything I believe in: period positivity, womxn empowerment, sustainability, accessibility, the environment, and our health.

Viv for Your V is a female-founded earth-friendly period-care company that cares deeply about the quality of their products and the impact they leave on our earth. Their products are consciously made with toxin-free, environmentally-friendly ingredients using practices that support sustainability. These products include the Viv Menstrual Cup (my personal favourite!), bamboo liners, bamboo pads, and tampons COMING SOON!

Some reasons why I love Viv…

  • Their products are made with organic bamboo + corn fibre, using drastically less water + land space to grow than cotton

  • Their products are completely plastic FREE

  • Their products are free from nasty chemicals

  • Their pads + liners are 95% degradable!

  • Their packaging is made with sustainable ink and 30% less paper than conventional period products

  • Their products are priced affordably, making them accessible to many

  • They ship ALL OVER the world!

  • They’re passionate about menstrual education, period empowerment, and removing stigmas + shame

I’m so excited to share that Viv was kind enough to offer a special discount code for this community! If you’d like to purchase your own Viv menstrual cup, or try any of their natural period products, you can use the code HANNAH15 at checkout for 15% your order! Considering their already accessible pricing, this is a deeply generous offer.

The Viv Menstrual Cup

I particularly love my Viv cup because of it’s made with 100% medical grade silicon, lasts 10 years with proper care, AND I can wear it for up to 12 hours at a time. Plus, it’s beautiful black colour means I don’t need to worry about staining. I like to wear my menstrual cup for the majority of my cycle, then switch to the Viv organic cotton panty liners in the last day or so. I sleep with my cup in overnight, and pair it with a Viv pad for extra protection on heavier bleeding evenings. This cup, and these pads, have truly made my period feel like a dream.

2871E66E-7C33-4F12-8D9A-93C5D3BD0800-6030658E-F137-4EA9-8D16-CBDA33E91526.JPG


P E R I O D C U P Q + A

Before I made the switch, I had so many questions about the cup. So, I’ve compiled this handy Period Cup Q + A as a resource for you to turn to. I hope this information provides answers to your burning questions, helps break the menstrual cup stigma, and gives you the reassurance, support, and inspiration to finally make the switch.


How do I insert the cup?

Your first time inserting the cup always feels a little scary. But with a bit of practice, insertion becomes a breeze - I promise! First, take some slow, deep breathes, until you begin to feel somewhat relaxed. Then, squat down (either on the floor or over the toilet) and open your legs. Fold your menstrual cup in half, and insert just like you would a tampon. It can sometimes help to wet the cup first for easier sliding! Allow the cup to open up inside. When it’s in the correct position, you won’t be able to feel it at all.

Here’s a handy little tutorial if you need further guidance: How to Insert a Menstrual Cup

How do I figure out my cup size?

Not all vaginas are the same, and using a properly sized cup is super important for comfort and insertion ease. Your unique cup size will depend on your cervix height and average period flow. Viv for Your V has a handy little sizing chart that you can refer to before purchasing!

How long can I keep my cup in?

This will largely depend on the flow of your bleed and the size of your cup. On heavier days, I like to change my cup ever few hours to prevent potential leakage. On lighter days, I keep my cup in all day long without thinking about it!

How do I take the cup out?

Sit down on the toilet, and reach up until you can feel the tip of your menstrual cup. I LOVE the Viv cup’s handy ring, which makes it super easy to remove and completely beginner friendly. Once you’ve got hold of your cup, slowly pull it out and empty the contents into your toilet.

Pink+Cactus+Guides+or+Tutorials+Blog+Graphic.jpg

Can the cup get lost inside of me?

NO!

Once you understand your female anatomy, then you’ll realize that it’s physically impossible for your cup to get lost inside of you. This is because it’s impossible for the cup to move past the cervix and into your uterus.

However, depending on the length of your cervix, the cup can sometimes slide up a bit to far and become out of reach. Do not panic! You can simply use your pelvic floor muscles to push the cup back down.


Can I exercise with my cup in?

Yes! From swimming to running to yoga, menstrual cups allow you to move freely, without worry.

Can I sleep with my cup?

Yes! You can leave your cup in safely for up to 12 hours. On heavier flow days, I recommend paring the cup with an organic pad or a pair or absorbable period undies in case of leakage.

How do I clean my cup?

While on my period, I simply rinse the cup under hot water in-between usage. Then, once my bleed has finished, I give the cup a more thorough cleaning. On the stove, heat a small pot of water until boiling. Boil the cup for about 5-10 minutes to kill off potential bacteria and remove any stains. Let dry, then store in a clean place until your next cycle. Good as new!

Is there a risk of TSS?

While its not impossible, the chance of developing Toxic Shock Syndrome (TSS) while using a menstrual cup is incredible rare. To date, there has only been one reported case of TSS from the period cup, and this was due to an unlikely scrape that occurred during insertion. Overall, menstrual cups are quite safe. Just follow instructions, check on your cup from time-to-time, and always listen to your body.


Since switching to the menstrual cup, I now feel a deeper connection with my body and to my monthly bleed. Our period is a gift. Let’s CELEBRATE our beautiful cycle, normalize menstruation, and acknowledge the sacredness of the menstrual phase.

This post is lovingly sponsored by Viv for Your V. Thank you, Viv, for making this content possible!

Season Syncing

FullSizeRender 45.jpg

As we enter into the autumn season, I want to talk about Season Syncing. Sadly, our modern world has fallen out of touch with the Earth’s natural rhythm. Thousands of years ago, there were no alarm clocks or grocery stores or packaged foods or transported goods from halfway across the globe. Our ancestors rose with the sun, ate off the land, and lived according to the seasons. This way of being is our natural state. It’s how we’re designed to thrive.

Season syncing brings us back to our roots. Based on Traditional Chinese Medicine and Ayurvedic philosophies, the practice encompasses sleeping, eating, and living in-tune with the seasons.

The idea: to synchronize the seasons with our largest categories in life; sleeping, eating, exercising, and living. When we tune in, get quite, and listen, our body intuitively knows what to do.


Syncing with the Sun

Our cirdadium rhythm (aka internal clock) follows the sun. This means, our body naturally wants to sleep and rise with the setting and rising sun. And to best support our needs, our sleep cycle may very throughout the year.

Fall: The transition from Summer to Autumn can be exceptionally hard. The mornings become darker and the days go grey. Wind down earlier, sleep in a bit later, and allow your body additional rest.

Tips: exposure to daylight in the morning helps reset our sleep and wake cycles, and naturally alleviate tiredness. Try going outside first thing in the morning, even for just a couple of minutes.

Winter: With shorter days and longer nights, winter is the time to slow down, withdraw, hibernate, nest, and rest. It’s the perfect opportunity to fully recharge and prepare for a new year ahead. Longer periods of sleep are often required, AND completely healthy!

Tips: Supplement with vitamin D to support seasonal depression, and consider installing natural spectrum light bulbs - especially if you live in a place with limited sunlight during the winter months.

Spring: The mornings slowly get brighter, and daylight increases. Begin to shift your alarm clock a little back each day.

Summer: Bright mornings, later evenings, and increased sunlight often results in feeling like we need less sleep during the summer. Favour early rising, and listen to your body!

Eating with the seasons

Seasonal eating provides our body with the nutrients it needs in specific seasons. Do you naturally crave different foods depending on the time of year, climate, and weather conditions? Does your digestion fluctuate as the seasons change?

Research now shows that our gut micro-biome physically changes it’s structure, as well as enzyme production, with the seasons! This means, our body optimally digest different foods at different times of the year. And when we eat something completely out of season - like tropical fruit in the winter (guilty!) - our body won’t efficiently produce the correct enzymes needed to properly break these foods down.

Eating with the seasons is quite simple - just focus on eating local, in-season foods. Basically, anything that's grown locally will be in-season. An easy way to figure out what's seasonal in your area is to check your city's growing guide, or pop by a neighbourhood farmer's market!

Produce-By-Season.png

Farmer's markets are an excellent way to connect with the people who grow your food, and support local during the spring, summer, and early autumn months. cNot only do they foster a sense of community, but they're also so much fun! Shop at grocery stores and markets that carry in-season produce grown close to home, as opposed to the other side of the world. Shopping this way supports both our body AND Mother Earth.

Fall

Grounding, starchy, warming, aromatic

  • Winter squashes

  • Roots and tubours

  • Cooked, steamed, dark leafy greens

  • Warming spices like cinnamon, nutmeg, and ginger

  • Starchy vegetables

  • Fiberous fruit like apples, pears, and plums

Winter

Grounding, earthy, warming, comforting

  • Starchy root vegetables like carrots and parsnip

  • Winter squashes

  • Brown and sweet potatos

  • Cruciferous veggies like brussel sprouts

  • Oranges and clementines

  • Hearty chills, soups, and stews

Spring

Light, fresh, bitter, cleansing

  • Bitter greens like arugula and dandelion

  • Sprouts and dark leafy greens

  • Fresh herbs (parsly, dill, cilantro)

  • Homemade vegetable and fruit juices

  • Sea vegetables like spirulina and chlorella

  • Fresh salads and smoothies

Summer

Cool, hydrating, juicy, abundant

  • Water-rich vegetables (cucumber, zuchinni, peas, tomatoes, lettuces)

  • Summer squashes

  • Tropical fruits and berries

  • Sprouts and sprouted legumes

Seasonal exercise

With the changing seasons, our excercise requirements often change, too.

Autumn: As the days grow darker, it's common to feel our energy start to dwindle. Instead of pushing through, transition intense workouts to nature walks and gentler movement. Honour your body’s declinng energy.

Winter: Favour restorative practices like yoga or pilates. Take your workouts indoors to keep warm, and consider investing in a gym membership during this time.

Spring: After winter’s hybernation, we often feel a sense of renewed energy. Now is a great time to take your workouts outside.

Summer: It’s common to feel a surge in energy and motivation during the summer months. The long days and abundance of sunshine make us feel awake, energized, and ready to move. In this fast-paced season, try new things and pariticpate in a wide variety of activities; from mountain hikes to ocean swims and workouts at the beach.

B789DA0E-74F1-4FFA-8A34-6601890EF7A1.JPG


Daily Habits

Fall: Winding down, wrapping up, completion, and tuning in. The perfect time to:

  • Slow down

  • Reorganize

  • Wrap up projects and loose ends

  • Spend time in the forrest

Winter: Deep rest, comfort, coziness, hibernation, withdrawal, and reflection. The perfect time to:

  • Journal and reflect

  • Set intentions for the coming year

  • Less work, more rest

  • Spend time at home

Spring: Re-organizing, resetting, planning, checking in, cleaning up. The perfect time to:

  • Spring-clean your closet, space, and thoughts

  • Plant ideas, dreams, and seeds

  • Start new projects

  • Resert with a health-supportive cleanse

  • Spend time in the garden

Summer: Play, spontaneity, adventure. The perfect time to:

  • Adventure, travel, and explore new places

  • Actively participate in social activities

  • Spend time in the ocean, lakes, and rivers

Mint Chocolate Cauliflower Smoothie

Mint + chocolate are the perfect duo.

I’m keeping it simple and sweet today with this decadently delicious cauliflower smoothie. It tastes like mint chocolate chip ice-cream, but it’s dairy-free, nutrient rich, and much lower in sugar. This is my go-to when I’m craving dessert for breakfast.

Happy almost December, friends!

Recipe

  • 1 cup steamed then frozen cauliflower

  • 1 baby frozen zucchini

  • 1/2 frozen banana

  • 1 scoop vanilla or chocolate protein

  • 1 scoop collagen greens powder

  • 1 cup coconut milk

  • 1/4 tsp pure mint extract

  • Dark chocolate or cacao nibs for topping


Method

Blend all ingredients together in a high-speed blender until thick and creamy. Adjust the liquid as needed to achieve your favourite consistency.

Digestive-health tips for balanced hormones

The gut + hormone connection!
Let’s chat about it.

F621550B-AA46-413B-80D7-21135A4EFA4F-D72E2AF3-EA5B-4236-A38D-37B3EEAA375C.jpg

The health of our hormones is directly connected to the health of our digestive system. In my studies to become a holistic nutritionist, I learned that the body is deeply connected. When imbalance is presenting in one area, it often affects all other areas. I’m so fascinated about these interconnections - particularity between our hormones and the gut. As I began my personal hormone-balancing journey, I discovered how important it was to nurture my digestive health. By doing so, I was more easily able to support my hormones and bring my body back into balance.

So how is the gut and our hormones interconnected? I like to focus on these three areas:

Constipation + estrogen buildup

In our modern day world, we’re constantly exposed to environmental toxins, endocrine disrupts, and “xenoestrogens” that mimic estrogen in the body. These hormone-disruptive chemicals are commonly found in things like household plastics, pesticides sprayed on non-organic foods, conventional makeup + beauty products, toiletries, and cleaning products. In order to ‘detox’ these toxins and prevent buildup, it’s absolutely essential that our digestive system is working smoothly. This means having at least one (or more!) formed bowel movement per day.

Digestive distress + cortisol

Our body can experience physical stress in the form of digestive issues, gut inflammation, food sensitivities, improper chewing, and imbalanced gut bacteria. These physical stressors prompt our body to release the stress hormone, ‘corstiol’. Chronic gut inflammation = chronic cortisol production. While cortisol can be beneficial when released on occasional, a continuous production of this stress hormone is quite harmful to the rest of our hormones. This is because cortisol uses the same building blocks that our other hormones need to be produced - and cortisol ALWAYS takes priority!

Dysbiosis + thyroid hormones

Certain hormones (particularly, our thyroid hormone!) need to be “converted” in the gut to a form that’s more usable by the body. The healthy bacteria within our gut are responsible for making this conversion happen! But when we have an imbalance of good-to-bad bacteria (also known a dysbiosis), these important hormones cannot be converted properly. Thyroid hormone imbalances and digestive problems go hand in hand.


5 tips for digestive health

So how can we remedy hormonal imbalances by improving digestive health? I like to focus on these simple yet deeply nourishing practices:

Eat plant fibre

Fibre is such a beautiful nutrient! Unfortunately, our standard North American diet is deeply lacking in fibre-rich plant foods that are so, so good for our digestive health. Some of my favourite incredibly nourishing fibre-rich foods include seeds such chia, flax, + hemp, fibre-rich grains like buckwheat + oats, crucifies vegetables, legumes, fruits, and dark leafy greens.

One way I love to support my gut is with Holy Crap’s Superseed Blend breakfast cereals.  I mean, the name speaks for itself! These cereal blends are naturally gluten-free, low in sugar, and SO rich in gut-supportive fibres to encourage regular elimination and ease IBS symptoms. The ingredient list is simple, consisting of just chia, hemp, and buckwheat. These mixes take only a couple of minutes to prepare, and make the perfect gut-healthy breakfast for those busy mornings. I’m SO in love Holy Crap, and everything this company offers!

Drink more water

Often, the simplest practices are the most profound. Adequate hydration is essential for eliminating toxins and ensuring you’re going to the bathroom regularity! While each individual’s water requires are unique, I often encourage my clients aim for 8-12 8oz cups per day. Another beautiful way to increase hydration is through water-rich foods like vegetables + fruits, or creating your own electrolyte drinks with a pure sea salt, lemon, and raw honey.

Chew your food

Digestion begins in the mouth - with chewing! Chewing our food breaks down hard-to-digest particles and stimulates the release of important enzymes. It’s one of the most affective ways we can support our gut, yet so often, chewing gets overlooked. Between eating on the go or in front of electronics, it’s common to rush through meals without taking the time to actually savour each bite. Today, I encourage you to create space to sit down, connect with your food, and enjoy a beautiful meal in full presence.

Incorporate fermented foods

In traditional cultures, fermented foods were treasured and regularily enjoyed. They understood the potent doses of live cultures in these foods, and the benefits they have on our gut. I invite you to begin adding a heaped tablespoon or two of fermented vegetables to your lunches and dinners daily. Try it out, and feel the difference for yourself!

Take a probiotic

In addition to fermented foods, I find a high-dose probiotic taken in the evenings before sleep is often very beneficial for preventing constipation, reducing bloating, and keeping digestion running smoothly. I recommend a probiotic supplement with at least 10billion CFU, or more! The higher the strain, the more potent the affects will be.


D51CD67B-2AA3-4E2E-A41B-F5BCE78FF55E-7BF6576D-FF6F-45AF-BEA0-9115C4DA1A1A.JPG

This post is lovingly sponsored by Holy Crap Cereal. Thank you to Holy Crap for making posts like this possible!

Gut-Healthy Apple Pie Bites

Tis the season of crisp apples, wholesome oats, and warming autumnal spices!

E1DF3C7D-9FE6-4FEB-8FE9-8B1C1531AD23-F43152AD-2243-41AB-8273-BC5F4EC8DB42.jpg

To celebrate the beginning of fall, I’m sharing my Gut-Healthy Apple Pie Bites recipe in collaboration with Holy Crap. Holy Crap is one of my favourite local Sunshine Coast-based companies. They make a wide selection of gut-healthy, high-protein breakfast cereals made from one of my most loved superfoods; seeds! This recipe features Holy Crap’s Maple Oat Superseed Blend; a mix of gluten-free oats, chia seeds, hemp hearts, buckwheat, dried fruit, cinnamon, and pure maple syrup. This blend tastes like fall in a bowl, and makes the perfect addition to autumn inspired recipes. Or, just add freshly boiled water and enjoy the breakfast cereal all on it’s own!

Bliss balls are one of my favourite snacks. I naturally gravitate towards them year-round because they’re delicious, satiating, and just so easy to make. These simple Apple Pie Bites contain a variety of wholesome ingredients, take only a few minutes to whip up, and last for weeks in the fridge - making them the perfect prep ahead snack! All you need is a food processor, a handful of pantry staples, and your favourite fall spices.

E657C8C0-7B4C-49C1-ABAC-0D3488C3B500-864C9EA7-576A-4CDE-8161-5E4F84803386.JPG

Recipe

Method

Combine all the ingredients in your food process, and process on low until a smooth ‘dough’ forms. Roll into balls, and place on a large plate or parchment paper-lined tray. This recipe makes about 15 balls. Pop in the freezer or fridge to set, and keep frozen for preservation. The bites will last approximately 5 days in the fridge, or multiple weeks in the freezer - although, they never last more than a couple of days around here!

My Menstrual Phase Beetroot Smoothie

Today on the blog, I’m sharing my nourishing period smoothie recipe in partnership with Garden of Life! I make this recipe ritually on the first day of my cycle every month. The ingredients in the smoothie help reduce PMS symptoms, decrease period bloat, increase energy, and support healthy digestion.

The recipe features nutrient-rich beets to support blood flow and restore lost nutrients, chocolate-y cacao powder to replenish magnesium levels, elevate your mood, and ease cravings, raw flax seeds to balance hormones, and Garden of Life’s Plant Iron and Organic Herbs supplement to re-mineralize the body and increase energy during your moon cycle.

IMG_2453 2.JPG

Growing up, I used to see my period as a burden. Painful cramps, intense emotions, hormonal breakouts, bloating, water retention, and frequent mood swings were a regular occurrence every month. These symptoms made me dread my monthly bleed.

But when I came off the hormonal birth control pill, my period didn’t return. What followed in the coming years was a journey to regain and maintain a regular menstrual cycle. (You can read all about my experience with amenorrhea here!)

Now that I have my period back, I see my cycle in a whole new way. I no longer think of my period as a burden, disgusting, or shameful - but instead, a magical, beautiful gift.

Seeing your period as a gift isn’t always easy - especially if you suffer with uncomfortable symptoms every month. But with supportive foods, intentional supplementation, herbal remedies, and nourishing lifestyle practices, we can overcome these symptoms, find harmony with our hormones, and experience gentler, easier, more beautiful periods. Overtime, we can learn to fall in love with our cycles.

5EECB2AA-35B3-4FD6-BFD0-E3A2B374E184-198DA3CD-65E8-4AD3-B668-106ECE4DB743.jpg

When my period commences every month, I love to celebrate with this nourishing Menstrual Phase Beetroot Smoothie. This smoothie incorporates powerful nutrients that are essential for balancing hormones and experiencing a more beautiful cycle. The recipe includes nutrient-dense beets, magnesium-rich cacao, hormone-balancing flax seeds, and Garden of Life’s Plant Iron and Organic Herbs. Beets promote blood flow and circulation, helping to cleanse the uterus. Cacao provides a rich source of magnesium - a nutrient that helps reduce water retention, period induced bloating, and cravings. Flax seeds work to cleanse the liver, and bring low or high hormone levels back into balance.

Iron is one of the most important nutrients for menstruating women - yet it’s often overlooked. It’s common for women with heavy periods, gut issues, weak digestive symptoms, or those who follow a plant-based diet to not obtain or absorb enough iron every month. Iron deficiency can show up in a variety of unpleasant symptoms, like extreme fatigue, pale skin, dizziness + lightheadedness, hair loss, brittle nails, and cold hands and feet. Garden of Life’s Plant Iron and Organic Herbs is a beautiful supplement that includes added botanics and nutrients like vitamin c and b vitamins to increase iron absorption and further support a healthy cycle.

Recipe

  • 1 medium beet, chopped

  • 1 tbsp raw flax seed

  • 1 serving Garden of Life Plant Iron and Organic Herbs

  • 1 scoop Garden of Life Raw Organic Vanilla Protein

  • 1 tsp cacao powder

  • 1 cup frozen blueberries or blackberries 

  • 1 cup non-dairy milk

  • Optional - unsweetened coconut yogurt for swirling ontop

Method

Combine all ingredients in your blender. Blend on low speed, slowly increasing until smooth and creamy. Pour into a glass (or your favourite mason jar!) and optionally swirl in unsweetened coconut yogurt for added gut-health benefits.

All About Earthing

I truly believe at the root of almost every imbalance in our modern world is a disconnection from our natural world. Human beings were never meant to live the way we do - indoors in front of screens all day, overloaded with information, to-do’s and expectations, and disconnected from our environment. But through reconnection with the earth and her frequency, we can begin to slowly shift, heal, and return to a state of balance.

Trees, flowers, and plants release healing vibrations that directly communicate with our central nervous system. Sunlight resets our circadian rhythm and naturally replenishes vitamin d levels to support immune health, deep rest, strong bones, and glowing skin. Fresh air cleanses out toxins, releases stuck energy, and clears our mind. Healthy soil is rich in trillions of microorganisms that nourish and promote diversity within our gut microbiome. Ocean air releases endorphins, crashing waves promote calmness, and salty water encourages physical healing. Clean water contains important minerals that are needed to fully hydrate our cells. Fresh, locally grown, in-season, organic foods contain the full spectrum of vitamins, minerals, and energetic qualities to support vibrant health.

Potentially most powerful of all, is the earth's vibrational energy. A healing electrical current emanates from deep within her core, that reenergizes, recharges, and grounds our entire being. When we make direct contact with the earth, these ‘negative ions’ naturally reduce inflammation and soothe the nervous system.

13D6E607-B9F9-46F9-808B-0B66B441AB34-1434D427-55C3-4515-8C6D-7E24D30FE8C6.jpg


Earthing, also known as grounding, is the practice of touching the earth with our bare skin, and letting her energy flow through us.

The Earth radiates a powerful, naturally healing electrical current that reenergizes, recharges, and grounds our entire being. This energy is referred to as ‘negative ions’. Research shows negative ions positively alter our brain chemistry to encourage feelings of contentment, peace, and well-being. Unfortunately, our modern world is filled with technologies that produce positive ions - an energy that promotes inflammation and negatively impacts both mental and physical health. Positive ions are formed from toxins (chemicals found in your home and products, air pollutants, etc), indoor lighting, and anything electromagnetic such as electronic devices like your phone or tv.

But when we make physical contact with the Earth, it’s healing energies bring our body back into a state of neutral homeostasis and balance.

Earthing is one of my favourites methods for calming anxiety and stress. It’s simple to do, completely free, and you’ll feel so much better once you’re done. Just go outside, take off your shoes, and sit, stand, or lie down bare foot on the grass, sand, or soil. Breathe deeply, and let the earth’s energy wash through you. This practice calms our stress hormones and naturally reenergizes us - without caffeine or sleep. While we may not always feel in control of our external circumstances, we do have the power to shift our internal state. And there are so many simple, free practices we can implement from home to help relieve anxiousness, manage stress, soothe our nervous system combat feelings of anxiety and overwhelm. Amongst those, Earthing is one of my most treasured of all.

SWEET POTATO BLENDER SOUP

The evenings are growing darker, the mornings becoming colder, and September is right around the corner. Soup season is here! Each year, I welcome the seasonal transition by incorporating more grounding dishes like starchy root vegetables, cooked foods, and autumnal spices. Warming, grounding foods help ease our body through this physical and energetic shift.

And what more fitting way to celebrate the beginning of fall than with a simple blender soup for one? With notes of sweet cinnamon, creamy coconut, roasted garlic, and spicy paprika, this soup checks all the boxes. Feel free to double or triple the recipe for leftovers, or if you’re cooking for two!

828A1D50-76B6-46B3-B373-CAD7996C300B-FDA58AE5-7571-4D18-9D66-66B8791780ED.jpg

RECIPE

I N G R E D I E N T S


• 1 medium sweet potato
• 1 carrot
• 2 cloves garlic
• 1/2 small yellow onion
• 1 tbsp coconut cream
• 1 cup vegetable or bone broth
• A dash of cinnamon, cumin, cayenne, + smoked paprika (I love @simplyorganicfoods spices!)
• Sea salt and black pepper to taste


M E T H O D

  1. Cube the sweet potato + carrot, and place on a baking plan along side onions + garlic. Drizzle with extra virgin olive oil, sea salt, + black pepper, and roast at 350 for 25-30 minutes until soft.

  2. Once done, place the roasted vegetables alongside broth, coconut cream, and spices in your blender. I used my Vitamix!

  3. Blend everything together, starting on low speed and gradually increasing until the soup is smooth and creamy. Transfer to a pot, heat, and serve.

My Coffee Journey + Why I Made the Switch

Today, I want to talk about coffee.

If you told me 5 years ago that I would no longer be a coffee drinker, I would have straight up laughed.
But here I am this morning, watching the sun rise and sipping a foamy cup of Dandy Blend - happy as can be.


2 years ago, I gave up coffee completely - and now, I want to share why I did, how I did it, and what I drink instead.

Dandy4.JPG

My journey with coffee

I started drinking coffee back when I was 16. At first, it was just an occasional treat purchased while out on a date with friends. But slowly, coffee made it’s way into my daily routine. It started with a cup on the weekends, and then one every morning, and then a second in the afternoon. Before I knew it, I was drinking a minimum of 2-3 cups per day just to keep awake.

I love the taste of coffee. The smell of a fresh brew first thing in the morning, it’s earthy, bitter taste, and that pleasurable feeling when you take the first sip - it’s a whole experience.

But what I thought would be a life-long relationship came to a sudden halt 3 years ago, when I started to experience a whole list of health complaints: bloating, cramps, loose stools, trouble sleeping, and feeling “anxious” all the time. After a visit with my naturopathic doctor, I was encouraged to do 3 things: remove a few food sensitivities, take a couple of supplements, and stop drinking caffeine.

How caffeine affects the gut

Caffeine (and in particular, the type of caffeine found in coffee) negatively affects our gut in two main ways: First, caffeine is a natural laxative.  This means it promotes bowel movements by increasing the rate at which food moves through our digestive system. If you’re already experiencing loose stools or having trouble absorbing nutrients, going to the bathroom more frequently means an increased chance of malabsorption.  And if you struggle with IBS, diarrhea, or constipation, coffee will likely make symptoms worse. Second, caffeine is inherently “acidic”.  Acidic foods can irritate our gut lining, increase digestive issues, and contribute to ‘leaky gut’.

Coffee, anxiety, and hormone imbalance

Have you ever finished a cup of coffee, and suddenly felt your heart begin to race?  Does caffeine make you feel jittery, shaky, anxious for no reason, “wired and tired”, and unable to sleep? That’s because coffee is a stimulant. It “stimulates” our mind and nervous system, switching us from a state 'of “rest and digest” to a state of “fight or flight”. Caffeine also stimulates our body to release the stress hormone cortisol. If we’re drinking coffee on a regular basis, we’re constantly stressing our body out. To much coffee encourages blood sugar to rise and crash, creating a vicious stress cycle and negatively impacting other hormones. When one hormone becomes out of balance, so do the rest!

My dependancy + addiction

Aside from worsening gut issues and over-stimulating my already active mind, there was one unhealthy affect that was more than just physical - it was emotional. When I really reflected on my relationship with coffee, I realized my addiction was more deep routed then simply loving the taste. For years, I used caffeine as a crutch.

Coffee gave me the false belief that I didn’t need sleep. I found myself in a routine of staying up late and waking up early - convinced that sleep wasn’t important or necessary. Instead of allowing myself deep rest, I relied on coffee for energy (when really, my adrenal glands desperately needed support!) I also used coffee in unhealthy ways, like drinking a cup when I was hungry to suppress my appetite.

A note - every body is unique and individual. What works for me may not work for you. Instead of labelling caffeine as “good” or “bad”, I encourage you to tune in and re-evaluate your personal relationship with coffee. Why do you drink it? How does it make you feel?

What I drink instead

When I finally decided to give up coffee, my one requirement was to have an alternative that was actually enjoyable and tasted somewhat similar. If I can’t have coffee, I at least want to feeeeeel like I’m having coffee, right?! Unfortunately, many coffee alternatives on the market don’t taste even remotely close, and often contain weird filler ingredients.

After lots of experimentation, I wanted to share this list of the best coffee alternatives I’ve found. Dandy Blend, by far, takes the cake. Out of every caffeine alternative I’ve tried, nothing compares to Dandy Blend. It’s the closest drink I’ve found to “real coffee”, and contains all those delicious, earthy, slightly bitter sweet notes. Letting go of coffee isn’t easy, but it’s a whole lot easier when you have a delicious replacement to sip on.

Dandy Blend is a powdered blend of roasted barley, rye, chicory root, dandelion root, and sugar beet extracts. But no, it doesn’t contain gluten. That’s because the extracts of these plants are used, and not the whole plant itself! Dandy Blend is smooth, rich, full-bodied, and actually tastes like coffee. But the best part is the ingredients list! As a holistic nutritionist, I deeply care about the ingredients in my food. Unlike your typical coffee alternative (which usually contains gluten + fillers), Dandy Blend incorporates medicinal plants that support our internal health and well-being.

Other herbal coffee alternatives:

Dandelions

Chicory

Rooibos

Cacao

Carob

Purchase Dandy Blend Here:

Creamy Dandelion “Coffee” Latte Recipe:

  • 2 tsp Dandy Blend

  • 1 tbsp coconut butter

  • A mug full of hot water

    Optional add-in’s

  • 1/2 tsp vanilla

  • Sprinkle of cinnamon

Combine all ingredients in a blender, and blend for about 1 minute until smooth and creamy. Alternatively, add ingredients to a pot and warm on the stovetop to let the coconut butter dissolve. Pour into your favourite mug, and sip slowly.

This post is in partnership with Dandy Blend, but all thoughts and opinions are my own. This post also contains affiliate links. By purchasing product through my link, I make a small commission without any additional cost to you. Thank you for supporting Wholistically Hannah and making this blog possible!

Elevated Vegetable Smoothie Bowl

A179E85B-AD29-4D50-B8A5-BACB5F5D5825.JPG

Green smoothies. I truly believe starting our day with a big bowl of blended green goodness is one of the BEST (and most simple) ways we can nourish ourselves and give our body a little extra love. Our first meal sets the tone for the rest of the day. While sugary cereals or pancakes can leave us feeling lethargic, green smoothies make me feel light, satiated, energized, and nourished. You can seriously fill them with whatever veggies you have on hand. It’s the easiest and most delicious way to pack in an abundance of plant nutrients and more greens then you could imagine, right when you wake up!

The downside of smoothies is that they can often leave us feeling bloated. This happens when we drink a smoothie without actually chewing it! That’s why I choose to eat smoothie bowls. Turning our favourite smoothie into a smoothie bowl by thickening it up encourages us to actually sit down, be mindful, and CHEW our smoothie inside of mindlessly sipping it back on the go. Chewing is an essential first step for initiating the digestive process, even for blended foods!

One of my favourite tricks to making smoothie bowls even more nourishing is elevating them with nutrient rich powders, mixes, and blends. That’s why I’m so excited to share this Elevated Vegetable Smoothie Bowl with you all in collaboration with Garden of Life, using their newest superfood product: Raw Organic Perfect Food Greens Powder.

Perfect Food Greens Powder is a powerful blend of fermented and sprouted whole-foods and 45 superfood ingredients like sea vegetables, juice grasses, and probiotics to support a healthy gut. Your guys, this supplement is POWERFUL. It’s more of a potent multi-vitamin then a powder, and the perfect addition to any smoothie.

1E381487-CACC-41A7-B39C-A3585EE7801C.JPG
 

Ingredients

  • 1 extra ripe banana

  • 1 cup frozen cauliflower, zucchini, broccoli, or cucumber (I like to do a blend of a couple, or them all!)

  • 1 scoop plant-based vanilla protein powder

  • 1 scoop Garden of Life Perfect Food Powder

  • 1 tbsp flax or chia seeds

  • 1 tbsp nut butter of choice (I like peanut, almond, or cashew)

  • 1 cup dairy-free plant milk

Method

Combine all ingredients in your blender, and blend on low speed for 1-2 minutes or until smooth. Pour into a bowl, top with your favourite goodies, and serve. I love to use fresh fruit, frozen berries, seeds, or low-sugar granola. Optionally, cover the smoothie bowl and chill in the fridge if you’re prepping breakfast for the next day.

Seed Cycling Bliss Balls

2A13DA46-6EB2-496F-AEAE-500534A58C8C.JPG

I first heard about Seed Cycling a few years ago, when I decided to stop taking hormonal birth control pills and my period completely disappeared. I was intrigued by the idea of balancing my hormones (and hopefully bringing back my cycle!) using the nutrients in seeds, so I decided to give it a try. After a month of diligently taking my seeds every day, my period finally came back all on it’s own. I also noticed other incredible changes, like reduced PMS symptoms, clearer skin, and a more-regular cycle over the coming months. That’s when I truly fell in love with the process and became a firm believer in the power of seeds!

If you’re new to Seed Cycling, it’s essentially the practice of rotating specific seeds throughout the month, depending where you are in your cycle. The most important aspect of Seed Cycling is to make sure to consume your seeds ground. When we eat whole seeds, they often do not digest properly. But by grinding the seeds, we ensure our body can absorb the full nutrient spectrum.

There are plenty of ways to eat ground seeds (in smoothies, oats, or sprinted on top of yogurt bowls), but grinding our seeds every day can be a tedious task. I wanted an easy way to prepare my seeds so they were ready to go anytime of day.

Cue - Seed Cycling Bliss Balls!

These little balls are so simple to make. I prepare a batch every Sunday, so they’re ready for the week ahead. Just store them in the fridge or freezer for a quick snack or deeeelicous smoothie bowl topping. To make, all you need is whatever two seeds you’re currently taking depending on where you are in your cycle (either sunflower and sesame, or pumpkin and flax), some dates, and a food processor or high-speed blender.

CE03F5C6-2072-40E6-A4A9-7BEBED491F69.JPG

Ingredients

  • 7 tbsp sunflower OR pumpkin seeds

  • 7 tbsp sesame OR flax seeds

  • 14 dates

  • 4 tbsp coconut flour

  • 1 tbsp coconut butter

  • 1 tbsp nut milk or water

Method

Combine all ingredients in your food processor or blender. Process on low speed until a smooth, ‘dough-like’ batter forms. Roll into balls (this recipe is designed to make 7 / a week’s worth of balls) and place in the fridge to set. Eating one bliss ball per day will give you the recommended amount of seeds for seed cycling.

If you’d like to learn more about how to Seed Cycling, I have a blog post all about how to do it here.

Eating For Calm in Stressful Times

Food is powerful.

The way we choose to eat has a profound impact on our mental well-being during times of stress. Certain foods can trigger unpleasant emotions, promote mood swings, heighten anxiety, and increase levels of stress. But when we choose grounding foods that nourish our body and brain, the opposite affect takes place. Specific nutrients and eating practices help calm our nervous system, encourage balanced hormones, and keep anxiousness at bay.

IMG_6037.jpg

3 ways to support our body with food during stressful times:

Balance blood sugar levels

Balancing insulin levels is essential to prevent a crash in our blood sugar and mood. When we skip meals, overindulge in processed sugars, or eat carb-rich foods that lack healthy fats and proteins, our blood sugar spikes and then dips. This reaction is stressful for the body, and automatically triggers our brain to feel anxious

  • Add nourishing fats + proteins to each meal

  • Have breakfast shortly after waking

  • Eat every 3 hours

  • Add 1 tsp cinnamon to support insulin balance


Eliminate anxiety-promoting stimulants

Stimulants like caffeine and refined sugars stimulate our brain to enter a ‘hyperactive state’. This might look ike racing thoughts, increased heart rate, shakiness, and feeling “wired” and “panicky”.

  • Certain forms of caffeine - coffee, pop, black tea

  • Processed + added sugars - white and brown sugar, candy, processed sweets

  • Refined carbohydrates that lack fibre - white flour, white bread, pastries, fried foods, packaged “junk foods”

  • Alcohol


Incorporate soothing nutrients that help our brain feel calm

Certain nutrients have a calming affect on our brain, and work to naturally relieve tension and promote feelings of “well-being”. My favourite nutrients to focus on incorporating that help calm our mind and encourage relaxation: magnesium, b-vitamins, l-theanine, and adaptogenic herbs.

  • Magnesium rich foods - dark chocolate, almonds, seeds, cooked leafy greens

  • B-vitamin rich foods - grass fed meat, wild fish, sea veggies, sunflower seeds, nutritional yeast

  • L-Theanine rich foods - matcha + green tea

  • Herbs + Adaptogens - tulsi, skullcap, passionflower, ashwagandha, maca, and medicinal mushrooms like reishi

Sprouted Oatmeal Banana Breakfast Cookies

IMG_4742.JPG

These days, I like to keep an abundance of ripe bananas on hand at all times. They’ve truly become my favourite fruit! You can freeze them to use in creamy smoothies or plant-based “ice-cream” making, toss them onto oatmeal and yogurt bowls, bake them into nourishing treats, and, my personal favourite: use them as a natural whole-foods sweetener.

I love baking with banana. Not only does it naturally sweetener baked goods, but it’s creamy consistency acts as a wonderful egg replacement for plant-based baking. Best of all, bananas are extremely affordable and incredibly easy to come by!

These Sprouted Oatmeal Banana Breakfast Cookies were inspired by the extra ripe bananas sitting on my kitchen counter, a lonely bag of my favourite sprouted oats just waiting to be used, and a desire to start the day with something sweet. And what better way to start the day than delightful and nourishing cookies that are totally suitable for breakfast?

Count me in!

These babies are gluten-free, vegan, and made with simple real ingredients like ripe banana, nut butter, and @onedegreeorganics rolled oats. I love these oats because they’re sprouted, making them so much easier to digest.

When baking, I like to use coconut sugar because it’s lower on the glycemic index and more nutritionally dense compared to other sweeteners. This means the sugar is absorbed more slowly into our bodies, resulting in less of an impact on blood sugar levels.

Ingredients


2 extra ripe bananas, mashed
1.5 cups @onedegreeorganics gf rolled oats
3/4 cup peanut butter (or other nut butter of choice!)
1/3 cup @wholesomesweet coconut sugar
1/4 cup pumpkin or sunflower seeds
1 tsp @simplyorganicfoods vanilla
1 tsp cinnamon
Pinch of sea salt

Method


Preheat your oven to 350 degrees. In a bowl, mash together the ripe bananas until smooth. Stir in the remaining ingredients, then spoon the batter into cookie shaped circles across a parchment paper-lined baking sheet. Bake at 350 for about 10-12 minutes, or until the cookies have set and the bottoms aregolden brown.


Happy cookie making!

Nourishing Almond Butter Cup Balls

I’m easing into the first few days of March by setting my monthly intentions, “Spring Cleaning” the house, and getting ready for my big move out of the city and into our very first ever HOME! After 4.5 years in my little Downtown Vancouver apartment, I couldn’t be more ready to move back into the peace and quiet of nature. Hello slow and silent mornings, forrest bathing, and daily ocean swims! I ’m so excited to take you all along on this new journey and chapter of our lives.

Aside from the move (which I can’t wait to share more about soon!), this past week I finished my program at the Canadian School of Natural Nutrition. In three short weeks, I’ll be a Registered Holistic Nutritionist! This month is all about big changes, moving towards fear, and letting go of the old to make room for the new.

69ACB8D9-5927-4337-BEB9-8EF4D69AB880.JPG

Amidst the excitement and nerves, I’m learning to find calm in the chaos. When life gets hectic and big changes are taking place, I naturally gravitate towards simplifying the areas of my life where I can. This means clearing my schedule of unnecessary tasks, incorporating little relaxation breaks throughout the day, and nourishing my body with simple, easy to make recipes.

When New World Foods gifted me a few of my favourite nut butters (hello almond and cashew!), I immediately knew that I wanted to create a quick, easy, and delicious snack to fuel me during these busy days. Preferably made with minimal ingredients and no baking required. And so, these Nourishing Almond Butter Cup Balls were born. The star of the show is New World Food’s Organic Dark Chocolate Almond Butter, along with a couple of pantry staples like almond flour, dates, and cocoa powder. If you can’t get your hands on this delicious chocolate butter, any almond butter can easily take it’s place!

938F1299-1FE6-46CC-B0A1-6CBF2A127AA8.JPG

Recipe

Ingredients

*I recommend soaked your dates to make them easier to blend. Simply place them in a bowl and cover with boiling water. Let soak for 5-10 minutes until soft, strain, and use!

Method

These balls are SO simple to make. Place all ingredients in a food processor (or high speed blender like a Vitamix!). Pulse a few times to get things moving, then blend on medium speed until a sticky dough forms. When the mixture is smooth, roll into little balls (the recipe will make 8-12, depending how big you want them) and place on a plate. Optionally, you can roll them in fun toppings like shredded coconut, hemp hearts, and bee pollen. Pop the balls in the fridge for a minimum of 1 hour to let them set. Store refrigerated, and serve cold.

Soaked Buckwheat Granola

IMG_1802 2.JPG

Buckwheat! This little gem isn’t a grain, but it sure resembles one. Buckwheat is actually a grain-like seed, making it suitable for grain-free and paleo dishes. It’s gluten-free, high in protein, and packed with nutrients like magnesium, b-vitamins, and digestive-loving fibre. Buckwheat groats are so versatile, too. You can grind them into flour for making breads, pancakes, and wholesome versions of your favourite baked treats, or cook them into hearty porridges and rice-like dishes. Talk about a powerhouse!

One way I personally love using buckwheat is in homemade granola. Did you know that it’s SO easy to make your own? And not only does homemade granola take a matter of minutes, it’s also way better for you and your body. Say goodbye to the sugar-ladened verities at the grocery store that contain sneaky additives and an ingredient list that’s a mile long. With only a handful of simple, real foods (that are probably already have stashed away in your pantry!) this buckwheat granola is free from gluten, grains, refined sugars, and full of nutrients and plant protein to help you feel satiated and nourished.

Soaking Your Buckwheat

When preparing buckwheat, I always recommend to soak the groats first. Like other grains and seeds, buckwheat contains ‘anti-nutrients’ such as phytic acid that interfere with our body’s ability to absorb minerals from our food. Soaking also soften’s the hard-to-digest fibres and starches that often irritate our gut lining. No more tummy pains or uncomfortable bloat!

The evening before making my granola, I place the buckwheat groats in a bowl and cover them with clean, filtered water. Then, add 1 tbsp of apple cider vinegar or lemon juice (the acid helps to break down the seed’s phytic acid!) and let them sit on the countertop overnight. In the morning, the buckwheat will have absorbed some of the water and a sticky, goopy gel likely has formed. Don’t worry, this is totally normal! Just place them in a sieve and rinse until clean.

Recipe

  • 1 cup buckwheat groats (soaked overnight, then rinsed)

  • 1/2 cup unsweetened shredded coconut

  • 1/2 cup raw chopped nuts, soaked overnight* (I used cashews)

  • 1/4 cup seeds (I used hemp hearts)

  • 1/4 cup dried fruit (I recommend blueberries or goggi berries!)

  • 2 tbsp organic honey or maple syrup

  • 1 tsp cinnamon

  • 1 tsp pure vanilla extract

  • Pinch of sea salt

*If you’d like to take your needs to the next level and fully unlock their entire nutrient spectrum, you can soak them, too! Just follow the same method I outlined to soak the buckwheat groats.

Method

Soak your buckwheat overnight, and rinse until clean. Preheat the oven to 350 degrees. Spread the groats across a baking tray, and allow them to air dry OR pat down with a paper towl to absorb the excess liquid. Then, combine the buckwheat groats along with the other ingredients in a bowl, and stir until the mixture fully sticks together. Spread the granola across a baking sheet lined with parchment paper, and bake for 20-25 minutes, staring the granola about halfway through the ensure it cooks evenly. The granola is done when it’s toasted and crunchy!  Store in a lined jar on the countertop to keep fresh. I love sprinkling the granola on my coconut yogurt and smoothie bowls, or eating it straight up with some good old nut milk and a spoon.

Creamy Coconut Chia Pudding (2-Ingredients)

BE9BA5FA-B05B-436F-AF15-AEF8F7469FA0.JPG


Oh, chia. How I love you.

Weekday mornings can be a little hectic. Can we all agree? I like to set myself up for the week ahead with a technique called meal preparation - and Sunday’s are my day! Essentially, meal prep looks like batch-making easily storable meals for the coming days ahead. Chia seeds are a true gift from nature for prepping easy make-ahead breakfast recipes. You can mix them with oats, toss them into smoothies, or even use them as an egg replacer for pancakes and french toast. But my personal favourite way to use chia? In chia seed pudding, of course!

I love chia seed pudding because you truly only need 2-ingredients and just a couple of minutes to make it. It’s super filling, incredibly nourishing, easy customizable, and lasts for days in the fridge. Chia seeds are also quite nutrient dense, offering a generous source of protein, omega-3’s, and gut-supportive fibre. My secret to creating thick and creamy chia seed pudding is using Silk’s Unsweetened Coconut Beverage for the base. It’s a delicious plant-based milk replacement, and tastes even creamier than dairy-filled alternatives.

A133DF77-62AE-49CA-BA54-ED572424165C.JPG

Creamy Coconut Chia Pudding

Time: 5 Minutes
Servings: 1


Ingredients

Optional add-ins

  • 1-2 tbsp maple syrup or honey to sweeten

  • 1 tsp pure vanilla extract

  • Berries, sliced banana, chopped fruit

  • Nuts, seeds, + shredded coconut

  • Plant-based protein powder

Method

  • In a mason jar, bowl, or glass container, combine chia seeds and coconut milk. Whisk together until the mixture is fully incorporated.

  • Cover and place in the fridge. Let sit for a minimum of 2 hours (or overnight) to allow the mixure to thicken.

  • Add any optional add-ins you desire, and serve cold.

This post was Sponsored by Silk Canada, but all thoughts and opinions are my own.