All About Tongue Scraping

Tongue scraping is the ancient Ayurvedic practice of cleansing your tongue. It’s said to improve digestive and oral health, support the immune system, and clear toxic bacteria and residue.


I’ve been tongue scraping for over two years. And now, it’s become an essential part of my morning routine. Tongue scraping is a simple, fast, and natural way to freshen breathe, strengthen immunity, and improve digestion and gut health.

IMG_1603.jpg

What is tongue scraping?

Tongue scraping is the ancient Ayurvedic practice of cleaning your tongue by scraping away old bacteria and toxins using a curved, metal scraper. Our tongue naturally accumulates toxic debris throughout the day and while we sleep, so it’s important to cleanse the mouth regularly to dispose of any buildup.

The Benefits

Research shows regular tongue scraping improves oral health and prevents tooth decay. The white coating that builds up on our tongue consists of thousands of toxic bacterial strains. These organisms weaken our immune system and contribute to a variety of dental problems. And according to Ayurveda, tongue scraping can even improve digestive health by clearing microbes that interfere with our healthy gut flora. Additionally, tongue scraping an easy, natural, and effective way to freshen our breathe naturally!

How to tongue scrape

Step 1 - Purchase a tongue scraper. You can find them at most drugstores or health food shops for as little as $10. If you don’t have access to a proper scraper, use the back of a large metal spoon!

Step 2 - Go in front of a mirror, and stick out your tongue.

Step 3 - Place the tongue scraper (or spoon) as far back on your tongue as you can. Then, gently glide the scraper towards the front. You’ll see the white coating on your tongue begin to scrape off.

Step 4 - Rinse off the collected bacteria into the sink, and repeat the process 2-5 times until the tongue is clean.

Step 5 - Repeat every morning, preferably first thing before drinking or eating.

My experience

I personally notice my mouth tastes so. much. better. after tongue scraping. Now that I’m in the habit, I can’t start my day without doing it. You’ll quickly realize just how much bacteria builds up on your tongue overnight, or in accordance to eating certain foods. I also feel like my immune system is stronger (and I get sick less often!) since beginning to tongue scrape religiously. Maybe a coincidence, maybe not!


Have you tried tongue scraping? What are your thoughts? Would you consider adding it to your wellness routine?
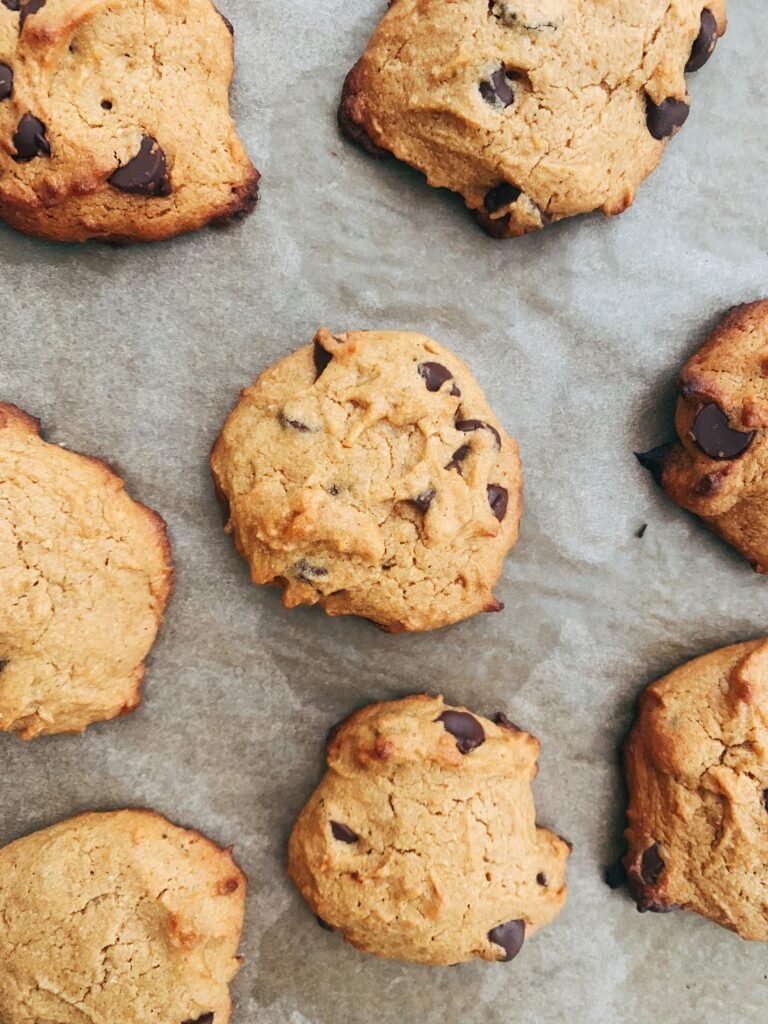
Pumpkin Chickpea Cookies

They’re high in protein. No grains, gluten, eggs, or dairy. And, the recipe is completely refined-sugar free.
This is my kind of cookie.

Pumpkin Cookies 2.jpg

Recipe

  • 1 cup chickpea flour

  • 1 tsp cinnamon

  • 1/4 tsp nutmeg

  • 1/8 tsp salt

  • 1/4 tsp baking powder

  • 1/8 tsp baking soda

  • 1/4 cup coconut oil, melted

  • 1/3 cup honey or maple syrup

  • 1/4 pure pumpkin puree

  • 1/2 tsp vanilla

  • 1/3 cup dark or semi-sweet chocolate chips

Method

Preheat oven to 350 degrees. Line a cookie sheet with parchment paper. Combine dry ingredients and whisk together. Add the coconut oil, honey, pumpkin puree, vanilla, and stir to incorporate until a smooth sticky batter forms. Fond in the chocolate chips. Drop batter onto cookie sheet into golf-ball sized bounds. Bake for 8-12 minutes, until the bottoms are golden brown.

One-Pot Coconut Milk Curry

09063382-754E-4B57-AF62-0206F900433F.jpg


Growing up, dad made curry every week. It was a dinner tradition in our home. Family dinner has a very special place in my heart. Dad always cooked, mom would do dishes, and we all sat around the table and talked about our days. A tip for digesting your meals better? Share good food with the people you love.

When I moved out, I remember so clearly being nervous about cooking my own meals for the first time. This easy one-pot curry recipe was passed on to me, and it made cooking seem less intimidating. I felt safe in the kitchen, and like I could nourish myself without needing to be a chef or know all the fancy tips and techniques.

This recipe is adapted from my dad’s famous curry, but I made a couple tweaks to make it a little more gut-friendly. I swapped brown potato for white sweet potato (you can find them at Whole Foods) and soaked the chickpeas overnight for easier digestion. If you’re in a hurry, Eden canned chickpeas are pre-soaked and completely gut friendly!

4004D59F-736F-4572-A9AF-DE2B8A794F42.JPG

One-Pot Coconut Milk Curry

  • 1 tsp extra virgin olive oil

  • 1 large onion, finely chopped

  • 4-5 white or sweet potatoes, cubed

  • 2 cups cauliflower florets

  • 1 can full-fat coconut milk (look for guar-gum free)

  • 2 heaping tablespoons curry powder

  • 2 cups soaked then cooked chickpeas*

  • Salt + pepper to taste

* To soak your dried chickpeas, place in a bowl and cover with water and 1 tbsp apple cider vinegar. The vinegar helps to remove the lectins and make the beans easier to digest. Soak overnight, drain, rinse, and cook covered in fresh water until soft.

Method

In a large pot, sauté onions in olive oil over medium heat until soft. Add cubed potato, cauliflower, coconut milk, and curry powder, and bring to a boil. Turn to medium-low, stir, and let simmer until the potatoes and cauliflower are soft. Stir in the chickpeas, and season with salt + pepper to taste. Serve with quinoa, buckwheat, or rice.

The FUDGIEST Healthy Brownies

The fudgiest, healthiest brownies ever.

Gooey, fudgey, healthy chocolate brownies. Need I say more?These brownies check all the boxes: they're paleo, vegan, gluten-free, grain-free, dairy-free, egg-free, refined sugar free, AND high in protein to support balanced blood sugar and keep you full and satisfied for hours. They're also easy to make, UBER fudgey, extra gooey, and rich in chocolate-ey goodness. My dream brownie.

Brownies.jpg

RECIPE

  • 1.5 cups hemp seed protein

  • 1.5 cups unsweetened cocoa powder

  • 1/2 tsp baking powder

  • 1/2 tsp sea salt

  • 4 flax eggs*

  • 1 cup maple syrup

  • 4 tbsp coconut oil, melted

  • 2 tsp vanilla extract

  • Optional - 1/2 cup finely chopped walnuts or dark chocolate chips.

*To make your flax eggs, simply combine 3 tbsp ground flax seeds with 7.5 tbsp water. Mix together, and let sit on the counter for 5-minutes to thicken.

METHOD

  1. Preheat oven to 300 degrees. Line a small-medium baking dish with parchment paper. The size of your dish will determine the thickness of the brownies.

  2. In a bowl, whisk together hemp seed protein, cocoa powder, baking powder and sea salt. Add the flax eggs, maple syrup, melted coconut oil, and vanilla extract, and mix until a smooth, thick batter forms. Fold in additional nuts or chocolate chips if desired.

  3. Scoop the batter into your baking dish, and spread smooth evenly across using a spatula.

  4. Bake at 300 for 25-30 minutes. The shorter you bake the brownies, the fudgier they will be.

Healthy Pantry Staples

Welcome to my pantry!

I like to take a balanced approach with food.

That means no labels, and nothing strictly off limits. My version of balance looks like finding healthier options for all the classic pantry staples. Truly enjoying what we eat and having fun with food is most important. And I believe we CAN create healthier versions of all our favourite recipes. It just comes down to choosing more wholesome alternatives, and releasing fear around trying new things.

What's "healthy", and what's not?

Everyone has a different definition of healthy. I personally like to think that healthy = whole. This means choosing foods in their most real, close-to-the-earth state as possible. For example, a potato vs potato chips. Steel cut oats vs packaged granola. Dates vs granulated sugar. Do you get the idea?A note on product quality - I try to buy organic whenever possible. This is especially important for pantry items like grains, nuts, and seeds, as these crops are heavily sprayed with toxic chemicals when conventionally grown. Just do the best you can, and let go of the need to follow this perfectly. Even choosing organic for one or two products every week makes a huge difference over time.

The List:

Flours

  • Almond - My personal favourite substitute for wheat flour.

  • Coconut - A little trickier to bake with, but a staple for paleo or grain-free recipes.

  • Buckwheat - I love using buckwheat for pancakes or homemade bread.

  • Oat - Just grind up rolled oats to make your own!

  • Chickpea

  • Cassava

Oils

  • Coconut oil - look for cold-pressed, organic, and virgin. My favourite for baking!

  • Olive oil - Best for salad dressings and medium-low heat cooking. Stick to extra-virgin.

  • Avocado oil - Best for frying and high-heat baking (this oil doesn't oxidize at high temperatures!)

  • Ghee - Another delicious option for frying or spreading on toast. It's also incredibly healing to our gut.

  • MCT oil - MCT gives us a quick burst of energy and noticeably improves brain clarity. Ideal for blending into your morning smoothie or latte.

Sweeteners

  • Honey - My favourite natural sweetener. Honey contains medicinal properties and antioxidants. It's also extra-sweet, so you can use less when subbing for sugar. A little goes along way!

  • Maple Syrup - Perfect for sweetening baked goods or drizzling over paleo pancakes, gf french toast, coconut yogurt, or oatmeal bowls.

  • Dates - I love using dates to naturally sweeten things like smoothies, bliss balls, or raw desserts.

  • Stevia - I have a love-hate relationship with stevia. While stevia is a plant and natural zero-sugar alternative, it's still considered an 'artificial sweetener'. I think it's best used in moderation, and comes down to the type of stevia you buy. Some varieties are MUCH more processed then others. Look for a liquid stevia over powdered (this means it's been less processed), and make sure it's 100% organic stevia leaf in it's purest form.

  • Monk fruit - another plant sourced, zero-sugar alternative. It's more sweet than sugar, so a little goes along way.

Grains

  • Rolled oats - I buy certified gluten-free. Stick to rolled or steel cut, and avoid instant oats as they're more processed.

  • Buckwheat groats - Perfect for making homemade flours or grain-free porridge!

  • Quinoa

  • Brown or wild rice

Nuts & Seeds

I always look for raw over roasted and organic whenever possible. Make sure there's only one ingredient, and avoid products with added salt or oils.

  • Nuts: Almonds, walnuts, cashews, hazelnuts, pecans

  • Seeds: Chia, hemp, pumpkin, sunflower, sesame

Protein Powders

I like to stick to protein powders with minimal ingredients. Think: plant-based seed or legume sourced proteins!

  • Hemp protein

  • Pea protein

  • Pumpkin seed protein

Speciality Items

  • Nut butters - Cashew, peanut, almond, and tahini are my favourites

  • Shredded coconut or coconut flakes - Make sure they're unsweetened!

  • Cacao powder - The raw, unprocessed version of cocoa powder.

  • Collagen peptides - Incredibly healing for our gut.

Packaged Snacks

Before I buy any sort of packaged products, I like to ask myself:

Do I know what all these ingredients are?

Could I make this at home?

Is this REAL food?

  • Larabars - Super minimal, whole-foods ingredients. Typically just dates and nuts!

  • Low-sugar granola - I love Rawcology's grain-free, low-sugar, sprouted granola

  • Organic popcorn - I LOVE LesserEvil's coconut-oil and ghee popcorn

Healthy Shopping on a Budget

Buying organic and high-quality products can be pricey. Thankfully, more and more well-known stores are beginning to lower prices and make healthier options more accessible to everyone.

  • Your local farmer's market - The best place to buy fresh fruits and in-season vegetables.

  • Costco - Costco is FULL of healthy / organic products, and the selection is constantly growing. It's the best place to bulk items like nuts, seeds, nut butter, cooking oils, organic frozen fruit, fermented vegetables, kombucha, and organic meat. They even sell larabars in bulk!

  • Amazon - The most selection of affordable organic nuts, seeds, flours, and grains I've found so far.

  • Whole foods - My favourite spot for finding fun, speciality items like interesting nut butter and healthy chocolate.

  • Superstore - Surprisingly, Superstore is gaining an incredible selection of (extremely affordable!) natural groceries. This is an excellent place to if you want to experiment with healthier options, but follow a tight budget. They have everything from organic product and nut milk, to vegan protein powder and coconut chips.

 Where do you like to shop? And what are your go-to healthier pantry staples? Please share your tips, tricks, and favourite products below!

Breakfast Apple Crisp

The end of August means apple season.

And every year, I'm gifted more apples then I know what to do with. The perks of having gardener parents! It's a tradition in my household to make a good-for-you apple crisp that I can indulge in for breakfast, snack, or dessert. This means a crisp that is typically lower in sugar, free from common allergens, and made with gut-healthy alternatives like raw honey and organic ghee.

This breakfast apple crisp is the ultimate autumn breakfast or brunch. The recipe is refined sugar free, and filled with alll the good stuff. Gluten free oats, homemade oat flour, juicy apples, raw walnuts, and pure organic honey. With notes of vanilla, nutmeg, and sweet cinnamon.

Fall, I'm ready for you!

Breakfast Apple Crisp.jpg

The Recipe

Filling

6 cups apples, cored and diced

1/8 cup honey (or maple syrup for vegan)

1/4 cup water

2 tsp arrow root starch

1 tsp vanilla

2 tsp cinnamon

1/4 tsp nutmeg

Topping

1 cup GF rolled oats (I like Bob's Red Mill)

1 cup homemade oat flour*

1 tsp cinnamon

1/2 tsp sea salt

1/4 cup honey (or maple syrup if vegan)

3 tbsp ghee, melted (can sub organic butter or coconut oil)

1/2 cup raw walnuts, roughly chopped

*To make the oat flour, simply grind your oats in a coffee grinder until a fine flour forms!


Method

  1. In a bowl, combine chopped apples, honey, water, arrowroot starch, vanilla, cinnamon, and nutmeg. Mix until thuroughly combined, then transfer to a crisp dish.

  2. In a separate bowl, stir together rolled oats, oat flour, cinnamon, and sea salt. Add in honey and melted ghee, and mix together until a crumbly topping forms. Add in your walnuts, then sprinkle topping evenly over the apples.

  3. Bake at 350 for 20-25 minutes until apples are soft and fully cooked. Serve warm with coconut cream, coconut yogurt, or dairy-free ice-cream.

Low-Sugar Blackberry Jam

Blackberry season is in full-swing.
Which means, it’s jam time!

This recipe uses chia seeds to thicken, and a little honey or maple syrup as the perfect natural sweetener. It's an easy, DIY way to preserve your favourite summer berries. Try the recipe with raspberries, blueberries, or wild berries too! I love using this jam to top oatmeal bowls, pancakes, or spreading alongside ghee on thick slices of toasted gluten-free bread.

Recipe

3 cups fresh or frozen blackberries

2 tablespoons chia seeds

2 tablespoons honey or pure maple syrup

1/2 tsp vanilla extract

Optional - scoop of grass-fed gelatine for additional gut support


Method

In a small pot, bring blackberries to a boil.

Turn to low, then simmer for 3-5 minutes until the berries have broken down. Next, add your honey or maple syrup and stir to combine.

Remove from heat and mix in the chia seeds to thicken. Optionally, add a scoop of grass-fed gelatine. Let the jam cool, then transfer to a glass mason jar. Store covered in the fridge.

Zucchini Oats

Zuchinni is incredibly versatile.

During the summer months when zucchini is most abundant, I try incorporating the plant into as many dishes as possible. One of my favourite, go-to recipes is zucchini oats. It’s the perfect vegetable-filled breakfast recipe to sneak extra greens into your diet.

Summer is also the season of farmer's market. Throughout the warmer months, I spend every Saturday morning at my local neighbourhood market; sampling homemade treats, chatting with the farmers, and carefully selecting bagfuls of fresh produce to use for the weak ahead. From June to August, zucchini is one of my main buys. Summer is peak zuchhini season, meaning they're extra flavourful and nutritious during this time of year. And, you can often score a gigantic organic zucchini for as little as $2 that will last you the entire week.

Recipe:

1 cup gf rolled oats

2 cups filtered water

2-4 cups grated zuchinni (depending on how 'zuchinni' you like it)

1 tsp vanilla*Optional

2 scoops vanilla protein powder of choice (I like Vega or Leanfit brand)

2-4 tablespoons honey or maple syrup to sweeten

Cinnamon to garnish

Method:

  1. Combine oats and water in a small pot, and bring to a boil.

  2. Reduce heat to medium and cook, gently stirring until the oats are soft.

  3. Mix in zucchini. Turn to low and continue to cook until the zuchinni is soft.

  4. Remove oats from heat and stir in protein powder of choice or honey/ maple syrup to sweeten.

  5. Garnish with cinnamon, seeds, nut butter, or fresh fruit.

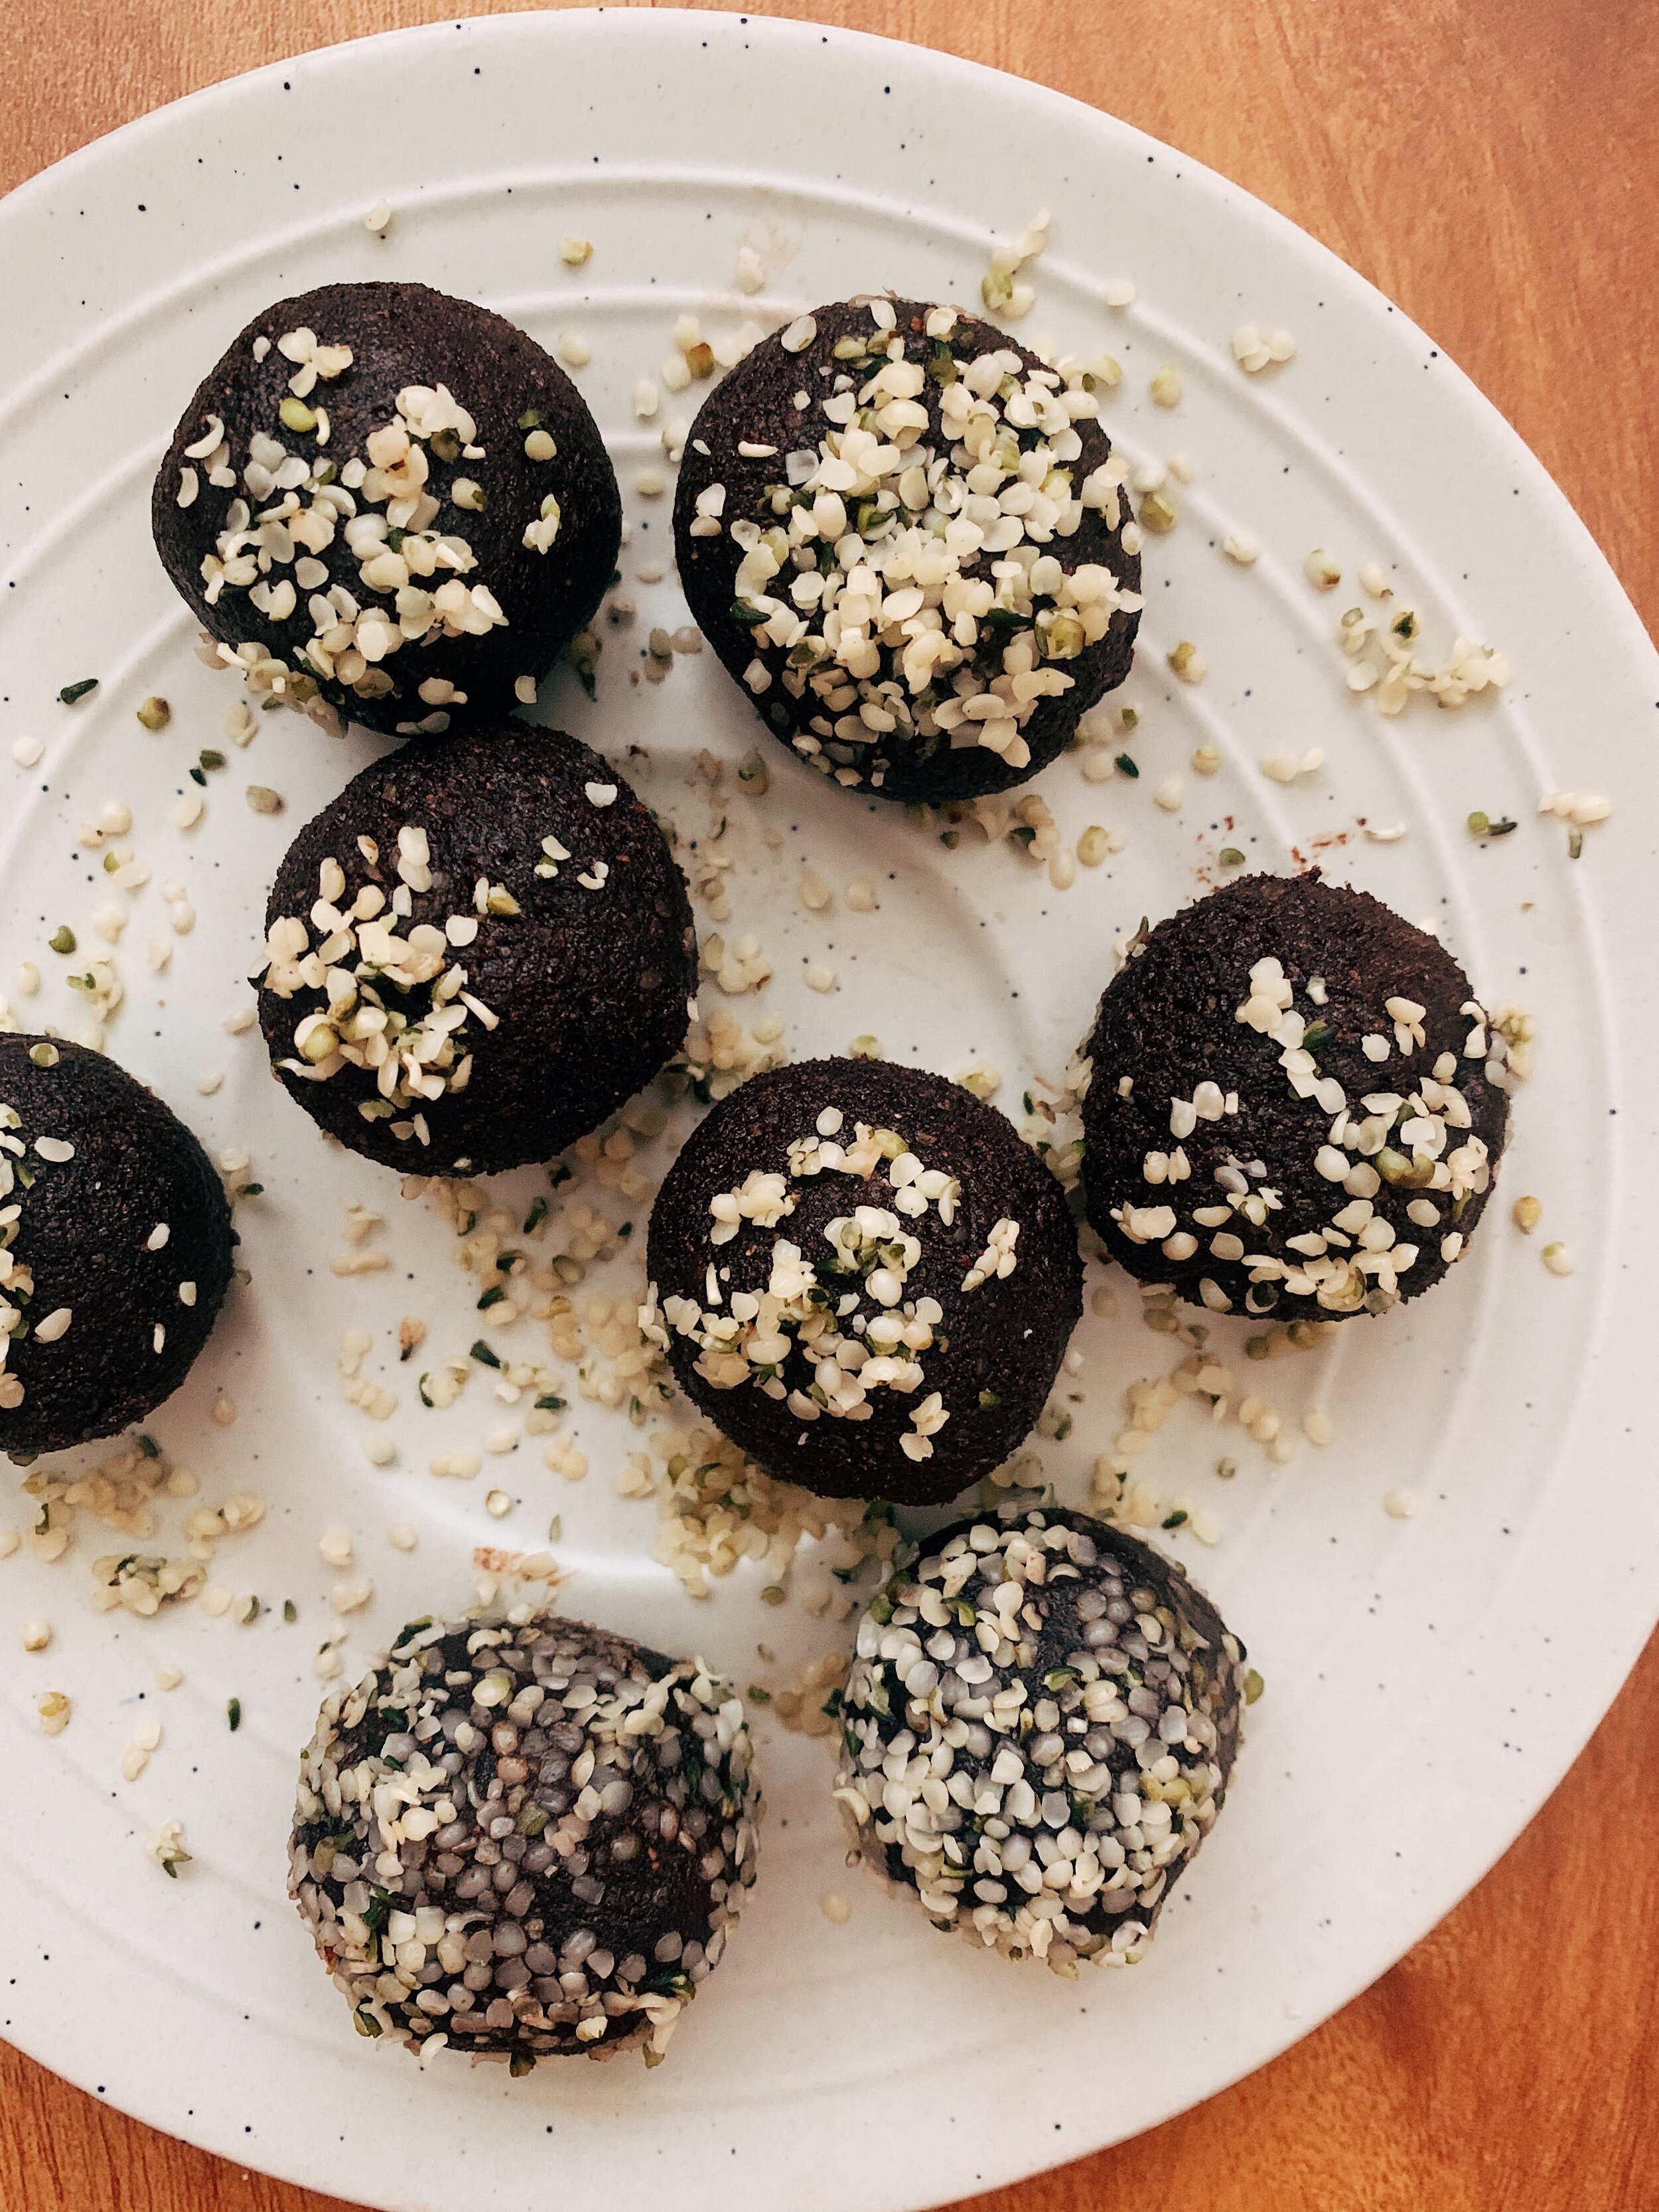
Raw Hempseed Brownie Bites

Some days, my chocolate cravings are real. And a square or two of dark chocolate just won't sufice.

Cue:  raw hempseed brownie bites. To satifisy all your chocolatey needs in a way that both nourishes body and soul.

I love chocolate, and I love sweet things. But I also love feeling good in my body, and honouring it the best way I can. These Raw Hempseed Browie Bites are a perfect combination of the two - they taste delicious, and make a wonderful afternoon snack or post-dinner treat. But they're also gluten, grain, dairy, and refined sugar free, and made from real, whole food ingredients that make you feel good from within.

And during the Summer months, I just can’t be bothered to turn on the oven often. My little apartment doesn't handle the heat.  This is where raw desserts come in - they’re easy to make, and no baking required. These fudgey date and hempseed brownie bites are going to be your new go-to Summer treat.

E59335F0-5C0C-47DC-82B7-6C178A98D28A.jpeg


Raw Hempseed Brownie Bites:

Time:  10M

Yields:  12-15 balls

INGREDIENTS:

  • 1 cup dates

  • 1 cup hemp seeds

  • 1/2 cup cocoa powder

  • 1/4 coconut flour

  • 1/4 cup coconut milk

  • 1 teaspoon vanilla

  • 1/4 teaspoon salt

DIRECTIONS:

  1. Combine all ingredients in a food processor. Blend on medium speed until a thick, sticky dough has formed.

  2. Dampen your hands, then roll the batter into little balls.

  3. Role in additional hemp hearts if desired, then place in the freezer to chill for at least 2 hours. Serve cold.

  4. Happy rollin’!

3 Ingredient Buckwheat Pancakes (GF + V)

Hello Buckwheat!

My favourite gluten-free flour.

These 3 ingredient buckwheat pancakes are wholesome and delicious. They're gluten-free, grain-free, (buckwheat is actually a seed!) and free from other common allergens like dairy, soy, and eggs. The recipe is easy to make, and consists of only simple, whole-foods ingredients: pure buckwheat flour, plant-based 'buttermilk', and baking powder. I love making these pancakes on a lazy weekend morning, and cozying up to enjoy them with a matcha latte or cup of dandelion tea.

What is buckwheat flour?

Buckwheat is a gluten-free seed, and despite it's name, has nothing to do with wheat. The grain-like seed has been used in Southeast Asia for thousands of years as a nutrient-rich alternative to other grains. Buckwheat is high in fibre and protein, and when ground, closely resembles wheat flour. The seed is also low in phytic acid, making it gentler on digestion and easier to absorb than other common grains.

Making dairy-free buttermilk

Buttermilk is the secret to light and fluffy panckaes. The dairy-free 'buttermilk' in this recipe helps the pancakes rise and hold together, without the need to add eggs or other binders. To make your own plant-based buttermilk, simply combine 1 cup nut milk of choice and 1 tsp acid (I like lemon juice or apple cidar vinegar!) Allow the mixture to sit for 10 minutes or so to thicken and curdle.

3 Ingredient Buckwheat Pancakes (GF + V)

Time:  10M

Yields:  2 servings

INGREDIENTS:

  • 1 cup buckwheat flour*

  • 1 cup cashew milk (or other nut milk of choice)

  • 1 tsp lemon juice

  • 1 tsp baking powder

  • 1 tsp vanilla

  • Small pinch sea salt

  • Dash of stevia or 1-2 tbsp maple syrup to sweeten

*Feel free to make your own buckwheat flour by grinding whole buckwheat groats or flakes in a coffee grinder until smooth.

DIRECTIONS:

  1. Combine your nut milk and lemon juice in a small bowl. Stir together, then place on the counter and let sit for 10 minutes. This will allow the mixture to curdle and become 'buttermilk'.

  2. In a frying pan, melt 1 tsp coconut oil over medium heat. In a separate bowl, whisk together the buckwheat flour, baking powder, and sea salt. Add the buttermilk, vanilla, and sweetner of choice, and stir together until smooth.

  3. Spoon the mixture onto the pan to form your pancakes. Let each pancake cook for 2-3 minutes per side, flipping when the surface fills with bubbles.

  4. Top with coconut yogurt, fresh fruit, berry compote, or pure maple syrup.

No-Strain Cashew Milk

DIY, No-Strain Cashew Milk.

The thickest, creamiest, easiest to make of the nut milks. And, it contains all the nutrients whole nuts have to offer. The recipe is free from dairy, gums, added sugars, and requires only 2 ingredients and a powerful high speed blender.

When I decided to remove dairy from my diet a few years back, plant milk was the first dairy-free alternative I tried. I quickly fell in love, and began incorporating nut milks into all my favourite recipes; from overnight oats and smoothies to my daily morning latte. However, buying nut milk on the regular can add up rather quickly. But thankfully, making your own is an affordable alternative - and so much easier then you might think!

The one pet-peeve I have with homemade nut milk is straining. I believe every part of the nut offers us nourishment, and I prefer not to waste anything. Plus, unstrained nut milk is thicker, creamier, and much more satisyfing than it's alternative. I created this No-Strain Cashew Milk to save us all a step and preserve the wide range of nutrients nuts have to offer. This cashew milk is thick, creamy, and perfect for adding to smoothies, breakfast bowls, curries, or your daily cup of coffee.

No-Strain Cashew Milk

Time: 5 minutes

Yields: 1 jug of nut mylk

INGREDIENTS:

  • 1 cup raw cashews

  • 4 cups cold filtered water

  • 1 tsp pure vanilla

DIRECTIONS:

  1. Place cashews in a bowl and cover with filtered water. Allow the nuts to soak for at least 2 hours (preferebly overnight) to soften. This will make them easier to blend and digest!

  2. Rinse the nuts thoroughly, then place them in your blender along with fresh water and vanilla.

  3. Blend everything together on low speed for approx. 5 minutes, until the milk is smooth and creamy. Pour into a jug or large mason jar, and store in the fridge for up to 5 days.

Wholesome Oatmeal Cookies (GF + DF)

These cookies are your classic oatmeal cookie, healthified!

By swapping out refined flour for nutrient rich sorghum, and proccesed sugars for natural maple syrup, you're left with a healthy oatmeal cookie recipe that's gluten, dairy, and refined-sugar free.  These wholesome oatmeal cookies remind me of those soft and chewy ones you ate as a child - only, they're much lower in sugar and higher in fibre and nutrients!  The recipe is simple, easily customizable, and contains only whole-foods pantry staples, making them ideal for whipping up as an easy snack or healthy treat.

These 'Wholesome Oatmeal Cookies' were adapted from Amy's Healthy Baking's Soft and Chewy Oatmeal Raisin Cookies

Wholesome Oatmeal Cookies

Time:  25 Min.

Yields:  12-15 cookies

INGREDIENTS:

  • 1 cup gluten-free rolled oats

  • 3/4 cup sorghum flour

  • 1/2 tbsp cinnamon

  • 1 tsp baking powder

  • 1/4 tsp sea salt

  • 1/2 cup pure maple syrup

  • 2 tbsp avocado oil (or other liquid oil of choice)

  • 1 egg

  • 1 tsp vanilla extract

  • Optional - 1/3 cup raisins, dried berries, or dairy-free chocolate chips

DIRECTIONS:

  1. Preheat the oven to 350 degrees. Line a baking sheet with parchment paper.

  2. Combine sorghum flour and rolled oats in a medium sized bowl.

  3. Add the cinnamon, baking powder, and sea salt, and whisk together until smooth.

  4. Stir in the remaining ingredients until a sticky batter has formed. Spoon the batter onto your parchment paper to form the cookies. I like to use a measuring cup as my scooper.

  5. Bake the cookies for 10-12 minutes, until the bottoms are golden brown and the centre is cooked. Allow them to cool completely before removing from the tray. Store on the counter for 2-3 days, or in the fridge for up to 1 week.

Cultivating a Morning Routine

My morning routine is everything to me.

The way we start our day has a profound impact on our mental state, emotional-wellbing, and how the rest of our day will unfold. Cultivating an affective morning routine doesn't need to be lengthy or complex. It's about listening to your body, and doing what feels right to you. And this will change, each and every day.

My morning routine never stays the same. I check in with myself upon waking, and choose rituals based on how I feel, how much time I have, and what I need that day. I used to feel a lot of pressure to 'do everything' and have a morning routine that included all the things. But when we fall into that mindset, our practice becomes yet another thing to add to the 'to do' list. Our morning routine should be supportive and feel good - not become another source of stress.

When cultivating a morning routine, it's important to start slow. Implement one practice at a time and don't be afraid to add or subtract things! There is no right or wrong, and it's important to honour what feels good for your mind and body. Our needs change on a yearly, monthly, weekly, and daily basis. They shift with the seasons, our work, mood, and daily schedules. Allow this change, and don't let yourself become fixiated on your practice always looking a 'certain way'.

Presence Practice

The idea of meditation used to scare me. But now, it's the most constant part of my daily practice. I think meditation is intimidating because there's a lot of expectation around it: sitting for hours at a time, completely quieting your mind, and reaching a state of enlightement. But mediation is simply practice of sitting in stillness, fully present to the moment. That's all it really is. Whether you choose to mediate for 5 minutes or 50 minutes is up to you. The time isn't as important as the intention behind it. I like to focuse on my breath, body sensations, or any noises around me. This helps us stay grounded in the moment. Thoughts will come up, again and again. This is okay. Some days will be easier than others, and sometimes your mind will never stop flowing. Allow whatever is happening and however you feel to be okay. Let go of any judgement around it.

Apps I like to use:

  • Insight Timer (free)

  • Daily Calm ($60CAD/ year)

mememme.jpg

Water

Do not underestimate the power of water. Staying hydrated is one of the most beneficial things we can do for our health. And, it's completely free! I like to drink a huge glass of water first thing in the morning. It's a beautiful and simple way to cleanse the body and wake our mind up. Room temperature or warm water is excellent for digestion. You can add a splash of lemon juice or apple cider vinegar for further support.

Making My Bed

The act of making your bed might sound simple, but it's actually a very powerful practice. Making our bed starts the day off in a positive way, and encourages us to further accomplish our dreams. And personally, having a clean space enhances calmness, clarty, creativity, and my overall sense of well-being. This practice is now a special little part of my daily ritual.

Morning Gratitude

I started a gratitude practice about 3 years ago, after realizing my tendancy to get stuck in negative thought patterns - especially first thing in the morning. I used to wake up and immediately dread the day ahead, quickly becoming lost in thoughts of worry and resentment. Unfortunelty, this mentality only has a harmful impact on our day. When I started focusing on the good, my outlook naturally began to shift. Gratiude works in a special way where the more we focus on it, the more grateful we become. You can write a list, create a gratitude journal, say them outloud, or simply think about them in your head. Just start with 5 things, and really feel into the emotion of gratitude. Let your mind flow from there.

Movement

Gentle stretching, a walk around the neighborhood, yoga, a long run, or a workout in the gym - all movement is beneficial, no matter the length or form. My excercise practice changes daily, depending on my schedule and how my body feels. Choose a form of movement that feels right for you.

Time Outside

Nature is so healing. Fresh air cleanses the mind, and exposing our eyes to natural light first thing in the morning can actually help us sleep better! Daylight naturally regulates our circadium rhythm, and will help you feel more tired at night. Whenever I'm feeling down, fatigued, or in a funk, going outside automatically boosts my mood. Try to step outside in the morning, even if just for a moment. Let the daylight touch your skin and take a few deep breathes.

fall.jpg

Flourless Nut Butter Bread

D2447E33-99EE-42C0-97CC-3AF77FF7739B.jpeg

Flourless Nut Butter bread. Say what?!

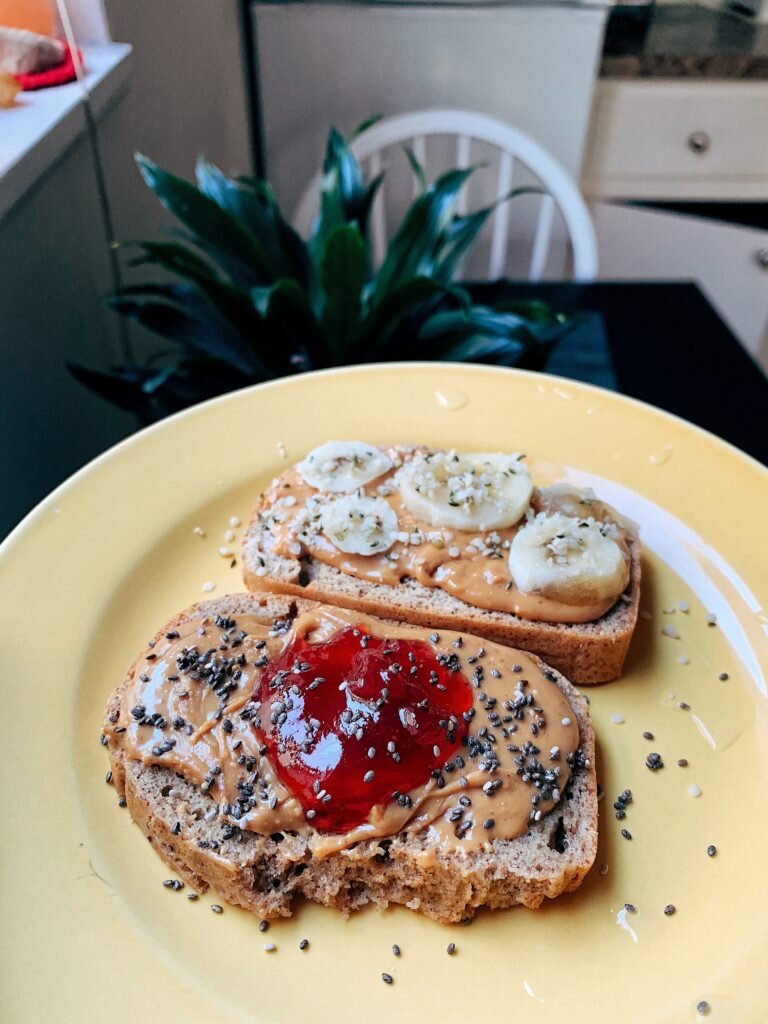
Okay guys. This bread is UNREAL. Like seriously, I just can't get over it. Or quite wrap my head around how this recipe is even possible. There's no flour. No grains. No gluten. No dairy. And no sugar. You only need TWO ingredients - nut butter, and eggs. Yes. You heard that right! This bread is just so simple, and absolutely delicious if I say so myself. It's wonderful spread with ghee, jam, or coconut oil and sea salt. You can toast it, or just eat it cold - and it slices like magic. No crumbles, no falling apart, no mess, no fuss.

You can use any nut butter you'd like for the recipe. My personal favourites are almond for a nuttier loaf, or peanut butter if you're craving something a little more fluffy and light. I make my own nut butters using raw or roasted nuts. It's much cheaper this way, and quite easy too! All you need is a food processor, or powerful high-speed blender. My favourite affordable nut brands are Yupik (which I order off amazon in bulk!) or Kirkland Signature nuts from Costco. If I decide to buy my nut butters premade, I'm a HUGE fan of the 'Nuts to You Nut Butter' brand.

Pb toast.jpg

Flourless Nut Butter Bread

Servings = 12

  • 1 cup nut butter of choice (I used almond)

  • 4 organic eggs

  • 1 tsp baking powder

  • Large pinch sea salt

Preheat your oven to 350 degrees. Line a standard sized loaf tin with parchment paper. In a medium sized bowl, combine nut butter, eggs, baking powder, and sea salt. Stir ingredients together until smooth. Transfer batter into the lined loaf tin. Bake for 25-30 minutes, until the loaf is fully cooked in the centre. Allow the bread to cool completely before slicing. Store on the counter for 1-2 days, then transfer to the fridge or freezer for extended storage.

Paleo Banana Bread (Refined-Sugar Free)

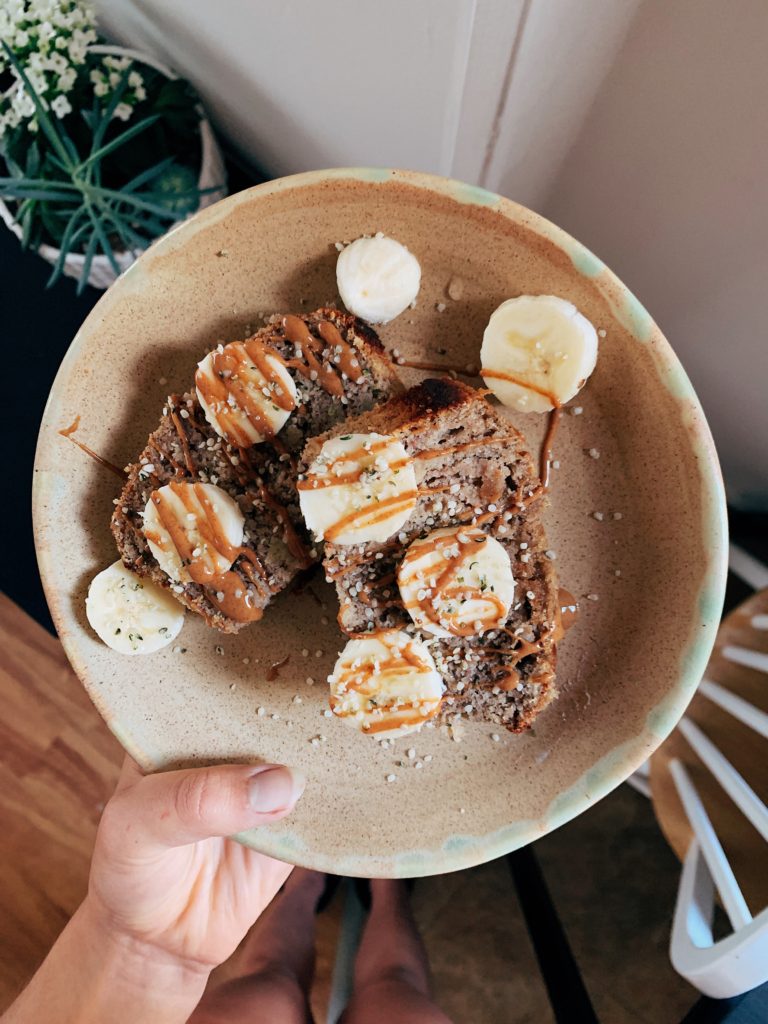
Oh, banana bread. You've always had my heart.Banana bread is just one of those foods that's really hard not to love. Especially when it's warm out of the oven, and slathered with ghee, peanut butter, and extra sliced bananas. Unfortunately, classic banana bread is usually lacking in fibre and nutrients, and instead filled with refined flours and proccessed sugar.

That's why I created this Paleo and Sugar-Free Banana Bread. It's a healthier alternative that tastes just as delicious! The bread is super moist and nutrient rich, with hints of nuts and vanilla. The recipe is completely free from grains, gluten, dairy, and any sort of added sugars, making it perfect as a quick breakfast or nourishing snack for little ones.

Paleo Flour

Not all flours are grain-based. Nut flours, such as almond or coconut, are completely free from grains - and make excellent substitutes in paleo and gluten-free baking! I usually use almond flour, coconut flour, or a combination of the two in my recipes. I prefer nut-based flours because they can be easier to digest and healthier for our guts. And if you don't have access to almond flour, you can easily make your own! Just grind up whole almonds in a coffee grinder until a fine flour is formed.

Sugar-Free Sweeteners

Sugar-free sweeteners are perfect for low-carb, paleo, or keto baking. They don't affect blood-sugar, preventing our levels from spiking and crashing. However, it's important to be extra mindful of the types of sugar substitutes available. Some are much healthier then others! When choosing your sugar-free sweetener, the more natural the better. I always look for the least proccessed option, and usually go with stevia or monk fruit. These sweeteners are both extracted from plants, and have quickly become my two favourite natural sugar alternatives.

Ingredients

  • 2 large ripe bananas

  • 3/4 cup almond flour

  • 1/4 cup coconut flour

  • 1/3 cup granulated monk fruit (or other sugar-free sweetener)

  • 1 tsp cinnamon

  • 1/2 tsp nutmeg

  • 1/2 tsp baking soda

  • 1/4 tsp sea salt

  • 3 eggs

  • 2 tbsp coconut oil, melted

  • 1 tbsp apple cider vinegar

Method

Preheat oven to 350 degrees. Lightly grease a loaf tray with coconut oil.

Combine your bananas in a bowl along with the melted coconut oil. Using a fork, mash together until fully pureed. In a separate bowl, whisk together the almond and coconut flour, monk fruit sweetener, cinnamon, nutmeg, baking soda, and sea salt until any clumps are gone. Add the banana puree, and continue to stir.

In another bowl, combine the eggs and apple cider vinegar. Using a fork, beat together until bubbles form on the top. Add the mixture to the dry ingredients, and stir until fully incorporated.

Pour the mixture into your greased loaf pan. Top with chopped walnuts, cinnamon, or extra banana slices if desired. Bake for 35-40 minutes until the centre comes out clean. Allow the loaf to cool completely before removing from the tin.

My Amenorrhea Journey

What is Amenorrhea?

Amenorrhea:  is classified as not having your menstrual cycle for more than 3 months at a time.

It all started back in high school. I was a young girl, struggling with bad body image, her relationship to food, and to herself. And that's when the food restriction and exercise obsession began. It was an obsession to change her body any way she could. A belief that the smaller she made herself, the more she would be loved.

By the world, by others, and most importantly - by herself.

Fast forward to a year after graduation. I was still exercising vigorously, but my relationship with food had improved. Around this time, I started learning about the negative affects of hormonal birth control pills, which I had been taking religiously over the last three years.  At the time, I was bleeding regularly. I decided to stop the pill, assuming my period would continue on as normal.

But the following month, it never came.

My period was gone. And this was the beginning of my journey of hormonal imbalances, irregular cycles, and periods of amenorrhea. Little did I know, I'd still be on this journey three years later.


The down-low on hormones.

Our hormones are produced by a number of glands located all throughout the body. This network of glands is called our Endocrine System. Not only do these glands secrete hormones;  but they also control almost every function that takes place within the body. From our sleep cycles and appetite, metabolism and digestion, to balancing blood sugar levels and our natural response to stress.

The Hypothalamus is a small, almond-sized gland located at the top of our brain who plays a very important role:  he is the overseer of the entire Endocrine system.  Essentially, the Hypothalamus controls all the other hormonal glands by ordering them to either start or stop the production of various hormones. By doing so, the Hypothalamus helps maintain balance within the body and reproductive organs. The health of our reproductive system depends largely on the Hypothalamus, and his ability to release or inhibit specific sex hormones at just the right times throughout the month.

Amenorrhea occurs when there is a miscommunication between the Hypothalamus and our Ovaries. For some reason, the Hypothalamus stops telling the ovaries to release the necessary hormones needed to complete our cycle and induce a bleed. The result? No ovulation, and no period.

According to the ‘FLO website’, almost 50% of females who exercise regularly experience some form of menstrual irregularity/ dysfunction, such as irregular or missing periods. And 30% of these females struggle with amenorrhea.

IMG_4657.JPG


What causes Amenorrhea in the first place?

After years of nutrient depletion (from both food restriction and the pill), combined with the physical stressors of intense workouts and low body fat, it was no wonderful I didn't get a period. My hormones were completely out of balance!

Birth Control Pills

Birth control pills can cause SO MANY issues, especially if you've been on the pill for quite some time. Basically, "the pill" supplies our body with a dose of synthetic hormones, and induces a "fake" bleed. So, when we're on hormonal birth control, we're not actually getting a real period. This constant supply of synthetic hormones tells our Endocrine System it no longer needs to make sex hormones. And when we go off the pill, our body often forgets how to produce these hormones on it's own. On top of this, the pill depletes our body of nutrients necessary for a healthy cycle. Post-pill induced amenorrhea is one of the most common causes of losing our periods.  

Low Body Weight

This typically happens one of two ways, or a combination of both:

1.) Over Exercising

We always hear about the benefits of exercise, but no one ever talks about the danger of taking it too far. Society tells us we need to constantly push our bodies in the gym to be "fit" and "healthy". But in reality, too much exercise can wreak havoc on our hormones and reproductive system. Long, intense workouts and heavy energy expenditure raises cortisol levels (our stress hormone) and puts additional stress on our bodies. You don't have to be exercising at extreme levels to loose your period. Every body is different, and a workout schedule that might seem "normal" for one women, can be hormonally damaging to the next. It's important to let go of comparison and really tune into your own body. Do what feels supportive to you.

2.) Under Eating

This means not eating enough food, calories, or nutrients (like carbohydrates or healthy fats) to encourage and support a menstrual cycle. It can be especially hard when society tells us to look and eat a certain way. Not to mention the huge emphasis on clean eating and certain trendy (yet restrictive) diets like keto, sugar-free, raw vegan, etc.

Chronic Stress

Constantly elevated levels or cortisol and adrenaline (our stress hormones) can contribute to a variety of hormonal imbalances. Stress causes a reduction in the production of hormones that are necessary for ovulation to occur. And when our body is under high levels of stress, it doesn't feel safe. The last thing it wants to do is grow another human being inside! So to save energy, our body shuts down it's reproductive system as a form of protection.

Undernourishment

This could be caused by poor eating habits or nutrient malabsorption due to gut disorders and digestive imbalances.


Bringing back my period.

My plan: Focus on good, wholesome nutrition and make sure I'm eating enough to support my cycle. Supplement with products that boost hormones naturally, and ensure I don't have major nutritional deficiencies. Exercise LESS, and give my body permission to rest whenever it needs. And last of all, continue learning to manage stress and take care of my emotional well-being.

DIET

Food is medicine, and supporting our bodies with nutrition might be one of the best ways to bring back our period. Aside from eating enough calories in general (this was big for me), it's also important to eat a balance of all 3 macronutrients: Wholesome carbohydrates, protein, and healthy fat. Foods to focus on:

Complex carbohydrates:  Whole grains like quinoa, buckwheat, amaranth, and brown or wild rice, starchy root vegetables and tubers like squashes, potato and sweet potatoes, carrots, turnips, and beets.

Organic protein:  Animal protein like poultry, free-range eggs, wild-caught fish, grass-fed beef, bone broth, and vegetarian protein sources like beans and legumes (soaked to improve digestibility), spirulina, fermented tempeh, and nutritional yeast.

Healthy fats:  Omega 3's like wild-caught sockeye salmon, flax, chia, and walnuts, coconut and coconut oil, avocados, and hemp seeds.

1C3BDB35-3328-49A3-8CBE-F1C8EBE5542B.JPG

SUPPLEMENTS

Chastebarry:  Also known as Vitex, it's an herb used to naturally balance estrogen and progesterone levels.  Studies show that the plant dramatically increases our sex hormones when taken regularly over a period of time. I started taking Chastebarry 3 weeks ago, and plan to continue until my period returns.

Vitamin B Complex:  B-vitamins are needed to maintain healthy menstrual function, but are often severely depleted from chronic stress or birth control pills. I take a multi b-complex everyday, and have noticed a huge difference in my stress levels.

Zinc:  Women who don't have a period are often zinc deficient. Especially if you've been on birth control pills for a number of years! I personally feel zinc supplementation is so important for me after having a Copper IUD for over 2 years. This is because excess copper levels in our body can cause a major zinc deficiency. If you've ever had a Copper IUD, I highly recommend researching this topic on your own - and consider getting your zinc levels tested!

Maca:  Maca root is said to help increase fertility and libido in both men and women. I recently started taking it again, and already feel like the powder is helping restore hormonal balance. I like to mix together 1 tsp Organic Traditions maca powder, 1 tbsp of cacao powder, and some full-fat coconut milk to make a delicious, chocolate-ey drink.

LIFESTYLE

Exercise appropriately

Support your body and hormonal system by exercising appropriately.

For many of us, this might mean reducing the intensity AND amount of exercise we do on a weekly basis.

Exercise is actually a huge stressor on our bodies.  Sometimes that stress is good, and sometimes it's not. It really comes down to the person, your body, and what's going on in your life at that time. Certain workouts like HITT (high intensity interval training) or lengthy cardio sessions raise cortisol levels and and intern affect all other hormones.  Focus on shorter workouts and slower, more calming movements like walking, yoga, pilates, or gentle resistance training instead.  And when your body's asking for it, give yourself permission to rest.

Balance blood sugar

Balancing our blood sugar levels results in more balanced hormones. This means having breakfast within 1 hour of waking, and eating every 2.5-3.5 hours throughout the day. Snacks are your best friend! And if you get to the point of "hanger", you've waited to long. I also try to include a protein and fat source with my carbohydrates so I don't spike my glucose too much.

Create stress management techniques

  • A mindfulness practice like meditation or deep breathing - this has been HUGE for reducing my stress

    1. Social media detoxes regularly

    2. Creating time for yourself (I like morning and evening routines)

    3. Declutter your space

    4. Setting boundaries and learning to say no

    5. Make time for fun, creativity, and play

15A54B0F-C93B-4683-9B12-A4DEEFDF37CE.JPG

Do you deal with amenorrhea or missing periods? Please share your stories and what's worked for you.

Almond Flour Gingerbread Men

HHUFE4681.jpg

Almond Flour Gingerbread Men:  the healthiest, most simple gingerbread recipe EVER! These cookies are gluten-free, Grain-free, Paleo, and Refined Sugar-free. The recipe is made with wholesome, gut-friendly ingredients like Bob's Red Mill almond flour, Nutiva coconut flour, coconut oil, and cinnamon. I used just a touch of honey for natural sweetness, and blackstrap molasses to create that delicious traditional gingerbread flavour.

Recipe Tips

  • I used almond flour for this recipe, but almond meal works too! If you don't have almond flour, you can easily make your own. Just grind raw or roasted almonds in a coffee grinder or food processor until flour consistency.

  • Make sure to use blackstrap molasses instead of regular cooking molasses. Blackstrap molasses is filled with antioxidants and nutrients, whereas cooking molasses is more refined and stripped of nutrients.

  • The dough MUST be chilled for at least 30 minutes before rolling. Do not skip this step! Chilling the dough makes rolling much easier, and helps the cookies stay together perfectly.

  • Allow the cookies to cool completely before removing from the tray.

HVLQE6745.jpg

Paleo Icing Sugar

For a healthier icing alternative, I recommend making your own icing sugar! The standard recipe is 1 cup granulated sugar of choice (coconut sugar, monk fruit, xylitol, etc) to 1 tbsp arrowroot powder or tapioca starch. Combine the two ingredients in a blender, and blend on high until well mixed. Use this homemade icing sugar as a substitute in your favourite icing recipe. I added coconut oil, vanilla, and almond milk to create my icing.Coconut butter also makes an excellent zero-sugar icing. Just melt the coconut butter with some vanilla extract, and drizzle!

RECIPE

(Makes 16 cookies)

INGREDIENTS

DRY

  • 2 cups almond flour or meal

  • 1/3 cup coconut flour

  • 1 tbsp cinnamon

  • 1 tsp ginger

  • 1/2 tsp nutmeg

  • 1 tsp baking soda

  • 1/4 tsp sea salt

WET

  • 1/4 cup honey

  • 2 tbsp blackstrap molasses

  • 2 tbsp coconut oil, melted

  • 1 egg

METHOD

  1. In a medium sized bowl, combine almond flour, coconut flour, cinnamon, ginger, nutmeg, baking soda, and sea salt. Mix together until combined.

  2. In a separate bowl, stir together honey, molasses, melted coconut oil, and egg. Add the liquid mixture to the dry ingredients, and mix until a smooth, sticky dough has formed. Using your hands, roll the dough into a large ball. Then, place the dough in the freezer for 30 minutes to chill. This will help the dough stay firm and together while your roll.

  3. While the dough is chilling, preheat the oven to 325 degrees. Line a cookie sheet with parchment paper. Then, dust your counter or table's surface with a generous amount of coconut flour to prevent the dough from sticking.

  4. Once the dough is chilled, place on the floured surface. Roll into a thin layer, approx 1/4 inch thick. Cut out the gingerbread men using a cookie cutter, and place on a parchment paper-lined tray.

  5. Bake the cookies at 325 degrees for 8-12 minutes. The exact time will depend on your dough's specific consistency, and the consistency of cookie you want. For a softer cookie, take out after 8 minutes, and for a crunchier cookie, leave in for the full time.

  6. Allow the cookies to cool completely before removing them from the tray. Decorate as desired, and serve.

Cashew Butter Cookies

Paleo Cashew Butter Cookies.

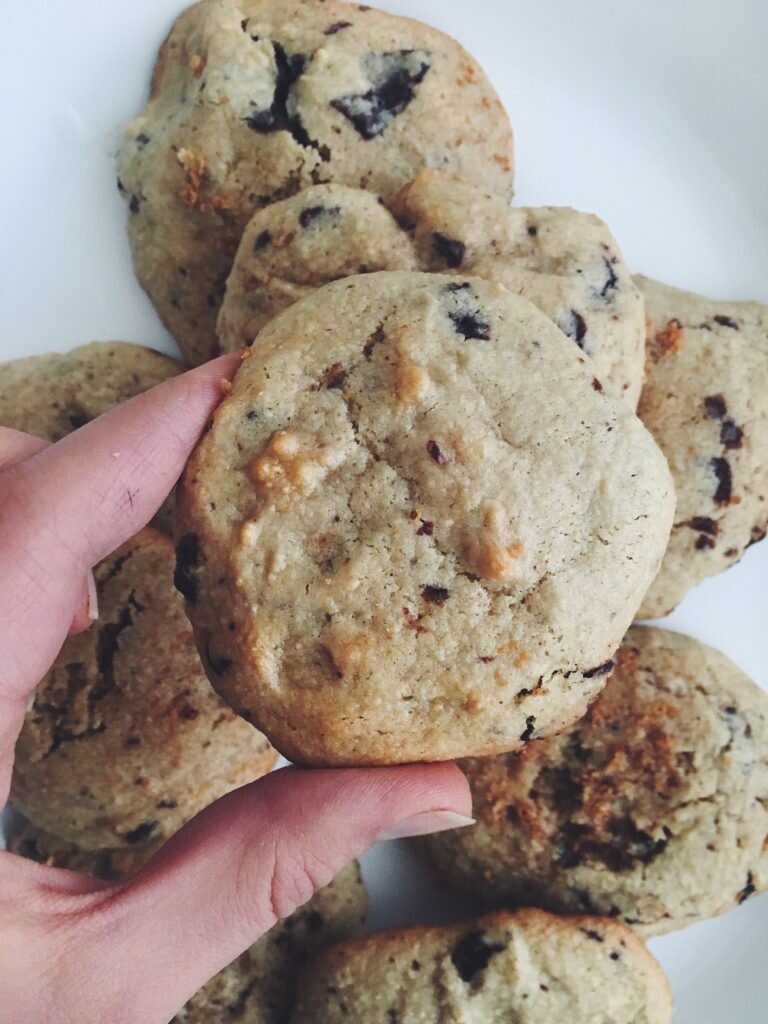
WHMC6857-e1543612481985-1024x768.jpg

Think: creamy cashew butter, nutty almond flour, pure vanilla extract, pink Himalayan sea salt, and a sprinkle of extra-dark chocolate chunks. These cookies are the bomb.com. I'm all about the gluten-free, dairy-free, refined sugar-free lifestyle. And if you are too, you're going to love these cookies. Now don't get me wrong - I still enjoy (and frequently eat) sweet treats. But if I'm gunna have a cookie, it's most likely gunna be a cookie filled with wholesome and nourishing ingredients. Why? Because healing my gut is important to me, feeling good in my body is important to me, eating foods that are free from toxins and heavily processed ingredients is important to me - and because these cookies taste just as good, if not BETTER, then the real thing.

Made with Bob's Red Mill almond flour, creamy cashew butter, Nutiva virgin coconut oil, and a touch of pure maple syrup for sweetness, these cookies are grain, gluten, dairy, and refined-sugar free. It's officially December, Christmas is just around the corner, and it's time to start your holiday baking. So turn on that oven, put on your favourite Christmas tunes, and lets make some Paleo Cashew Butter Cookies!

cooooookies.jpg

RECIPE

INGREDIENTS

  • 1 cup almond flour

  • 3/4 cup cashew butter

  • 1 egg

  • 1/4 cup maple syrup or honey

  • 1 tsp pure vanilla extract

  • 1 tsp baking soda

  • 1/8 tsp sea salt

  • 1 bar dark chocolate, chopped into chunks

METHOD

In a bowl, combine almond flour, cashew butter, egg, desired sweetener of choice, vanilla, baking soda, and sea salt. Mix until the batter is smooth, then gently fold in chocolate chunks until evenly dispersed.

Once mixed, cover the cookie dough and refrigerate for 25-30 minutes. While the dough is chilling, preheat your oven to 350 degrees and line a standard cookie sheet with parchment paper. Scoop the cookie dough in 1/8 cup measurements onto the tray using a spoon. The recipe should make approx. 12 cookies. Don't worry about shaping the cookies - they will naturally flatten as they cook.

Bake the cookies for 8-10 minutes, until the center is fully cooked. The cookies should be firm on the outside, and soft in the middles. Allow them to cool completely before removing from the tray. Store in an airtight container for 2-3 days, then transfer to the fridge for additional storage. 

Healthy Pumpkin Fudge (Paleo + Vegan)

Healthy Pumpkin Fudge. Plant-based, refined sugar free, six ingredients required, and less than 10 minutes to make.

A733891B-20A5-4C2B-BDAD-10960A04F7FD.JPG

The days are getting colder and the nights are growing longer. To me, fall is a time for cozy evenings in, wholesome and nourishing meals, morning walks in the forrest, and allowing myself extra time for sleep, rest and reflection. And of course, more time spent in the kitchen! I always feel a huge wave of baking inspiration as soon as the leaves begin to change colours, and the grocery store shelves fill with canned pumpkin and autumn spices.

This Healthy Pumpkin Fudge is everything I want a dessert to be - easy to make, free from dairy and refined sugars, and no baking required. It's fudgey, decadent, rich, and sweet, yet wholesome and satiating all the same time. I love making this fudge when pumpkin is in-season, and I start craving all those festive fall sweets.

This recipe was inspired by this 4-Ingredient Pumpkin Fudge found on wellandgood.com

RECIPE

INGREDIENTS

  • 1/2 cup cashew butter

  • 1/2 cup natural peanut butter

  • 1 cup pure pumpkin puree

  • 1/2 cup coconut oil

  • 1/2 cup pure maple syrup

  • 1 tsp cinnamon

  • 1/2 tsp pure vanilla extract

METHOD

  1. In a small pot, combine coconut oil and nut butter. Warm over medium heat until the oil is fully melted.

  2. Add the canned pumpkin, maple syrup, cinnamon, and vanilla extract, and continue to stir until the mixture is smooth.

  3. Remove from heat, and pour the mixture into your desired fudge mold of choice. I recommend using a shallow container lined with parchment paper, or a couple of ice cube trays for freezing pieces individually.

  4. Allow the fudge to cool on the counter for a couple of minutes, then place in the freezer to harden. Freeze overnight so the fudge has time to fully set.

  5. Serve cold, and store in the freezer or refrigerator to prevent the fudge from melting.

Coconut Flour Blueberry Muffins

I love a good o'l’ blueberry muffin. Fluffy on the outside, moist on the inside. But those big, extra sugary bakery style muffins that I loved so much in childhood just don’t sit right anymore. Enter, coconut flour blueberry muffins!

Coconut flour is a wonderful alternative to grain or gluten based baking flours. I find it works particularly well in breads, scones, and muffins. These Coconut Flour Blueberry Muffins are light, fluffy, and delicately sweet. The coconut flours helps them rise, while the fresh blueberries add a burst of natural sweetness. These muffins are free from all gluten, grains, dairy, and refined-sugar, making them an excellent breakfast or snack option for those with allergies and food sensitives.

f71a027f-4233-48d4-901e-a5b42a61ed2d.jpg

RECIPE

Makes 12 muffins

INGREDIENTS

  • 3/4 cup coconut flour

  • 4 large eggs

  • 1.5 cups light coconut milk (or other dairy free milk) *amount of liquid needed will depend on brand of coconut flour. See note below.

  • 1/4 cup honey

  • 1/4 cup coconut oil

  • 1/4 tsp baking soda

  • Pinch of sea salt

  • 1/2 cup blueberries

*The texture & consistency of coconut flour is different for every brand. Some coconut flours absorb more water than others. Because of this, the amount of liquid needed will vary. I recommend the 'Nutiva' brand for this recipe.

METHOD

  1. Preheat oven to 350 degrees. Lightly grease a muffin tin with coconut oil.

  2. Melt together honey and coconut oil in a microwave safe dish (approx. 30 seconds).

  3. Add coconut flour, eggs, milk, baking soda, and salt to a large bowl. Pour in melted honey / oil mixture, and mix until combined. The batter should be smooth and runny - if not, continue to add extra liquid until this consistency is achieved.

  4. Stir in blueberries, then pour mixture into greased muffin tins. Bake at 350 degrees for 20-25 minutes, or until the centers are cooked and the top is golden brown.