One-Pot Coconut Milk Curry

09063382-754E-4B57-AF62-0206F900433F.jpg


Growing up, dad made curry every week. It was a dinner tradition in our home. Family dinner has a very special place in my heart. Dad always cooked, mom would do dishes, and we all sat around the table and talked about our days. A tip for digesting your meals better? Share good food with the people you love.

When I moved out, I remember so clearly being nervous about cooking my own meals for the first time. This easy one-pot curry recipe was passed on to me, and it made cooking seem less intimidating. I felt safe in the kitchen, and like I could nourish myself without needing to be a chef or know all the fancy tips and techniques.

This recipe is adapted from my dad’s famous curry, but I made a couple tweaks to make it a little more gut-friendly. I swapped brown potato for white sweet potato (you can find them at Whole Foods) and soaked the chickpeas overnight for easier digestion. If you’re in a hurry, Eden canned chickpeas are pre-soaked and completely gut friendly!

4004D59F-736F-4572-A9AF-DE2B8A794F42.JPG

One-Pot Coconut Milk Curry

  • 1 tsp extra virgin olive oil

  • 1 large onion, finely chopped

  • 4-5 white or sweet potatoes, cubed

  • 2 cups cauliflower florets

  • 1 can full-fat coconut milk (look for guar-gum free)

  • 2 heaping tablespoons curry powder

  • 2 cups soaked then cooked chickpeas*

  • Salt + pepper to taste

* To soak your dried chickpeas, place in a bowl and cover with water and 1 tbsp apple cider vinegar. The vinegar helps to remove the lectins and make the beans easier to digest. Soak overnight, drain, rinse, and cook covered in fresh water until soft.

Method

In a large pot, sauté onions in olive oil over medium heat until soft. Add cubed potato, cauliflower, coconut milk, and curry powder, and bring to a boil. Turn to medium-low, stir, and let simmer until the potatoes and cauliflower are soft. Stir in the chickpeas, and season with salt + pepper to taste. Serve with quinoa, buckwheat, or rice.
The FUDGIEST Healthy Brownies

The fudgiest, healthiest brownies ever.

Gooey, fudgey, healthy chocolate brownies. Need I say more?These brownies check all the boxes: they're paleo, vegan, gluten-free, grain-free, dairy-free, egg-free, refined sugar free, AND high in protein to support balanced blood sugar and keep you full and satisfied for hours. They're also easy to make, UBER fudgey, extra gooey, and rich in chocolate-ey goodness. My dream brownie.

Brownies.jpg

RECIPE

  • 1.5 cups hemp seed protein

  • 1.5 cups unsweetened cocoa powder

  • 1/2 tsp baking powder

  • 1/2 tsp sea salt

  • 4 flax eggs*

  • 1 cup maple syrup

  • 4 tbsp coconut oil, melted

  • 2 tsp vanilla extract

  • Optional - 1/2 cup finely chopped walnuts or dark chocolate chips.

*To make your flax eggs, simply combine 3 tbsp ground flax seeds with 7.5 tbsp water. Mix together, and let sit on the counter for 5-minutes to thicken.

METHOD

  1. Preheat oven to 300 degrees. Line a small-medium baking dish with parchment paper. The size of your dish will determine the thickness of the brownies.

  2. In a bowl, whisk together hemp seed protein, cocoa powder, baking powder and sea salt. Add the flax eggs, maple syrup, melted coconut oil, and vanilla extract, and mix until a smooth, thick batter forms. Fold in additional nuts or chocolate chips if desired.

  3. Scoop the batter into your baking dish, and spread smooth evenly across using a spatula.

  4. Bake at 300 for 25-30 minutes. The shorter you bake the brownies, the fudgier they will be.

Breakfast Apple Crisp

The end of August means apple season.

And every year, I'm gifted more apples then I know what to do with. The perks of having gardener parents! It's a tradition in my household to make a good-for-you apple crisp that I can indulge in for breakfast, snack, or dessert. This means a crisp that is typically lower in sugar, free from common allergens, and made with gut-healthy alternatives like raw honey and organic ghee.

This breakfast apple crisp is the ultimate autumn breakfast or brunch. The recipe is refined sugar free, and filled with alll the good stuff. Gluten free oats, homemade oat flour, juicy apples, raw walnuts, and pure organic honey. With notes of vanilla, nutmeg, and sweet cinnamon.

Fall, I'm ready for you!

Breakfast Apple Crisp.jpg

The Recipe

Filling

6 cups apples, cored and diced

1/8 cup honey (or maple syrup for vegan)

1/4 cup water

2 tsp arrow root starch

1 tsp vanilla

2 tsp cinnamon

1/4 tsp nutmeg

Topping

1 cup GF rolled oats (I like Bob's Red Mill)

1 cup homemade oat flour*

1 tsp cinnamon

1/2 tsp sea salt

1/4 cup honey (or maple syrup if vegan)

3 tbsp ghee, melted (can sub organic butter or coconut oil)

1/2 cup raw walnuts, roughly chopped

*To make the oat flour, simply grind your oats in a coffee grinder until a fine flour forms!


Method

  1. In a bowl, combine chopped apples, honey, water, arrowroot starch, vanilla, cinnamon, and nutmeg. Mix until thuroughly combined, then transfer to a crisp dish.

  2. In a separate bowl, stir together rolled oats, oat flour, cinnamon, and sea salt. Add in honey and melted ghee, and mix together until a crumbly topping forms. Add in your walnuts, then sprinkle topping evenly over the apples.

  3. Bake at 350 for 20-25 minutes until apples are soft and fully cooked. Serve warm with coconut cream, coconut yogurt, or dairy-free ice-cream.

Low-Sugar Blackberry Jam

Blackberry season is in full-swing.
Which means, it’s jam time!

This recipe uses chia seeds to thicken, and a little honey or maple syrup as the perfect natural sweetener. It's an easy, DIY way to preserve your favourite summer berries. Try the recipe with raspberries, blueberries, or wild berries too! I love using this jam to top oatmeal bowls, pancakes, or spreading alongside ghee on thick slices of toasted gluten-free bread.

Recipe

3 cups fresh or frozen blackberries

2 tablespoons chia seeds

2 tablespoons honey or pure maple syrup

1/2 tsp vanilla extract

Optional - scoop of grass-fed gelatine for additional gut support


Method

In a small pot, bring blackberries to a boil.

Turn to low, then simmer for 3-5 minutes until the berries have broken down. Next, add your honey or maple syrup and stir to combine.

Remove from heat and mix in the chia seeds to thicken. Optionally, add a scoop of grass-fed gelatine. Let the jam cool, then transfer to a glass mason jar. Store covered in the fridge.

Zucchini Oats

Zuchinni is incredibly versatile.

During the summer months when zucchini is most abundant, I try incorporating the plant into as many dishes as possible. One of my favourite, go-to recipes is zucchini oats. It’s the perfect vegetable-filled breakfast recipe to sneak extra greens into your diet.

Summer is also the season of farmer's market. Throughout the warmer months, I spend every Saturday morning at my local neighbourhood market; sampling homemade treats, chatting with the farmers, and carefully selecting bagfuls of fresh produce to use for the weak ahead. From June to August, zucchini is one of my main buys. Summer is peak zuchhini season, meaning they're extra flavourful and nutritious during this time of year. And, you can often score a gigantic organic zucchini for as little as $2 that will last you the entire week.

Recipe:

1 cup gf rolled oats

2 cups filtered water

2-4 cups grated zuchinni (depending on how 'zuchinni' you like it)

1 tsp vanilla*Optional

2 scoops vanilla protein powder of choice (I like Vega or Leanfit brand)

2-4 tablespoons honey or maple syrup to sweeten

Cinnamon to garnish

Method:

  1. Combine oats and water in a small pot, and bring to a boil.

  2. Reduce heat to medium and cook, gently stirring until the oats are soft.

  3. Mix in zucchini. Turn to low and continue to cook until the zuchinni is soft.

  4. Remove oats from heat and stir in protein powder of choice or honey/ maple syrup to sweeten.

  5. Garnish with cinnamon, seeds, nut butter, or fresh fruit.

Raw Hempseed Brownie Bites

Some days, my chocolate cravings are real. And a square or two of dark chocolate just won't sufice.

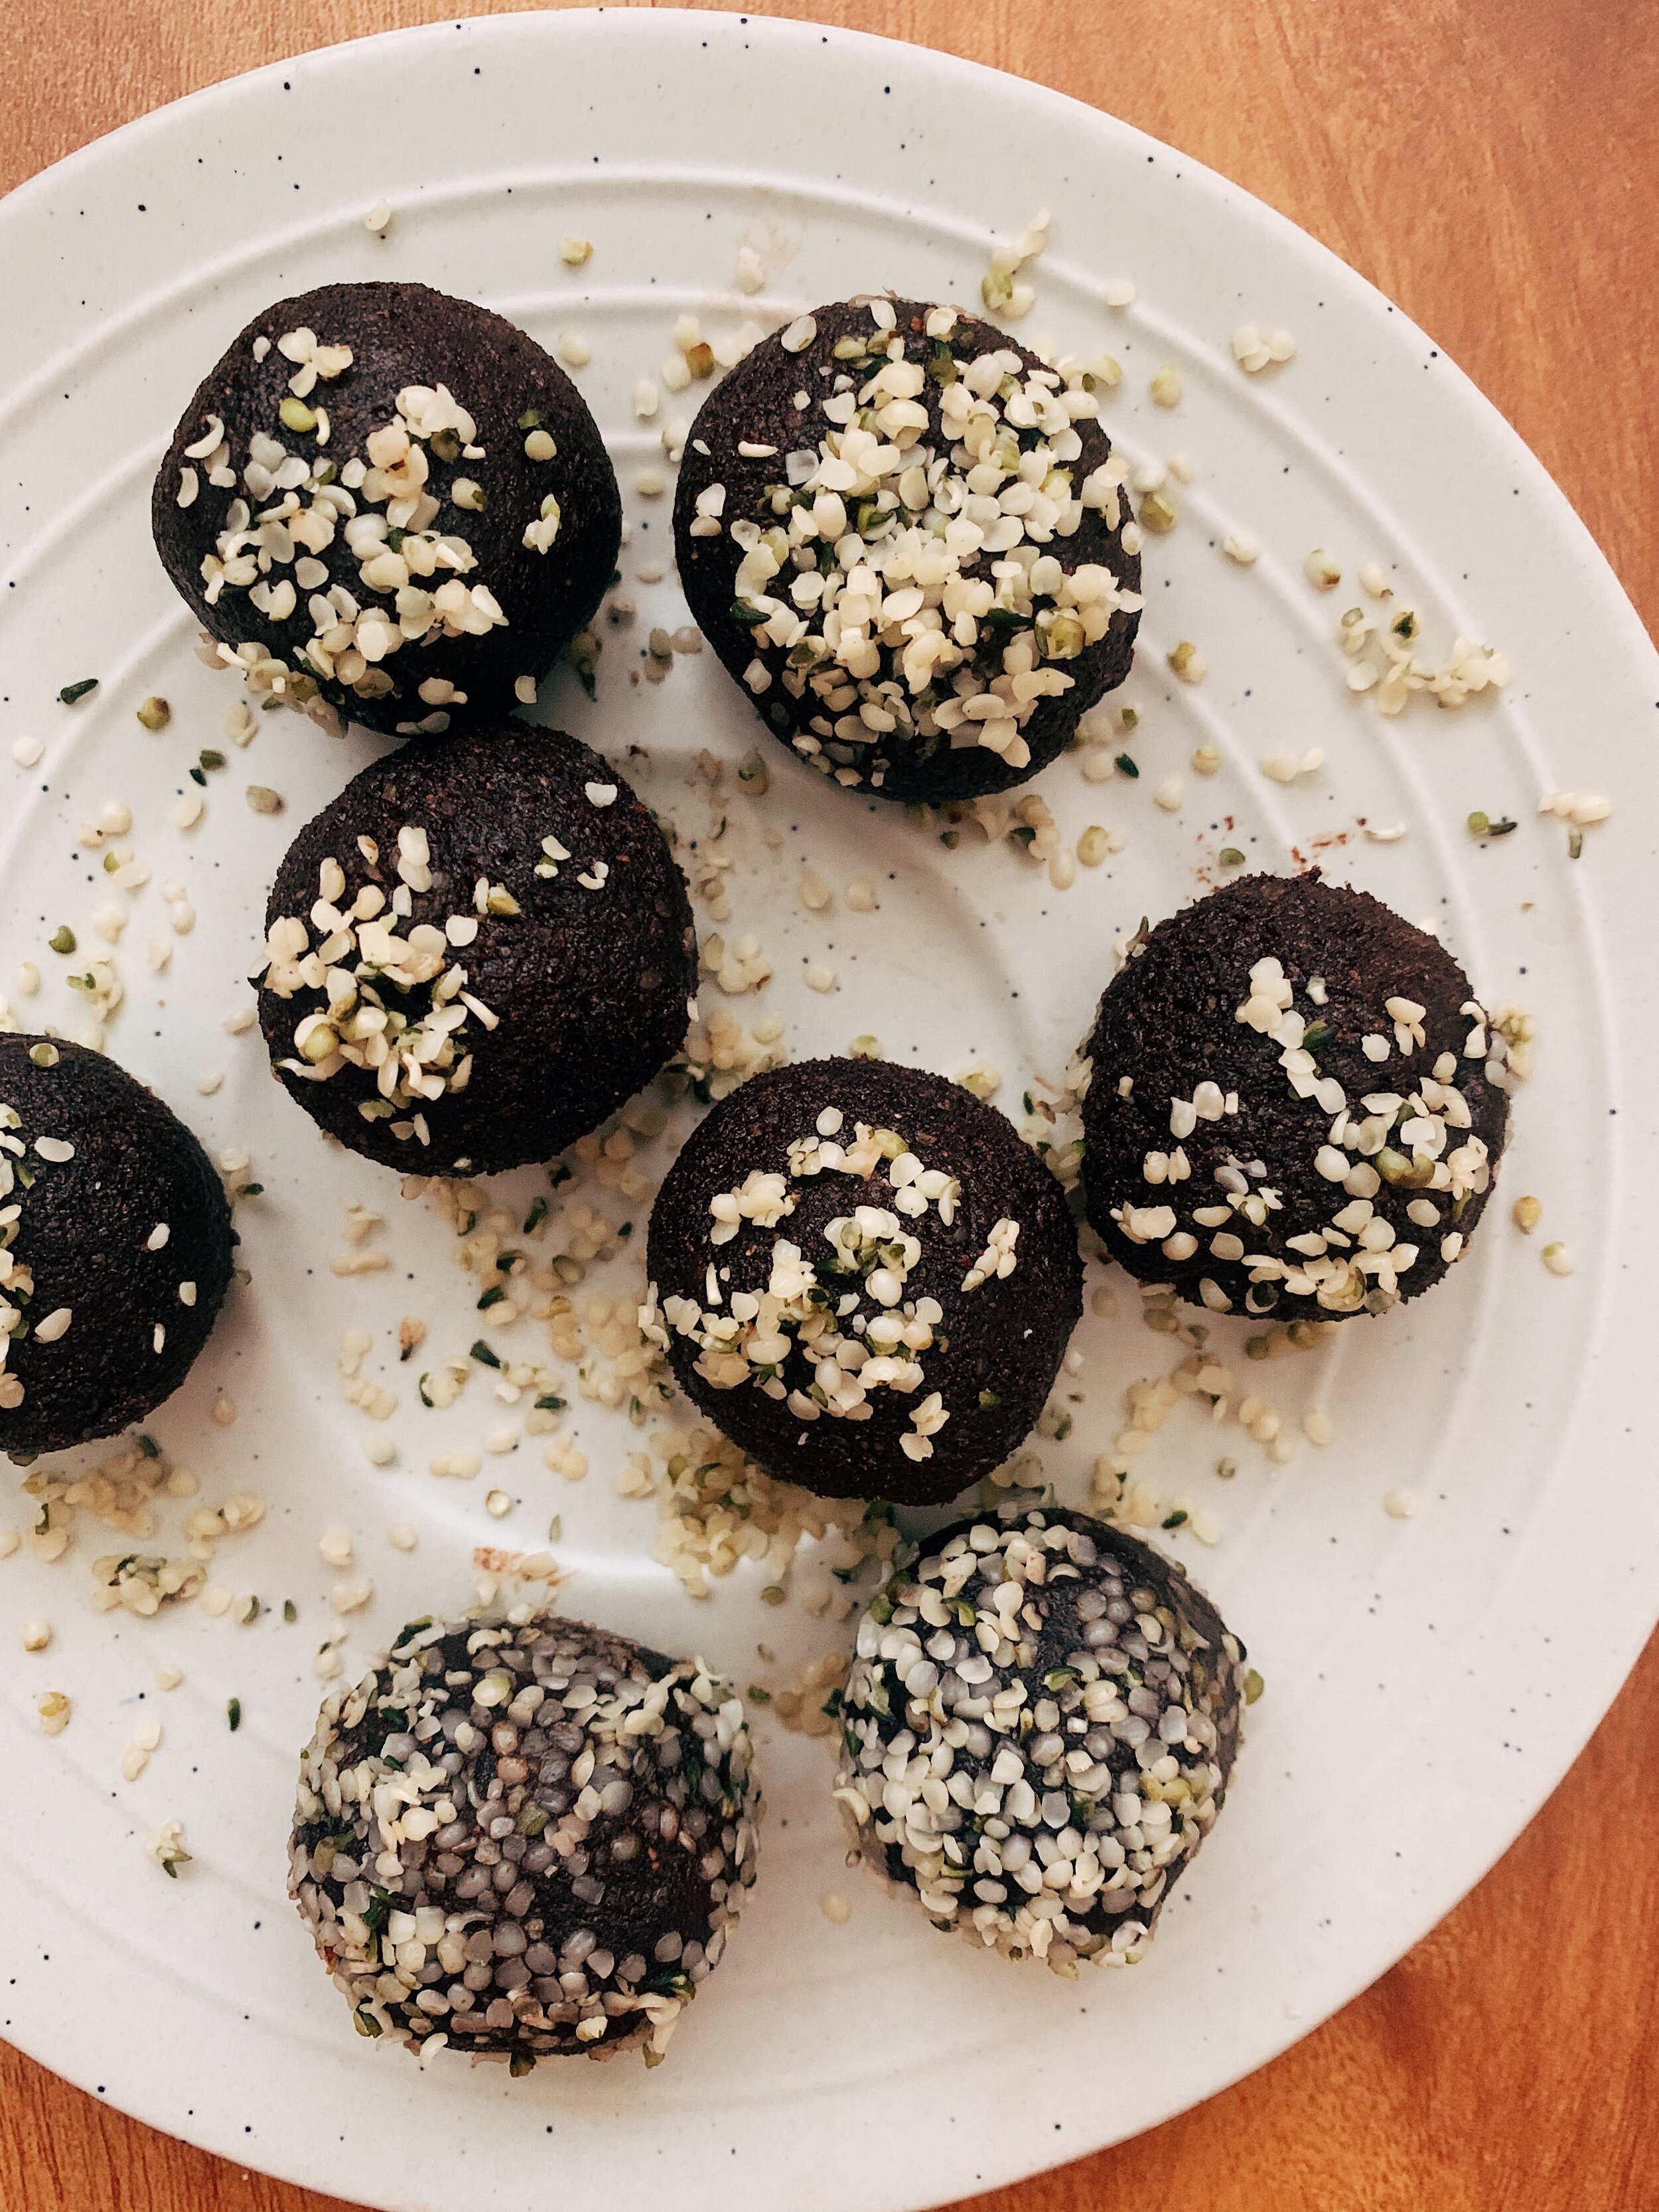
Cue:  raw hempseed brownie bites. To satifisy all your chocolatey needs in a way that both nourishes body and soul.

I love chocolate, and I love sweet things. But I also love feeling good in my body, and honouring it the best way I can. These Raw Hempseed Browie Bites are a perfect combination of the two - they taste delicious, and make a wonderful afternoon snack or post-dinner treat. But they're also gluten, grain, dairy, and refined sugar free, and made from real, whole food ingredients that make you feel good from within.

And during the Summer months, I just can’t be bothered to turn on the oven often. My little apartment doesn't handle the heat.  This is where raw desserts come in - they’re easy to make, and no baking required. These fudgey date and hempseed brownie bites are going to be your new go-to Summer treat.

E59335F0-5C0C-47DC-82B7-6C178A98D28A.jpeg


Raw Hempseed Brownie Bites:

Time:  10M

Yields:  12-15 balls

INGREDIENTS:

  • 1 cup dates

  • 1 cup hemp seeds

  • 1/2 cup cocoa powder

  • 1/4 coconut flour

  • 1/4 cup coconut milk

  • 1 teaspoon vanilla

  • 1/4 teaspoon salt

DIRECTIONS:

  1. Combine all ingredients in a food processor. Blend on medium speed until a thick, sticky dough has formed.

  2. Dampen your hands, then roll the batter into little balls.

  3. Role in additional hemp hearts if desired, then place in the freezer to chill for at least 2 hours. Serve cold.

  4. Happy rollin’!

3 Ingredient Buckwheat Pancakes (GF + V)

Hello Buckwheat!

My favourite gluten-free flour.

These 3 ingredient buckwheat pancakes are wholesome and delicious. They're gluten-free, grain-free, (buckwheat is actually a seed!) and free from other common allergens like dairy, soy, and eggs. The recipe is easy to make, and consists of only simple, whole-foods ingredients: pure buckwheat flour, plant-based 'buttermilk', and baking powder. I love making these pancakes on a lazy weekend morning, and cozying up to enjoy them with a matcha latte or cup of dandelion tea.

What is buckwheat flour?

Buckwheat is a gluten-free seed, and despite it's name, has nothing to do with wheat. The grain-like seed has been used in Southeast Asia for thousands of years as a nutrient-rich alternative to other grains. Buckwheat is high in fibre and protein, and when ground, closely resembles wheat flour. The seed is also low in phytic acid, making it gentler on digestion and easier to absorb than other common grains.

Making dairy-free buttermilk

Buttermilk is the secret to light and fluffy panckaes. The dairy-free 'buttermilk' in this recipe helps the pancakes rise and hold together, without the need to add eggs or other binders. To make your own plant-based buttermilk, simply combine 1 cup nut milk of choice and 1 tsp acid (I like lemon juice or apple cidar vinegar!) Allow the mixture to sit for 10 minutes or so to thicken and curdle.

3 Ingredient Buckwheat Pancakes (GF + V)

Time:  10M

Yields:  2 servings

INGREDIENTS:

  • 1 cup buckwheat flour*

  • 1 cup cashew milk (or other nut milk of choice)

  • 1 tsp lemon juice

  • 1 tsp baking powder

  • 1 tsp vanilla

  • Small pinch sea salt

  • Dash of stevia or 1-2 tbsp maple syrup to sweeten

*Feel free to make your own buckwheat flour by grinding whole buckwheat groats or flakes in a coffee grinder until smooth.

DIRECTIONS:

  1. Combine your nut milk and lemon juice in a small bowl. Stir together, then place on the counter and let sit for 10 minutes. This will allow the mixture to curdle and become 'buttermilk'.

  2. In a frying pan, melt 1 tsp coconut oil over medium heat. In a separate bowl, whisk together the buckwheat flour, baking powder, and sea salt. Add the buttermilk, vanilla, and sweetner of choice, and stir together until smooth.

  3. Spoon the mixture onto the pan to form your pancakes. Let each pancake cook for 2-3 minutes per side, flipping when the surface fills with bubbles.

  4. Top with coconut yogurt, fresh fruit, berry compote, or pure maple syrup.

No-Strain Cashew Milk

DIY, No-Strain Cashew Milk.

The thickest, creamiest, easiest to make of the nut milks. And, it contains all the nutrients whole nuts have to offer. The recipe is free from dairy, gums, added sugars, and requires only 2 ingredients and a powerful high speed blender.

When I decided to remove dairy from my diet a few years back, plant milk was the first dairy-free alternative I tried. I quickly fell in love, and began incorporating nut milks into all my favourite recipes; from overnight oats and smoothies to my daily morning latte. However, buying nut milk on the regular can add up rather quickly. But thankfully, making your own is an affordable alternative - and so much easier then you might think!

The one pet-peeve I have with homemade nut milk is straining. I believe every part of the nut offers us nourishment, and I prefer not to waste anything. Plus, unstrained nut milk is thicker, creamier, and much more satisyfing than it's alternative. I created this No-Strain Cashew Milk to save us all a step and preserve the wide range of nutrients nuts have to offer. This cashew milk is thick, creamy, and perfect for adding to smoothies, breakfast bowls, curries, or your daily cup of coffee.

No-Strain Cashew Milk

Time: 5 minutes

Yields: 1 jug of nut mylk

INGREDIENTS:

  • 1 cup raw cashews

  • 4 cups cold filtered water

  • 1 tsp pure vanilla

DIRECTIONS:

  1. Place cashews in a bowl and cover with filtered water. Allow the nuts to soak for at least 2 hours (preferebly overnight) to soften. This will make them easier to blend and digest!

  2. Rinse the nuts thoroughly, then place them in your blender along with fresh water and vanilla.

  3. Blend everything together on low speed for approx. 5 minutes, until the milk is smooth and creamy. Pour into a jug or large mason jar, and store in the fridge for up to 5 days.

Wholesome Oatmeal Cookies (GF + DF)

These cookies are your classic oatmeal cookie, healthified!

By swapping out refined flour for nutrient rich sorghum, and proccesed sugars for natural maple syrup, you're left with a healthy oatmeal cookie recipe that's gluten, dairy, and refined-sugar free.  These wholesome oatmeal cookies remind me of those soft and chewy ones you ate as a child - only, they're much lower in sugar and higher in fibre and nutrients!  The recipe is simple, easily customizable, and contains only whole-foods pantry staples, making them ideal for whipping up as an easy snack or healthy treat.

These 'Wholesome Oatmeal Cookies' were adapted from Amy's Healthy Baking's Soft and Chewy Oatmeal Raisin Cookies

Wholesome Oatmeal Cookies

Time:  25 Min.

Yields:  12-15 cookies

INGREDIENTS:

  • 1 cup gluten-free rolled oats

  • 3/4 cup sorghum flour

  • 1/2 tbsp cinnamon

  • 1 tsp baking powder

  • 1/4 tsp sea salt

  • 1/2 cup pure maple syrup

  • 2 tbsp avocado oil (or other liquid oil of choice)

  • 1 egg

  • 1 tsp vanilla extract

  • Optional - 1/3 cup raisins, dried berries, or dairy-free chocolate chips

DIRECTIONS:

  1. Preheat the oven to 350 degrees. Line a baking sheet with parchment paper.

  2. Combine sorghum flour and rolled oats in a medium sized bowl.

  3. Add the cinnamon, baking powder, and sea salt, and whisk together until smooth.

  4. Stir in the remaining ingredients until a sticky batter has formed. Spoon the batter onto your parchment paper to form the cookies. I like to use a measuring cup as my scooper.

  5. Bake the cookies for 10-12 minutes, until the bottoms are golden brown and the centre is cooked. Allow them to cool completely before removing from the tray. Store on the counter for 2-3 days, or in the fridge for up to 1 week.

Flourless Nut Butter Bread

D2447E33-99EE-42C0-97CC-3AF77FF7739B.jpeg

Flourless Nut Butter bread. Say what?!

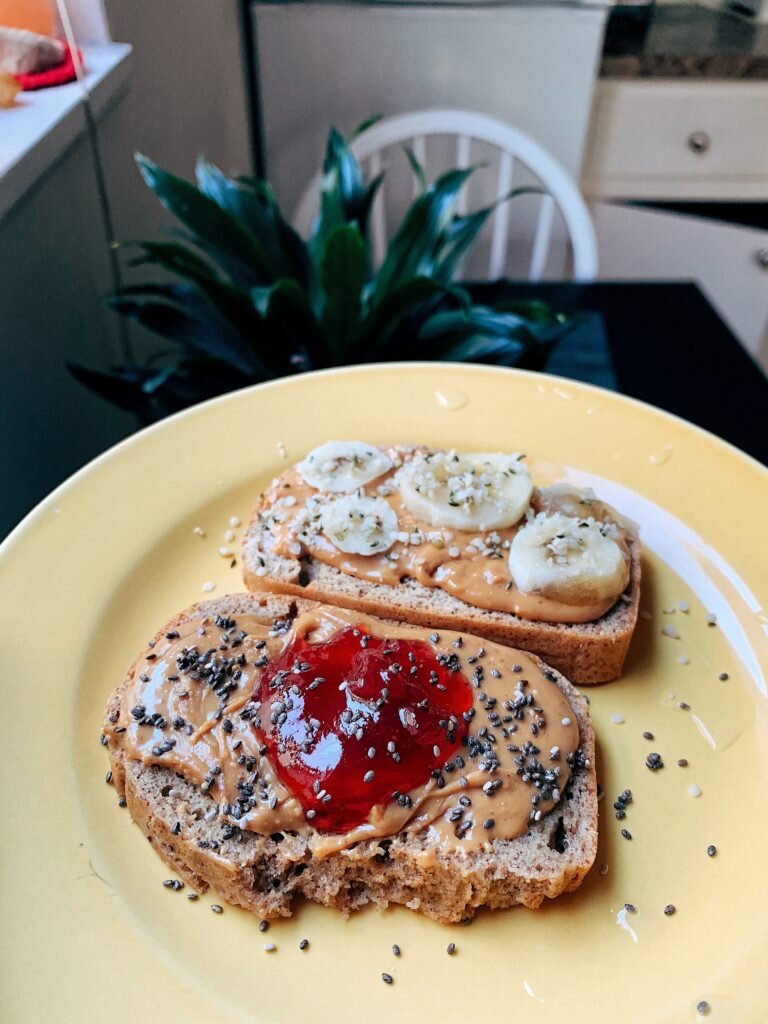
Okay guys. This bread is UNREAL. Like seriously, I just can't get over it. Or quite wrap my head around how this recipe is even possible. There's no flour. No grains. No gluten. No dairy. And no sugar. You only need TWO ingredients - nut butter, and eggs. Yes. You heard that right! This bread is just so simple, and absolutely delicious if I say so myself. It's wonderful spread with ghee, jam, or coconut oil and sea salt. You can toast it, or just eat it cold - and it slices like magic. No crumbles, no falling apart, no mess, no fuss.

You can use any nut butter you'd like for the recipe. My personal favourites are almond for a nuttier loaf, or peanut butter if you're craving something a little more fluffy and light. I make my own nut butters using raw or roasted nuts. It's much cheaper this way, and quite easy too! All you need is a food processor, or powerful high-speed blender. My favourite affordable nut brands are Yupik (which I order off amazon in bulk!) or Kirkland Signature nuts from Costco. If I decide to buy my nut butters premade, I'm a HUGE fan of the 'Nuts to You Nut Butter' brand.

Pb toast.jpg

Flourless Nut Butter Bread

Servings = 12

  • 1 cup nut butter of choice (I used almond)

  • 4 organic eggs

  • 1 tsp baking powder

  • Large pinch sea salt

Preheat your oven to 350 degrees. Line a standard sized loaf tin with parchment paper. In a medium sized bowl, combine nut butter, eggs, baking powder, and sea salt. Stir ingredients together until smooth. Transfer batter into the lined loaf tin. Bake for 25-30 minutes, until the loaf is fully cooked in the centre. Allow the bread to cool completely before slicing. Store on the counter for 1-2 days, then transfer to the fridge or freezer for extended storage.

Paleo Banana Bread (Refined-Sugar Free)

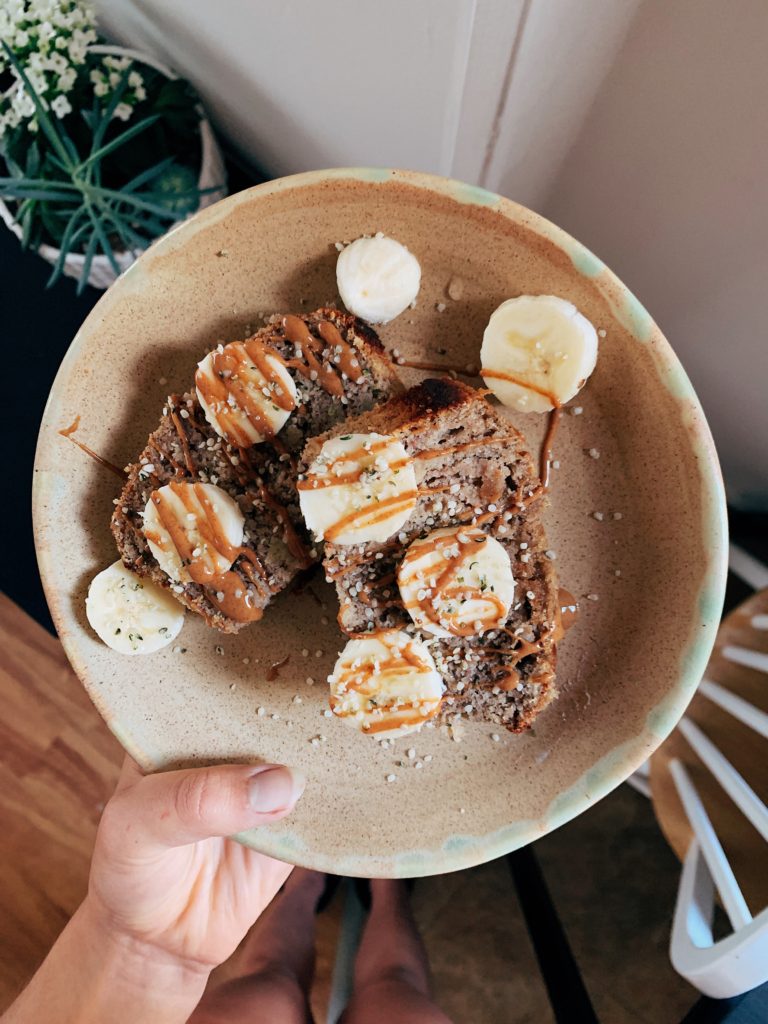
Oh, banana bread. You've always had my heart.Banana bread is just one of those foods that's really hard not to love. Especially when it's warm out of the oven, and slathered with ghee, peanut butter, and extra sliced bananas. Unfortunately, classic banana bread is usually lacking in fibre and nutrients, and instead filled with refined flours and proccessed sugar.

That's why I created this Paleo and Sugar-Free Banana Bread. It's a healthier alternative that tastes just as delicious! The bread is super moist and nutrient rich, with hints of nuts and vanilla. The recipe is completely free from grains, gluten, dairy, and any sort of added sugars, making it perfect as a quick breakfast or nourishing snack for little ones.

Paleo Flour

Not all flours are grain-based. Nut flours, such as almond or coconut, are completely free from grains - and make excellent substitutes in paleo and gluten-free baking! I usually use almond flour, coconut flour, or a combination of the two in my recipes. I prefer nut-based flours because they can be easier to digest and healthier for our guts. And if you don't have access to almond flour, you can easily make your own! Just grind up whole almonds in a coffee grinder until a fine flour is formed.

Sugar-Free Sweeteners

Sugar-free sweeteners are perfect for low-carb, paleo, or keto baking. They don't affect blood-sugar, preventing our levels from spiking and crashing. However, it's important to be extra mindful of the types of sugar substitutes available. Some are much healthier then others! When choosing your sugar-free sweetener, the more natural the better. I always look for the least proccessed option, and usually go with stevia or monk fruit. These sweeteners are both extracted from plants, and have quickly become my two favourite natural sugar alternatives.

Ingredients

  • 2 large ripe bananas

  • 3/4 cup almond flour

  • 1/4 cup coconut flour

  • 1/3 cup granulated monk fruit (or other sugar-free sweetener)

  • 1 tsp cinnamon

  • 1/2 tsp nutmeg

  • 1/2 tsp baking soda

  • 1/4 tsp sea salt

  • 3 eggs

  • 2 tbsp coconut oil, melted

  • 1 tbsp apple cider vinegar

Method

Preheat oven to 350 degrees. Lightly grease a loaf tray with coconut oil.

Combine your bananas in a bowl along with the melted coconut oil. Using a fork, mash together until fully pureed. In a separate bowl, whisk together the almond and coconut flour, monk fruit sweetener, cinnamon, nutmeg, baking soda, and sea salt until any clumps are gone. Add the banana puree, and continue to stir.

In another bowl, combine the eggs and apple cider vinegar. Using a fork, beat together until bubbles form on the top. Add the mixture to the dry ingredients, and stir until fully incorporated.

Pour the mixture into your greased loaf pan. Top with chopped walnuts, cinnamon, or extra banana slices if desired. Bake for 35-40 minutes until the centre comes out clean. Allow the loaf to cool completely before removing from the tin.

Almond Flour Gingerbread Men

HHUFE4681.jpg

Almond Flour Gingerbread Men:  the healthiest, most simple gingerbread recipe EVER! These cookies are gluten-free, Grain-free, Paleo, and Refined Sugar-free. The recipe is made with wholesome, gut-friendly ingredients like Bob's Red Mill almond flour, Nutiva coconut flour, coconut oil, and cinnamon. I used just a touch of honey for natural sweetness, and blackstrap molasses to create that delicious traditional gingerbread flavour.

Recipe Tips

  • I used almond flour for this recipe, but almond meal works too! If you don't have almond flour, you can easily make your own. Just grind raw or roasted almonds in a coffee grinder or food processor until flour consistency.

  • Make sure to use blackstrap molasses instead of regular cooking molasses. Blackstrap molasses is filled with antioxidants and nutrients, whereas cooking molasses is more refined and stripped of nutrients.

  • The dough MUST be chilled for at least 30 minutes before rolling. Do not skip this step! Chilling the dough makes rolling much easier, and helps the cookies stay together perfectly.

  • Allow the cookies to cool completely before removing from the tray.

HVLQE6745.jpg

Paleo Icing Sugar

For a healthier icing alternative, I recommend making your own icing sugar! The standard recipe is 1 cup granulated sugar of choice (coconut sugar, monk fruit, xylitol, etc) to 1 tbsp arrowroot powder or tapioca starch. Combine the two ingredients in a blender, and blend on high until well mixed. Use this homemade icing sugar as a substitute in your favourite icing recipe. I added coconut oil, vanilla, and almond milk to create my icing.Coconut butter also makes an excellent zero-sugar icing. Just melt the coconut butter with some vanilla extract, and drizzle!

RECIPE

(Makes 16 cookies)

INGREDIENTS

DRY

  • 2 cups almond flour or meal

  • 1/3 cup coconut flour

  • 1 tbsp cinnamon

  • 1 tsp ginger

  • 1/2 tsp nutmeg

  • 1 tsp baking soda

  • 1/4 tsp sea salt

WET

  • 1/4 cup honey

  • 2 tbsp blackstrap molasses

  • 2 tbsp coconut oil, melted

  • 1 egg

METHOD

  1. In a medium sized bowl, combine almond flour, coconut flour, cinnamon, ginger, nutmeg, baking soda, and sea salt. Mix together until combined.

  2. In a separate bowl, stir together honey, molasses, melted coconut oil, and egg. Add the liquid mixture to the dry ingredients, and mix until a smooth, sticky dough has formed. Using your hands, roll the dough into a large ball. Then, place the dough in the freezer for 30 minutes to chill. This will help the dough stay firm and together while your roll.

  3. While the dough is chilling, preheat the oven to 325 degrees. Line a cookie sheet with parchment paper. Then, dust your counter or table's surface with a generous amount of coconut flour to prevent the dough from sticking.

  4. Once the dough is chilled, place on the floured surface. Roll into a thin layer, approx 1/4 inch thick. Cut out the gingerbread men using a cookie cutter, and place on a parchment paper-lined tray.

  5. Bake the cookies at 325 degrees for 8-12 minutes. The exact time will depend on your dough's specific consistency, and the consistency of cookie you want. For a softer cookie, take out after 8 minutes, and for a crunchier cookie, leave in for the full time.

  6. Allow the cookies to cool completely before removing them from the tray. Decorate as desired, and serve.

Cashew Butter Cookies

Paleo Cashew Butter Cookies.

WHMC6857-e1543612481985-1024x768.jpg

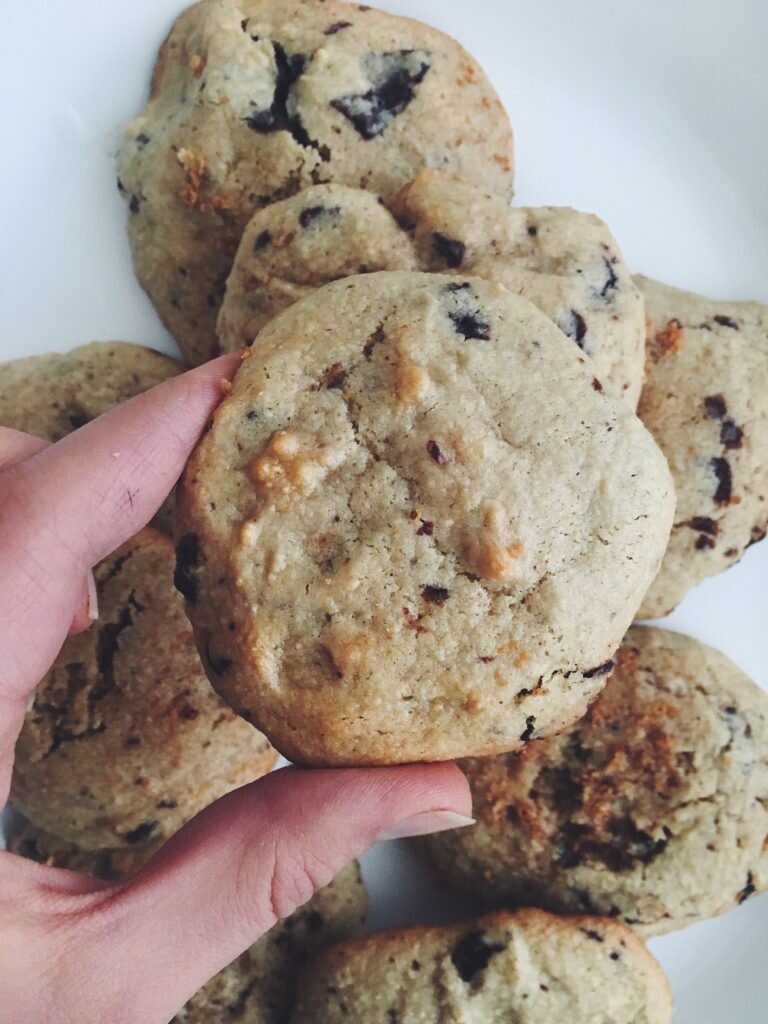
Think: creamy cashew butter, nutty almond flour, pure vanilla extract, pink Himalayan sea salt, and a sprinkle of extra-dark chocolate chunks. These cookies are the bomb.com. I'm all about the gluten-free, dairy-free, refined sugar-free lifestyle. And if you are too, you're going to love these cookies. Now don't get me wrong - I still enjoy (and frequently eat) sweet treats. But if I'm gunna have a cookie, it's most likely gunna be a cookie filled with wholesome and nourishing ingredients. Why? Because healing my gut is important to me, feeling good in my body is important to me, eating foods that are free from toxins and heavily processed ingredients is important to me - and because these cookies taste just as good, if not BETTER, then the real thing.

Made with Bob's Red Mill almond flour, creamy cashew butter, Nutiva virgin coconut oil, and a touch of pure maple syrup for sweetness, these cookies are grain, gluten, dairy, and refined-sugar free. It's officially December, Christmas is just around the corner, and it's time to start your holiday baking. So turn on that oven, put on your favourite Christmas tunes, and lets make some Paleo Cashew Butter Cookies!

cooooookies.jpg

RECIPE

INGREDIENTS

  • 1 cup almond flour

  • 3/4 cup cashew butter

  • 1 egg

  • 1/4 cup maple syrup or honey

  • 1 tsp pure vanilla extract

  • 1 tsp baking soda

  • 1/8 tsp sea salt

  • 1 bar dark chocolate, chopped into chunks

METHOD

In a bowl, combine almond flour, cashew butter, egg, desired sweetener of choice, vanilla, baking soda, and sea salt. Mix until the batter is smooth, then gently fold in chocolate chunks until evenly dispersed.

Once mixed, cover the cookie dough and refrigerate for 25-30 minutes. While the dough is chilling, preheat your oven to 350 degrees and line a standard cookie sheet with parchment paper. Scoop the cookie dough in 1/8 cup measurements onto the tray using a spoon. The recipe should make approx. 12 cookies. Don't worry about shaping the cookies - they will naturally flatten as they cook.

Bake the cookies for 8-10 minutes, until the center is fully cooked. The cookies should be firm on the outside, and soft in the middles. Allow them to cool completely before removing from the tray. Store in an airtight container for 2-3 days, then transfer to the fridge for additional storage. 

Healthy Pumpkin Fudge (Paleo + Vegan)

Healthy Pumpkin Fudge. Plant-based, refined sugar free, six ingredients required, and less than 10 minutes to make.

A733891B-20A5-4C2B-BDAD-10960A04F7FD.JPG

The days are getting colder and the nights are growing longer. To me, fall is a time for cozy evenings in, wholesome and nourishing meals, morning walks in the forrest, and allowing myself extra time for sleep, rest and reflection. And of course, more time spent in the kitchen! I always feel a huge wave of baking inspiration as soon as the leaves begin to change colours, and the grocery store shelves fill with canned pumpkin and autumn spices.

This Healthy Pumpkin Fudge is everything I want a dessert to be - easy to make, free from dairy and refined sugars, and no baking required. It's fudgey, decadent, rich, and sweet, yet wholesome and satiating all the same time. I love making this fudge when pumpkin is in-season, and I start craving all those festive fall sweets.

This recipe was inspired by this 4-Ingredient Pumpkin Fudge found on wellandgood.com

RECIPE

INGREDIENTS

  • 1/2 cup cashew butter

  • 1/2 cup natural peanut butter

  • 1 cup pure pumpkin puree

  • 1/2 cup coconut oil

  • 1/2 cup pure maple syrup

  • 1 tsp cinnamon

  • 1/2 tsp pure vanilla extract

METHOD

  1. In a small pot, combine coconut oil and nut butter. Warm over medium heat until the oil is fully melted.

  2. Add the canned pumpkin, maple syrup, cinnamon, and vanilla extract, and continue to stir until the mixture is smooth.

  3. Remove from heat, and pour the mixture into your desired fudge mold of choice. I recommend using a shallow container lined with parchment paper, or a couple of ice cube trays for freezing pieces individually.

  4. Allow the fudge to cool on the counter for a couple of minutes, then place in the freezer to harden. Freeze overnight so the fudge has time to fully set.

  5. Serve cold, and store in the freezer or refrigerator to prevent the fudge from melting.

Coconut Flour Blueberry Muffins

I love a good o'l’ blueberry muffin. Fluffy on the outside, moist on the inside. But those big, extra sugary bakery style muffins that I loved so much in childhood just don’t sit right anymore. Enter, coconut flour blueberry muffins!

Coconut flour is a wonderful alternative to grain or gluten based baking flours. I find it works particularly well in breads, scones, and muffins. These Coconut Flour Blueberry Muffins are light, fluffy, and delicately sweet. The coconut flours helps them rise, while the fresh blueberries add a burst of natural sweetness. These muffins are free from all gluten, grains, dairy, and refined-sugar, making them an excellent breakfast or snack option for those with allergies and food sensitives.

f71a027f-4233-48d4-901e-a5b42a61ed2d.jpg

RECIPE

Makes 12 muffins

INGREDIENTS

  • 3/4 cup coconut flour

  • 4 large eggs

  • 1.5 cups light coconut milk (or other dairy free milk) *amount of liquid needed will depend on brand of coconut flour. See note below.

  • 1/4 cup honey

  • 1/4 cup coconut oil

  • 1/4 tsp baking soda

  • Pinch of sea salt

  • 1/2 cup blueberries

*The texture & consistency of coconut flour is different for every brand. Some coconut flours absorb more water than others. Because of this, the amount of liquid needed will vary. I recommend the 'Nutiva' brand for this recipe.

METHOD

  1. Preheat oven to 350 degrees. Lightly grease a muffin tin with coconut oil.

  2. Melt together honey and coconut oil in a microwave safe dish (approx. 30 seconds).

  3. Add coconut flour, eggs, milk, baking soda, and salt to a large bowl. Pour in melted honey / oil mixture, and mix until combined. The batter should be smooth and runny - if not, continue to add extra liquid until this consistency is achieved.

  4. Stir in blueberries, then pour mixture into greased muffin tins. Bake at 350 degrees for 20-25 minutes, or until the centers are cooked and the top is golden brown.

Almond Coconut Flour Loaf

ACC9F729-61FC-4F33-8D63-0BA21688E682.jpeg
9CA0FA2A-57E9-405E-9C0B-E004015FFCE2.jpeg
B8551E0F-436B-4EA5-B057-1ACCAB4917C9.jpeg

I love a hearty, wholesome, and nutty bread. This Almond Coconut Flour Loaf fits the bill perfectly. This bread is dense and satiating, yet moist and fluffy all at the same time. The almond flour and flax meal contribute a nutty flavour, while the coconut flour adds a subtlety sweet taste and fluffy texture. I also added flax meal for some extra fiber, and topped the loaf with a variety of nuts and seeds to add crunch and plant-based protein. I created the recipe without grains, gluten, or dairy, making this bread a wonderful option for those with allergies or dietary restrictions. Coconut flour is the star of this recipe. High in fiber, protein, and nutrients like iron and potassium, it's one of my favourite gluten and grain-free flours to bake with. Coconut flour is low in carbohydrates and sugar, making it an easily digestible flour alternative for people with leaky gut and SIBO. Just make sure to choose a good quality brand that's organic, certified gluten-free, and free from additives or preservatives. I used Earth's ChoiceOrganic Coconut Flour for this recipe, and it worked wonderfully!

This Almond Coconut Flour loaf is delicious both toasted or cold, and pairs wonderfully with homemade stew, scrambled eggs, nut butter, and smashed avocado. I love spreading a thick slice with a generous spoonful of sesame tahini or coconut oil and sea salt.

Recipe

  • 1 cup almond flour

  • 1/2 cup coconut flour

  • 1/4 cup flax meal (or ground flax seeds)

  • 1 tsp baking powder

  • 1/4 sp sea salt

  • 1/2 cup water

  • 2 tbsp extra virgin olive oil

  • 4 whole eggs

*Optional - An assortment of raw seeds for sprinkling onto. I used pumpkin, chia, sesame, and flax.

Method

Preheat oven to 350 degrees. Lightly grease a standard-size loaf tray with coconut or olive oil. In a medium sized bowl, mix together almond flour, coconut flour, flax meal, baking powder, and salt. Stir in water and olive oil until a sticky batter has formed. Crack the eggs, and separate the yolks from the whites. Add the yolks to your batter, and transfer the egg whites into a separate bowl. Lightly beat the egg whites with a fork until fluffy. This will help the bread rise. Add egg whites to the batter, and stir everything together until smooth. Transfer the batter into your greased loaf tray, and gently smooth out the top. Optionally, sprinkle seeds over the top of the loaf, and lightly press them into the batter. Bake at 350 degrees for 30-35 minutes. The bread is done when the center is cooked and the top is golden brown.

Healthy Oatmeal Banana Muffins

Healthy Oatmeal Banana Muffins

They’re gluten, dairy, and refined sugar-free. Made with a base of brown rice flour, ripe bananas, and gluten-free rolled oats, the ingredients are simple, wholesome, and clean.

VNWQ4456.jpg

These muffins are naturally sweetened with Coconut Palm Sugar; a lower glycemic and more nutritionally dense sugar when compared to other sweeteners. Low glycemic sweeteners are less likely to spike blood sugar levels, with coconut sugar scoring lower than white or brown sugar, honey, molasses, and maple syrup!

If you have a gluten sensitivity or allergy, be sure to use certified gluten-free rolled oats. My favorite brand is Avena Foods. They're a Canadian Company that produces sustainabley grown, Certified Gluten-Free, Organic, and Non-GMO oat crops. You can easily find them on Amazon, London Drugs, and at most natural food stores like Whole Foods or Pomme Market.

Ingredients

  • 1.5 cups GF rolled oats

  • 1.5 cups brown rice flour

  • 1/3 cup organic coconut palm sugar

  • 1 tsp cinnamon

  • 1/2 tsp baking soda

  • 1/4 tsp salt

  • 2 ripe bananas, mashed

  • 2 whole eggs

  • 1 cup almond milk (or other dairy-free milk)

  • 1/4 cup coconut oil

  • 1 tsp apple cider vinegar

Optional

  • 1 cup dark or semi-sweet chocolate chips.

Method

Preheat oven to 350 degrees. Lightly grease a standard muffin tin with coconut oil. Mix together all dry ingredients in a medium-sized bowl. Add in wet ingredients, and stir until smooth. Evenly divide batter between each muffin tin. Bake muffins for approximately 30 minutes, or until the center is cooked and the tops are golden brown.

Homemade Coconut Milk

Coconut milk is incredibly nourishing.

Unfortunately, most brands on the market today contain fillers, preservatives, and thickeners like guar, locust bean, and xanthum gum. These ingredients can really distrupt digestion, especially for those of us with sensitive tummies, IBS, or leaky gut. Not to mention, the $$$.

Thankfully, homemade coconut milk is very easy to make, and tastes so much better than the boxed kind, anyways. This simple Homemade Coconut Milk recipe only requires two ingredients - shredded coconut and filtered water - and a powerful high speed blender or food processor.

recipe

4 cups filtered water

2 cups unsweetened shredded coconut

Optional

Dates (for sweetness)

Vanilla

Sea Salt

Cocao Powder

METHOD

In a small saucepan or kettle, bring water to boil. Once boiled, allow water to cool slightly before blending.

Combine shredded coconut and boiled water in a high speed blender or food processor. Blend on high for approx. 5 minutes, until a thick milk has formed.

Cover a medium sized mixing bowl with a cheesecloth or thin towel, then pour milk over the top to strain out excess coconut chunks. The leftover coconut can be baked and used in granola, bliss balls, cookies, etc. I like to toast it with coconut oil, sea salt, and cinnamon, then use it as a crunchy smoothie bowl topping!

Once strained, transfer milk to a jug or large jar to store. The milk will last up to 5 days in the refrigerator.

Oat-less Grain-Free Oatmeal

Oatmeal, but without oats! You heard that right. This oat-less Paleo Oatmeal is the perfect alternative to a traditional bowl of oats.

After being diagnosed with SIBO last year, I adapted a primarily grain-free lifestyle as part of my gut-healing protocol. While grains work wonderfully for some people (and I hope to reintroduce them again!) they can also be a huge source of digestive distress for others. In particular, 'cereal grains' like wheat, corn, rice, and oats are known to cause inflammation, irritation, and digestive discomfort for people with IBS, leaky gut, autoimmune diseases, or weaker digestive systems. Temporarily eliminating grains from my diet has reduce my bloat, cramps, and loose stools, while providing my gut with the support it needs to heal.

This Paleo Oatmeal recipe is simple, and uses a combination of coconut flour and ground flax to re-create the thick and fluffy texture of true oats. Completely free from gluten or grains, this "oatmeal" is an excellent substitute for those of us with allergies, food sensitives, or certain dietary preferences.

Oatmeal.jpg

Oat-less Oatmeal
(grain + dairy free)

Makes one serving

INGREDIENTS

3/4 cup coconut milk, nut milk, or water

3 tbsp coconut flour

1 tbsp ground flax seeds

1/2 cup egg whites

METHOD

  • In a small saucepan, bring milk or water to boil. Turn down to medium heat, then whisk in coconut flour and ground flax seeds. Once water is fully absorbed and the oatmeal is a 'thick' consistency, turn heat to low.

  • Whisk in egg whites until fluffy, then heat for another 1-2 minutes to allow oatmeal to thicken.

  • Serve with coconut or nut milk, fresh berries, sliced bananas, chopped nuts and seeds, and honey or pure maple syrup.

Carrot Cake Bliss Balls

Springtime is here, and so is the season of all things carrot! I have a love affair with both bliss balls and carrot cake, so naturally, I just had to combine the two. And thus - these elegant little Raw Carrot Cake Bliss Balls were born. These babies are nourishingly decadent, and the recipe is oh so simple. All you need is a high-speed food processor and a handful of wholesome ingredients.

When choosing delicious recipes for holidays and special occasions, I always go for simple. Easy, minimal ingredients, and no baking required? Yes, please! And this recipe checks all those boxes. These elegant little balls are a blend of fluffy coconut flour, earthy walnuts, sweet carrots, and creamy medjool dates. Perfectly spiced with cinnamon, vanilla, and notes of orange, and topped with a silky-smooth lemon cream frosting. I've fallen hard for these Raw Carrot Cake Bliss balls, and I know you will to.

RECIPE

INGREDIENTS

Serves: 12-15 balls

Bliss Balls

  • 15 pitted mejool dates, soaked

  • 1.5 cups raw walnuts

  • 1 cup unsweetened shredded coconut

  • 2 medium carrots, chopped

  • 1/4 cup coconut flour

  • 1 tsp orange zest

  • 2 tsp pure vanilla extract

  • 1 tbsp cinnamon

  • 1/4 tsp ground ginger

  • Pinch of nutmeg

  • 1/2 tsp sea salt

Lemon Cream Frosting

  • 1/2 cup plain yogurt (coconut, almond, or dairy)

  • 1/2 tsp lemon juice

  • Pinch of stevia to sweeten

METHOD

  1. Place dates in a small bowl, and cover with boiling water. Let them soak for 5-10 minutes, until soft.

  2. Once softened, drain the dates and add them to your food processor, along with the walnuts, carrot, and shredded coconut. Pulse ingredients a few times to get things moving, then blend for approximately 30 seconds.

  3. Add the remaining ingredients, and continue to blend. Once ingredients are fully combined, a sticky 'dough' will form.

  4. Roll the mixture into little balls, slightly smaller than a golf-ball. Place on a cookie sheet or large plate lined with parchment paper.

  5. In a separate bowl, mix together your yogurt, lemon juice, and stevia extract (or other sweetener of choice.) Drizzle the frosting over each ball. Top with additional cinnamon, walnuts, and orange zest.

  6. Place balls in the freezer to firm. Serve cold. The balls can be kept in either the fridge or freezer, depending on your desired tecture.